Buddy's Stripboard Builds

BuddytheReow

Breadboard Baker
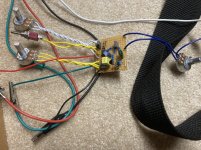
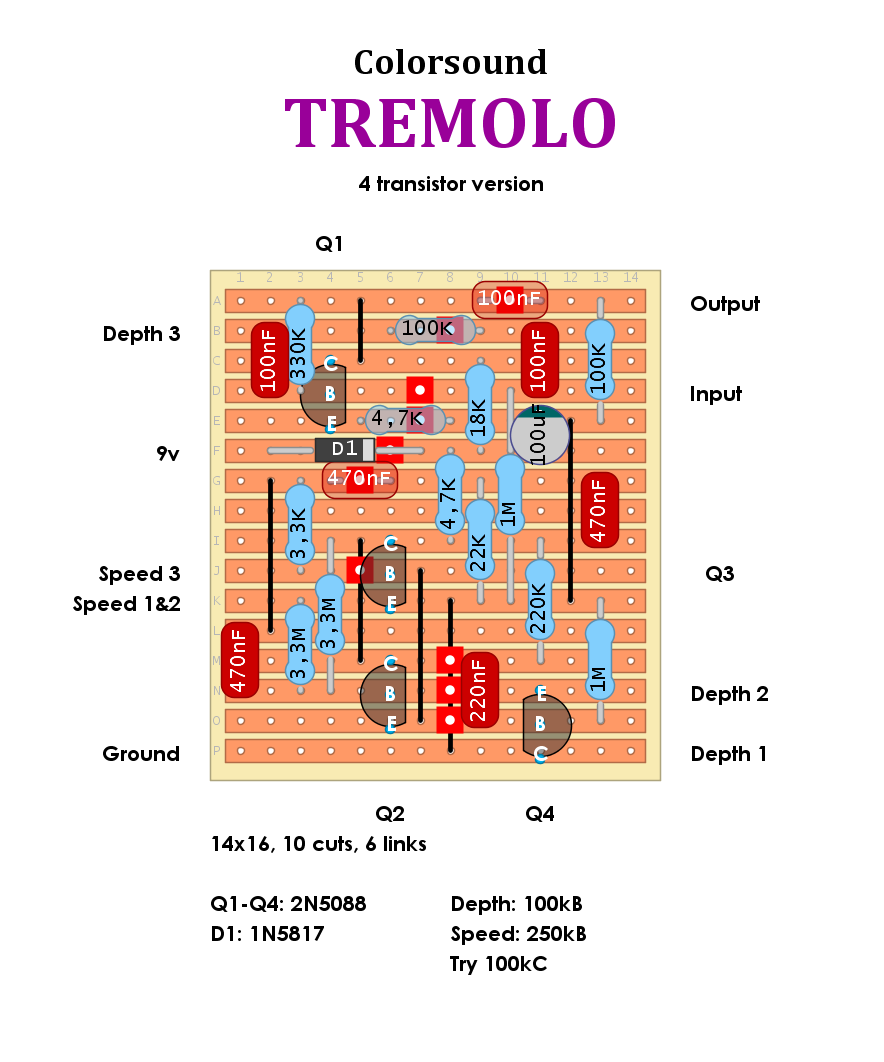
With all the breadboarding I've been doing recently I thought it would be a fun afternoon for myself to solder something and give my other board a break. It was also a good opportunity to try out the new solder I got from Amazon (it works, but doesn't flow very well). Took me about 2 hours start to finish. This is a Colorsound Tremolo. I have a hard time understanding LFO's for a circuit analysis standpoint, so I decided to build the stock circuit. I did switch out the speed pot for a C100k and am happy with the result. It's a simple tremolo with speed a depth control. I followed the layout from dirtboxlayouts and had no problems putting this together. It was also a good opportunity to use up those annoyingly big chicklet capacitors I bought a while ago. Not sure if I'm going to box this up but I think if I breadboarded a decent sounding fuzz I can make a beautiful monster out of this. My only complaint about this is that it needs a boost of some kind if you've just got raw guitar going into it. All my dirt pedals are much louder.

Colorsound%2BTremolo%2BV2.png

1643317777704.png
1643317811071.png
 
Last edited:
I got a new soldering iron from Amazon. Nothing extraordinary, but a step up from the super cheap $10 kit I got a few years ago. This one has digital temperature control rather than the analog knob. Better control on your iron.

Anyways, I wanted to try it out on a simple circuit to see if I liked how the iron handled. I decided to whip up a one knob fuzz. The Black Arts Toneworks Ritual Fuzz. These simple circuits are a great way to hone your soldering skills without investing too much time into one circuit. I didn't have TP2222A's like the layout says, so I used PN2222A. This circuit is a bit noisy, but with a noise gate it will clean it right up. I'm assuming the tranny's are to blame for that. Anyways, max out your guitar's volume knob and there's a lot of gating, er, I should probably say the signal is hitting the power rails WAYY too hard, but it's workable. Definitely have to roll back the volume knob for some doom sounds.
1643663950911.png
1643663971764.png
 
How about a strip board tutorial? This is interesting, but requires a bit of general knowledge…
Ditto here. I look at these strip board schematics and for the life of me I can't figure out what's going on with them. :p
Ok. I’ll do a stripboard write up in the Test Kitchen. I’m assuming you guys want the basics, right? How the board’s laid out, cuts, links, off board wiring (eww…)
 
Learning stripboard/Veroboard opened up a TON of new circuits for me. No more using legs from resistors and capacitors to act as traces. Just make sure you have your orientation correct and make all of the trace cuts and you're in business!

Here are a few tips that I use when I solder up stripboard:

I use a drill bit just a bit wider than the traces to make the cuts. I just spin it with my fingers until the copper doesn't connect anymore.
I use a thin sharpie to label the rows and columns to keep me from putting a part in the wrong space.
To cut the board, I use a metal ruler and a craft knife to score the lines on both sides before I snap them apart. The dust is nothing to mess with so use a mask. A small coping saw also works.
I use either magnifying attachments on my glasses or a loupe to make sure that I don't have any solder bridges between traces.
I also have used small zip ties to keep the birds nest of wires a bit more manageable. That's one of the downsides, as you often have wires branching out from both ends which gets messy.
I bought a nice kit of jumpers for breadboarding in different lengths which have been helpful when connecting traces. They are insulated and the perfect lengths to make it easy.

Hope those help.
 
I just finished my stripboard writeup. Check it out here.
 
I have a question about wiring. The black wire for ground on the left side, does that run to the footswitch? (I guess the middle lug if using PPCB schematics) Do you tie the ground of all three Jacks and run that to the same footswitch lug?
 
I have a question about wiring. The black wire for ground on the left side, does that run to the footswitch? (I guess the middle lug if using PPCB schematics) Do you tie the ground of all three Jacks and run that to the same footswitch lug?
all the grounds need to be connected in some way. The jacks, footswitch, and the circuit itself must all be grounded. You can do 1 of 2 things for grounding. You can connect everything in a ground loop where nearly every ground point has 2 wires going to it. An alternative which I’ve done is make a 4x1 piece of stripboard and put all the grounds to that. Either way will work. I think the second method is called star grounding but I could be wrong on the name
 
Here's a baxandall tone stack I found on this site. http://guitar-fx-layouts.238.s1.nabble.com/. It also has a variable gain control for volume. I haven't tried maxing it out yet since it's a trimmer and didn't have a screwdriver near my amp.

I stumbled upon this site a number of months ago and wanted to try a layout. For some reason the site was down for a while (maybe a few weeks?) and thought it was kaput. A day or two ago I found out it was back up (assuming they renewed their certificate/license).

Anyways, since this was a new site I was a bit hesitant of trying it out. Since it's stripboard you can basically salvage all your components so I said screw it and pulled the trigger this afternoon.

Fired up on the first try (always a great feeling). To really test I put a dirt pedal in front of it and does not disappoint. This circuit really is just a building block for tone control, but you can put it in an enclosure all by itself since there is no volume drop.

1644008330231.png
1644008354276.png
1644008379922.png
 
I wanted to get my feet wet with a Bitcrusher type build. These can get really complicated quickly depending on the circuit. This one I found on Dirtboxlayouts and only requires one knob. It also requires only a small amount of parts so I was all game for this one. You could really breadboard this one instead. I used a TL072 for IC1 and NE5532 for IC2. I also used a 2n5457 for the jfet. Putting in identical chips produced no effect.
After playing around with this for a bit I can say, that, it's....kinda cool, I guess. Really not my cup of tea, but there are others who love this type of effect. Musically you can only use the first 25% of the pot if you're using raw guitar signal. Putting this after a dirt pedal or a booster definitely helps get more out of it. Still on the fence if I want to box it up and sell it or salvage it for some parts and call it a day. Either way I'm going to pass on this type of effect, but I had fun putting it together. Was a quick build.


AVvXsEiTNNouijKacVqYdn3828iuNVOay_JEnR9YtjYIQl6Ad3prG5tnxHq5OJYt_uPFcf-R5iKmsXKdlRu5ipQNoY2oQmygqvM7lXrAdq-x2EhCKKz5y7ycStkxN05i2S0gxvnFxkBvLpCIwcg3JsCwkKjtd9GJnWwQpZqeXp0PgNeDsMVT48TSwZMRIlGqAg=s1003

Analog%20Bit%20Crusher.gif


1645045222206.png 1645045243290.png
 
Here's a baxandall tone stack I found on this site. http://guitar-fx-layouts.238.s1.nabble.com/. It also has a variable gain control for volume. I haven't tried maxing it out yet since it's a trimmer and didn't have a screwdriver near my amp.

I stumbled upon this site a number of months ago and wanted to try a layout. For some reason the site was down for a while (maybe a few weeks?) and thought it was kaput. A day or two ago I found out it was back up (assuming they renewed their certificate/license).

Anyways, since this was a new site I was a bit hesitant of trying it out. Since it's stripboard you can basically salvage all your components so I said screw it and pulled the trigger this afternoon.

Fired up on the first try (always a great feeling). To really test I put a dirt pedal in front of it and does not disappoint. This circuit really is just a building block for tone control, but you can put it in an enclosure all by itself since there is no volume drop.

View attachment 22561
View attachment 22562
View attachment 22563
IIRC, the guy behind this layout — Fredrik — is the brains behind Parasit Studio. He has many more interesting vero layouts, many of which are for his own pedals/PCBs and posted on his site.


You continue to inspire, BtR, I wish I had half your energy.
 
The LPB-1. Originally a pedal in and of itself, it is a textbook common emitter amplifier. It can also be used as an invaluable tool to make your signal louder. This is going into my Guvernator to match the volume of my other dirt pedals. The trimmer replaces the BOOST knob and becomes a set it and forget it scenario.

1645734886399.png
 
The Thunder Fuss which I recently designed and committed to vero. I'm still on the fence on what diodes to use, but I'm leaning toward a switchable LED/4148 combo. You can find the schematic and layout here

1659032974880.png
1659033007882.png
 
Here's a phenomenal Muff variant by Grind Custom Fx. The Ultra Stoner Mk II. I saw this layout online. As soon as I saw the DOOM switch I knew I had to try this one out. The SHAPE control throws your mids back into the mix and the result is phenomenal. If you want something that dooms, this is it. I really want to look into the SHAPE and DOOM sections and may take some time to trace this out to see how this bad boy works.

Oh yeah, this one's verified and definitely getting boxed up. :cool:
1668527686285.png
1668527745551.png
1668527812758.png
 
First time I've seen this thread and I love it. 👍

I've got a real soft spot for vero builds. As much as I like the ease of PCBs, there's just something about vero that keeps bringing me back. It always feels like the essence of DIY to me.
 
Back
Top