SOLVED Busted TS9 - Troubleshooting

EGRENIER

Well-known member
Dear experts,

I got my hand on a busted TS9, and offered a friend to troubleshoot the issue. Long story short, he inserted a 12v reverse polarity adaptor, saw or smelled the smoke and voila.

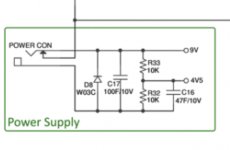
Remotely, we had identified that the reverse polarity/voltage regulator diode had broken in half, D8 in the following diagram.
C1B45765-CAFE-4A34-B992-286DF0052A23.jpeg
My friend replace it with a 1N5819, I know that it’s not the same as a W30C, and will not act as voltage regulator, but that should not impact the circuit.

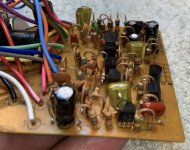
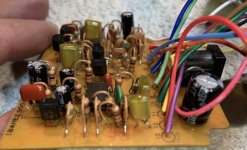
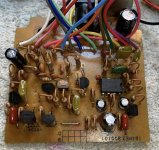
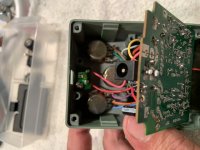
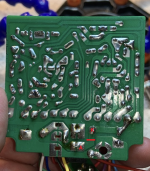
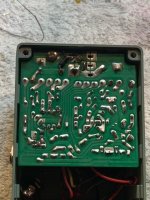
A few picture of what I’m working with followed my my actions.
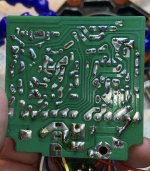
F4BBF5DF-591B-47AD-B120-C5D2B2BDB6DB.jpeg
1BDB302F-FEEC-4600-8681-3B47A99673EE.jpeg
C6FCD570-0727-44AD-9F7F-DA3D79DA5E68.jpeg
0AA9DC72-3525-4343-923D-BC1A14DBEC30.jpeg

Through visual inspection I noticed that the 100u (C17) cap was blown and for good measure also replaced the 47u (C16) cap.
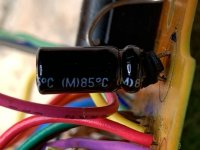
E1EB2DB9-3BDA-4446-BDCA-74D847C78E26.jpeg

I also notices some white residue between a cap and a resistor:
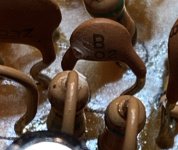
E51FB7A5-0041-4E07-A0FD-CCC62789C07D.jpeg

So I replaced the cap, but not the resistor…


Current state:
- works in bypass
- Switch works, I see a very faint red in the LED, reading a voltage of only 1.78V. I tested the LED at 9V and it shine bright.
- IC readings with the switch on:
1: 0.8v
2: 0.77v
3: 3.34v
4: 0v
5: 1.03v
6: 0.93v
7: 0.92v
8: 9.06v

- When engaged, the pedal only produce white noise that seem affected by the Level and Drive pots.

So now I can’t see anything suspicious visually to replace and not knowing the board, find it hard to audio probe.

Any suggestions ?
 
what does a cap tester look like? makes feel so nub. I was happy when I found a DMM that does both PNP and NPN transisitors (8 hole socket labeled ebce either type)for under $50 and if you toasted the cap, which it sounds like, changing it is fine if you have doubts of it's integrity after removal.
 
what does a cap tester look like? makes feel so nub. I was happy when I found a DMM that does both PNP and NPN transisitors (8 hole socket labeled ebce either type)for under $50 and if you toasted the cap, which it sounds like, changing it is fine if you have doubts of it's integrity after removal.
Nothing special really, we were talking about cheap transistor testers and @fig recommended this;


And it does resistors and caps…
 
Nothing special really, we were talking about cheap transistor testers and @fig recommended this;


And it does resistors and caps…
Yep, that one is great. I bought a busted SD1 a couple months ago that’s been sitting on my desk staring at me. I suspect the debugging will go just like in this thread…
 
So, thinking back about this, I realized that the TS9 doesn’t have a protection diode. It has a zener for power regulation, but nothing protect the circuit against reverse polarity. So I’m thinking of adding a protection diode, however I can’t see where I could put it.

The power input socket is board mounted and is required to mount the board in the enclosure. The 9V+ and - goes straight to the board.

Other then trying to cut the trace on the board and put a diode to reconnect (jump) the trace, is there any other way ?
 
How can I do that… is board mounted.

It does have polarity protection, it's just a terrible method that (as you are now aware) doesn't really work all that great.

What you want is series polarity protection, for that you'd need to cut a trace.

Cut the trace at the red line, verify there is no continuity between the points marked A and K after cutting the trace.

Connect a 1N5817 across A and K. A = Anode, K = Cathode (Stripe)

1660424680035.png
 
Last edited by a moderator:
It does have polarity protection, it's just a terrible method that (as you are now aware) doesn't really work all that great.

What you want is series polarity protection, for that you'd need to cut a trace.

Cut the trace at the red line, verify there is no continuity between the points marked A and K after cutting the trace.

Connect a 1N5817 across A and K. A = Anode, K = Cathode (Stripe)

View attachment 30694
Thanks Robert… that’s also the only way I could think of. However, it shouldn’t be brain surgery ! I assume a sharp exacto knife and a few stroke should do it?
 
That's what I usually do, or a dremel tool with a fine tip.
Did it with a knife... took a few passes, but go to the copper and cut the trace. Ran a continuity test, nothing, so the trace was cut.

diode protection.jpg

Installed the diode, tested the pedal, it all worked. Box it up to ship back... and realized something was missing...

box mistake (2).jpg

Yep, forgot to put the knobs back on the pedal !!!! Oh well !
 
Thanks to all who posted on this feed. I am trying to fix an elderly and busted TS9 - this feed has been very useful. There are a few problems with this TS9 including no signal output at the moment. I am working through issues. Does anyone have any idea why the LED remains on all the time? The momentary footswitch appears to be working ok in that continuity across the switch is present when the foot switch is pressed. With battery connected and input jack inserted LED remains on, and the footswitch operation has no effect on this state. Any suggestion sappreciated
 
Back
Top