Guardians of the analog
Well-known member

Yeah, I know...I can hear the collective moan as eyes roll in the back of their heads, Chris is posting another build reports of a stupid pedal that no one cares about with another stupid marvel character and a long boring write up. Happy New Year everyone
This is my second blueshift build. I took what I learned from the last one I did nearly 3 years ago and tried to do it it better. I put more time and effort into getting this one cleaner and with better attention to detail. If you are going to build this then take your time, check every part before soldering and please follow the build doc. I would not want to have to troubleshoot this. I didn't do my standard all white wiring because there are way to many wires for that here. I tried to keep everything as clean with regards to the wiring as possible. By color coding everything the way I did, I made it easier for future Chris should he need to replace the footswitch or make repairs in the future.
It's not the cheapest build. It's probably gonna be around 100 bucks to build. Still cheaper than a used unit. It's also a fully stereo analog chorus, which is really rare in diy. The stereo spread in this is something special. What makes this different from other analog chorus pedals? The build doc breaks it down great. "The DC-2 is different from other choruses in that there are actually two clock+BBD pairs, each powered by either the inverted or non-inverted output of a single LFO. These BBDs then modulate the dry signal so that signal “A” reaches its maximum delay time when signal “B” reaches its minimum and vice versa as they criss-cross back and forth. The average remains constant between the two signals and only the space between the two signals is modulated. The DC-2’s effect is often referred to as motionless because it doesn’t have the signature “warble” or unsteadiness of a traditional chorus with a single BBD."
Unlike the original that had just 4 radio buttons, using 3 switches, we now have 7 possible presets instead of 4. How's it sound? AMAZING! It's the often described as the chorus for people who don't like chorus. It's hard to describe it without being cliche. You really have to be in front of it to appreciate how great it sounds, especially in stereo. If you like stereo chorus then you should definitely build this. With only 7 sounds possible, none of the sounds are bad, just less or more of a great thing. Calibration is easy with a scope or just by setting the voltage of the test points for each BBD to 3.4v.
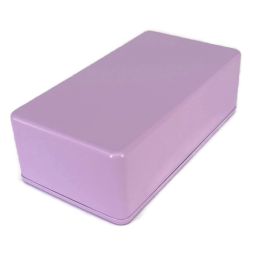
You may notice I don't have the mounting screw on the front. I went a different route to free up the enclosure face for my graphics. Instead of the screw thru the face, I used a jb weld stick to attach the hex standoff to the enclosure. I didn't get a picture because after it cured I didn't take it apart and decided to start wiring everything. I really wanted a light violet color box but tayda has been out of that color for a long time and I went with violet. For the graphics I went with America Chavez, the dimension hopping hero who punches star shaped portals. If you're still here then I hope you enjoyed the write up and pictures. It's a great project for many reasons and a really inspiring effect.


Last edited:


