BuddytheReow
Breadboard Baker
Hey everyone,
I am starting on the journey to build my very first actual pedalboard! What I currently have is a piece of MDF board that was taken from an old computer desk that my folks have in their attic. That's it, literally just a board. To counter my pedals from shifting around I installed cabinet bumpers on the bottom of them. For those that don't know, cabinet bumpers are pieces of rubber (about the size of a shirt button) that you will stick on the inside of a cabinet door or on the face frame to protect the two pieces when you close the door. These bumpers really aren't working on top of my Chinese power supply looking like an Octopus mess.
I've decided to document this project for others to enjoy or possibly be inspired. This is currently how my pedalboard flows and I think I'm going to keep this layout. Where I play, my amp is to the left of me. The green box is my power supply. As you can see this is kind of a mess to connect the bottom row to the top and I currently use a spare, coiled cable. This I want to incorporate into my new board.

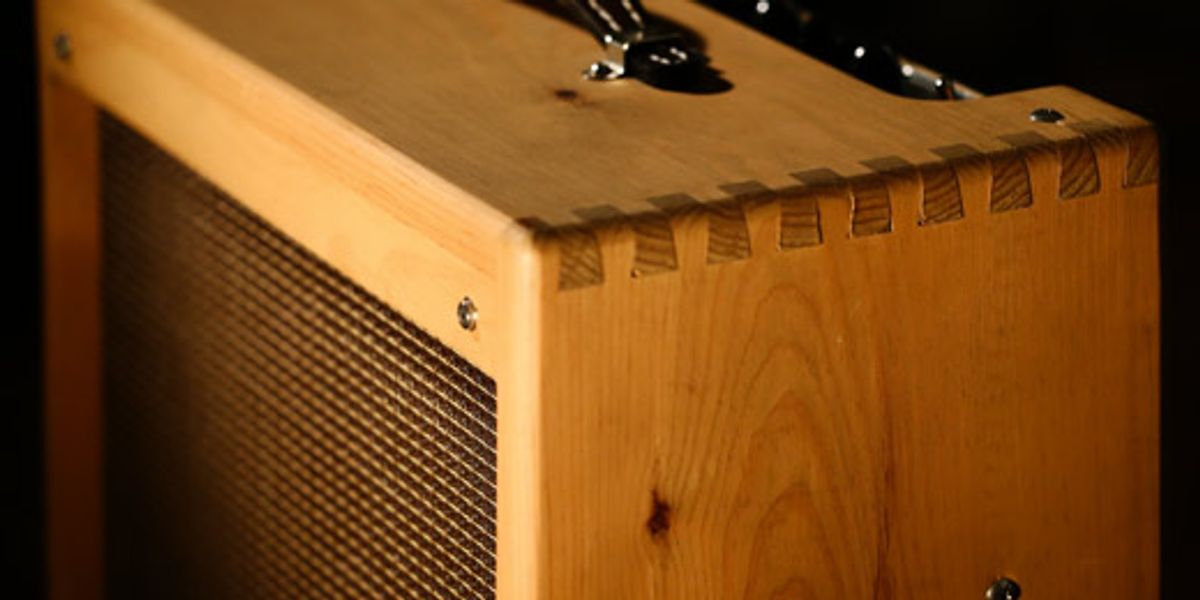
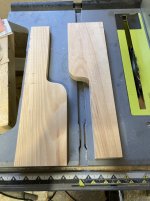
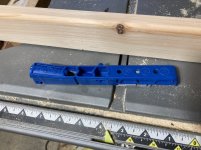
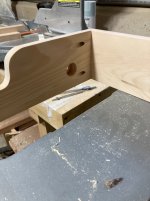
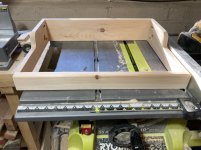
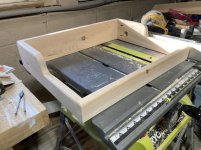
I'll be building this out of some spare pine boards I have in my garage. The dimensions are going to be roughly 4" high, 20" wide end-to-end, and 14.5" depth. So now we have a rough shaped box to fill with my DIY creations. I want to give myself a new challenge so I am going to connect the board ends with a box joint using my table saw. Sure, I could just use a butt joint and throw some screws in there, but I want to try my skills at something new. Of course, I'll practice it using some scrap. The two rows for the pedals I'm going to throw some 5" wide boards in there and mount some velcro on. I'll probably just use pocket holes for that since I won't care what's underneath.
Now the electronics portion. I want to mount the power station underneath and will do that with some velcro. This board is just staying in my basement, so I'm not to worried about falling out while traveling. In from guitar and out to amp, I'm going to install some jacks on the sides to have a "plug and play" scenario. To connect the bottom row to the top, I'm going to install additional jacks and connect them with some shielded cable underneath. This way I can plug patch cables into the jacks to connect them.
Cable management: I've decided to use cable/wire clips that I will hammer on the underside. Cable ties may also be included here, but that's far down the line from now. I'll also have to drill out a hole for the power supply from the outlet.
If anyone's got any other ideas or what works/didn't work for you let me know. This will be my personal project over the next few weeks.
BuddytheReow
I am starting on the journey to build my very first actual pedalboard! What I currently have is a piece of MDF board that was taken from an old computer desk that my folks have in their attic. That's it, literally just a board. To counter my pedals from shifting around I installed cabinet bumpers on the bottom of them. For those that don't know, cabinet bumpers are pieces of rubber (about the size of a shirt button) that you will stick on the inside of a cabinet door or on the face frame to protect the two pieces when you close the door. These bumpers really aren't working on top of my Chinese power supply looking like an Octopus mess.
I've decided to document this project for others to enjoy or possibly be inspired. This is currently how my pedalboard flows and I think I'm going to keep this layout. Where I play, my amp is to the left of me. The green box is my power supply. As you can see this is kind of a mess to connect the bottom row to the top and I currently use a spare, coiled cable. This I want to incorporate into my new board.
I'll be building this out of some spare pine boards I have in my garage. The dimensions are going to be roughly 4" high, 20" wide end-to-end, and 14.5" depth. So now we have a rough shaped box to fill with my DIY creations. I want to give myself a new challenge so I am going to connect the board ends with a box joint using my table saw. Sure, I could just use a butt joint and throw some screws in there, but I want to try my skills at something new. Of course, I'll practice it using some scrap. The two rows for the pedals I'm going to throw some 5" wide boards in there and mount some velcro on. I'll probably just use pocket holes for that since I won't care what's underneath.
Now the electronics portion. I want to mount the power station underneath and will do that with some velcro. This board is just staying in my basement, so I'm not to worried about falling out while traveling. In from guitar and out to amp, I'm going to install some jacks on the sides to have a "plug and play" scenario. To connect the bottom row to the top, I'm going to install additional jacks and connect them with some shielded cable underneath. This way I can plug patch cables into the jacks to connect them.
Cable management: I've decided to use cable/wire clips that I will hammer on the underside. Cable ties may also be included here, but that's far down the line from now. I'll also have to drill out a hole for the power supply from the outlet.
If anyone's got any other ideas or what works/didn't work for you let me know. This will be my personal project over the next few weeks.
BuddytheReow