SOLVED Hyped fuzz mode switch

Bungoslysse

New member
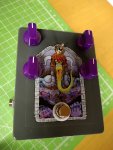
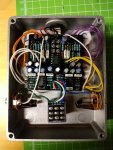
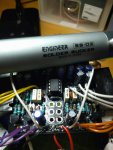
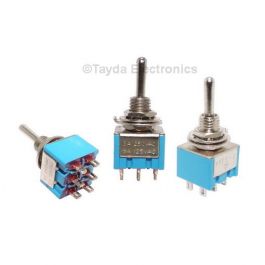
Hi, just a quick one I think - i have built the hyped fuzz and it's working great, except the switch only seems to give 2 modes - middle and bottom settings give the same effect, which I think is "fuzz 1", top is "fuzz 2". I have used a type 1 dpdt ononon switch as it's what I had, but it is supposed to be type 2 according to the docs - is this the expected result of using the type 1 switch, or is something else maybe wrong? Any help much appreciated, thanks
 

Attachments

  • _20200306_153701.JPG
    _20200306_153701.JPG
    425.4 KB · Views: 31
  • DSC_0118.JPG
    DSC_0118.JPG
    494 KB · Views: 30
Ok, thanks. I am not looking forward to desoldering it, already ruined my first hyped fuzz board by soldering the switch on the wrong side of the board and totally mashing up the holes getting it out - that's what you get for building at 3am...
 
Do you have a solder sucker? I find it best to hit it with the solder sucker then use some fine solder wick (or pinch and roll a wider one) once I have the lug opened up, jam the wick into the lug and get the rest out. I’ve rescued a few switches without burning them up this way. Leave plenty of time between each go for cooling.
 
Yes I have a load of cheap solder suckers, might get a better one. Never have much luck with the wicks, but again they are cheap ones that came free with something. Suppose I'll have to just take my time and hopefully get there eventually, thanks
 
a counter-intuitive hint: if you are having trouble removing some small bits of solder with wick, put a bit more solder on the spot so it joins with the little bit you want to remove, and then use the wick. make sure to use a new part of the wick instead of a part already has some solder on it but looks like it could surely hold a little bit more....
 
Success! Just got to wait for the new switch to arrive. At which point I'll find out I broke something whilst removing the old switch. Thanks for the tips, didn't need wick in the end, just slurped it all up out of there.
 

Attachments

  • DSC_0119.JPG
    DSC_0119.JPG
    431.2 KB · Views: 21
this also happened to my build. I simply opened the dpdt switch and switched the contact points to turn it into a type 2.
If it's not too much trouble, do you have some pictures of which contact points to move over? Or do you literally just swap the two points?

Type 2 switches cost about 10 times more to get to Australia when factoring in shipping, so being able to change my type 1 switches would be incredibly helpful.
 
Bungoslysse I feel your pain. I wrecked a lot of builds and got really frustrated trying to fix my mistakes and making more problems in the process. Take your time and be patient with desoldering. I find that a magnifying lamp really helps because I can see when the solder is good and flowing and can get sucked out easily.
 
Tayda says this is type 2
but I received a maroon colored one which is type 1. Tayda insists it is type 2 I am just need to look at it from the toggle switch side.

Good day, because you are looking at image facing to you, but actually that image represents the orientation when you turn around switch.
You get confused with image orientation and actual position. Switch is fine and it is type 2.

which one is it?
 
Back
Top