Grubb
Well-known member
After some brief troubleshooting, I'm pleased to say that my Parentheses build works and sounds suitably sludgy.
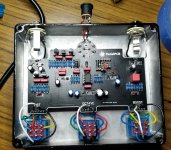
This was my first go using a rotary switch, and also the first time I have wired up a footswitch without using a breakout board of some kind. Apart from one loose connection that was killing the output on the Boost stomp switch, it went pretty well. I wired the LEDs in reverse polarity by accident too, which didn't help. It's all working fine now. I have the DC jack dangling out the back of the unit as I drilled the hole in the wrong place and would have had the rotary switch and DC jack terminals in contact with each other. Eventually, I'll order an external nut jack which will rectify the problem. I also scratched the paintwork by placing the soldered PCB on top to check the drill holes were correctly placed - oops.
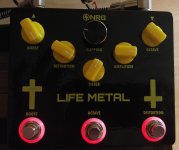
I don't love the sound. I'm not a massive fuzz guy and this distortion is pretty fuzzy. It sounds a lot better with my Chapman 7 string than it does with my HSS Strat. The "Octave" switch is producing less of an octave sound and more of an extra layer of doomy weirdness - I'm assuming that's its main function. But I'm glad I built the pedal as I learned some new skills and have now got a 3 button 1590XX build under my belt. Occasionally it will be fun to drag this out and play slow power chords in minor keys. Here are the photos:


Since the picture was taken, I reversed the LED leads to the footswitch
This was my first go using a rotary switch, and also the first time I have wired up a footswitch without using a breakout board of some kind. Apart from one loose connection that was killing the output on the Boost stomp switch, it went pretty well. I wired the LEDs in reverse polarity by accident too, which didn't help. It's all working fine now. I have the DC jack dangling out the back of the unit as I drilled the hole in the wrong place and would have had the rotary switch and DC jack terminals in contact with each other. Eventually, I'll order an external nut jack which will rectify the problem. I also scratched the paintwork by placing the soldered PCB on top to check the drill holes were correctly placed - oops.
I don't love the sound. I'm not a massive fuzz guy and this distortion is pretty fuzzy. It sounds a lot better with my Chapman 7 string than it does with my HSS Strat. The "Octave" switch is producing less of an octave sound and more of an extra layer of doomy weirdness - I'm assuming that's its main function. But I'm glad I built the pedal as I learned some new skills and have now got a 3 button 1590XX build under my belt. Occasionally it will be fun to drag this out and play slow power chords in minor keys. Here are the photos:


Since the picture was taken, I reversed the LED leads to the footswitch

