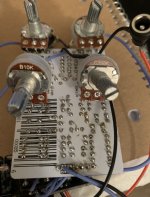
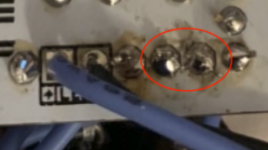
Sea Lion Comp (Guitar pcb mania) LED staying on

megatrav

Well-known member
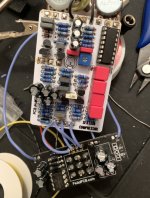
I posted about this build in another thread related to wiring a charge pump board. Pedalpcb gave me the test method and when I remove the SW wire, the LED remains lit. I checked all of my connections and reflowed just about every joint and it did not fix the problem. I am assuming its something small and silly since the pedal is working.
Here is the build doc and I will add some pics in the next post
Sea Lion Compressor
 
It turns out I accidentally left out R28 which is pretty dumb of me. However, this didn't fix the problem.
I checked all of my connections and I can't see any bridges, but I did use my iron and a knife to make sure.
Not sure what else to check
 
Okay so I know the issue is happening with the Level pot. I connected the pedal to power and started messing with things. As I was moving around I discovered that if I touch the volume pot, then the LED will go in and out intermittently.
I am going to try cleaning the pot and the pads and see if I can solve it
 
Boutique pedal manufacturers called that a "highly interactive control", and often charge you extra for it!

Intermittent problems like that are difficult to solve, but as both the LED and Volume control connect to ground, it's likely a short to ground or mixed up ground wire.

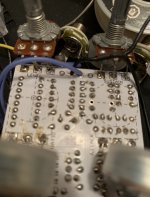
The LED cathode connects to ground through that "SW" connection, so you may want to reflow the solder on both boards for that connection. There is also quite a bit of solder on all of the offboard wiring joints connecting the main PCB to the switch PCB, so if you have a solder sucker or wick, I'd the excess solder & reflow it, adding just enough solder back for a smooth, non-bulbous joint.
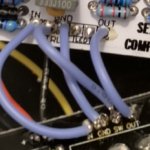
sea lion top.jpeg

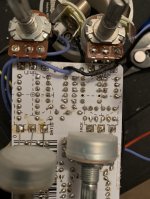
Same goes for the Volume pot. Any pads that don't have a continuous, smooth surface may be cold solder joints, which can cause intermittent connections.
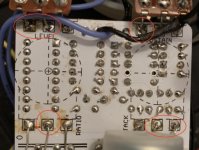
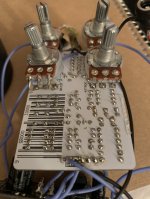
sea lion bottom under pots.jpeg

If you don't mind me asking, what kind of solder, soldering iron, and temperature are you using? I think part of the problem may be that your iron is set too low for the type of solder. Most of your joints look good, it's mainly the ones with a large thermal mass (like the pots & offboard wires) that look problematic.
 
I will definitely reflow my joints.
Admittedly, I have been using solder that is too large for circuit boards, but it's 60/40 rosin core stuff from RadioShack that I've had for years. I am waiting for it and some wick to come in.
The iron that I am using does have adjustable temp but it goes 1-10 instead of showing the actual temp.
I'll try a higher setting when I work on it next.
Thank you for the observations and advice!
 
No problem, I had an iron with that same adjustment and it gave me trouble too. On mine, the temperature dial wasn't great at staying in place, but you should be able to take off the label & tighten the dial screw to keep it from changing settings every time you pick it up. Double check that your tip is well-seated & firmly tightened into the heating element as well. If the contact between them is poor, the heating element won't be able to heat the tip quickly enough for parts like jacks & pots.

Once you've done that, finding the solder melt point & perfect temp setting is easy. Set the iron to a low temperature & see how well the solder melts at each temp setting as you turn it up (cleaning the tip in between, if needed).
  • If it's a eutectic solder (63% Tin/37% Lead) then it will have a pretty sharp transition from "this isn't melting" to "this is the perfect melting temp". You want a shiny, flowing solder that doesn't have any lumps or dull coloration.
  • If it's a non-eutectic alloy, then it might melt but won't look shiny at lower temps. You want the solder to melt & look shiny on your tip right away (remember to clean & tin your tip each & every time you put it down!).
Once you find the right dial setting, put a sharpie mark so you can tell at a glance if the setting has moved.

Keep in mind: A slightly too high temp is much more manageable than a slightly too low temp as you can just get in & get out quickly to avoid burning things. If the iron isn't hot enough, no amount of time applying heat with your iron is going to fix that, and that heat will just transferring to the board or other components.

Bon Voyage!
 
Back
Top