
bifurcation
Well-known member
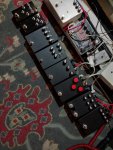
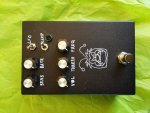
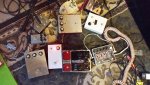
There's some really lovely pedal designs in build reports. I'm wondering if folks would be willing to share their physical decoration techniques in one big thread for reference?


I use acrylic paint pour...
Just acrylic paint mixed with pouring medium and silicon...
Yeah I just use spray enamelDo you seal it afterwards, or does it just form a ... hard shell?
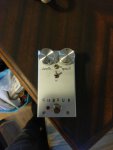
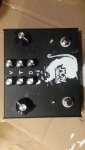
I like simple, so I usually just use solvent based ink and stamps for labels. Lately, I've been on a flat black kick. If I could still find a source for the EHX-style enclosures, I'd gladly keep using 'em.
Stazon, if I recall.Ohhh... I like the typewritery lettering! What brand ink do you use?

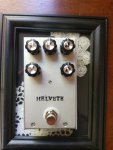
Blue PNP transfer paper printed in reverse\negative and ironed on to the enclosure. Mix up a solution of water and lye, let it do its thing. Wash it off with acetone, spray paint the whole thing black and sand it down to make the detail pop.
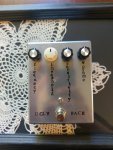
I just print the black with a laser printer. Here's the example - golden letters on a black "background" = golden paper with a "mask" printed on.
") Do you use spray adhesive? And/Or clear coat over it? )
Do you use spray adhesive? And/Or clear coat over it? )
I just print the black with a laser printer. Here's the example - golden letters on a black "background" = golden paper with a "mask" printed on.
. It's a crime 
when I design the artwork I use layers for different types of objects. Holes, text, outlines, hardware, etc.
I have separate layer for centerlines. For the drilling template...
This is what I use for for my Transparent Inkjet Graphics prior to Automotive Clear Coat.
View attachment 166
NOTE : It's also available in a Gloss finish, I have not used it.
This is what I use:
View attachment 170
I learned from a Sign Writer applying Graphics.
First, Make sure the Graphic is Cured (Completely Dried)
Cut to Size
Place Graphic exactly in place on the Pedal and as Flat as possible.
Use Low Tack Painters Tape around 20mm wide.
Cut 2 approx. 10mm by 20mm pieces, Place 1 at each end in the middle of the Narrow sides enough to hold the Graphic in Place.
Adjust Graphic to exact position.
Cut a piece of Low Tack Painters Tape approx. 10mm Longer than Graphic on Longest side.
Apply Tape approx. 10mm on the Graphic & 10mm to the Edge of Pedal & Wrap over the side to form a Hinge.
Remove Temporary End pieces of Tape.
Fold back Graphic like an Open Book & carefully remove Adhesive Backing Paper.
Make sure Pedal is free of any form of Debris.
Swing Graphic towards Top of Pedal holding Firmly to around 30 degrees away from Face of pedal.
Carefully slide the Tip of your Finger approx. 5 to 10mm (3/8'' Inch) along the length of Tape & Graphic while still holding Graphic up with other Hand.
I find that now working from one corner of Tape Side with the Tip of your Finger & moving approx. 5 to 10mm on a diagonal to the Edges removes any Creases or Bubbles while still holding the Graphic Firmly & Lowering as you go.
If you now have the Graphic nice and flat, Carefully remove the Tape from one end, pulling it Back as low as possible to avoid lifting Graphic.
Now use the Backing Paper with the Shiny side towards the Graphic to make sure it is firmly in place.
PRACTICE MAKES PERFECT!
Cheers music6000
I really like the look of this and just to clarify, what kind of paper are you using?I just print the black with a laser printer. Here's the example - golden letters on a black "background" = golden paper with a "mask" printed on.
View attachment 1050
T.

