NGD! Sorta...

Alan W

Well-known member
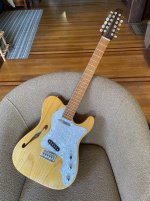
I'll start with a picture. IMG_1595.jpeg

Up until about 2 months ago, this was a Baritone I had put together in 2020. In late 2021 I began to think how much I'd love a guitar that combined the open and rich sound of my Eastman carve stop (thin line, single-cut jazz box basically) with the Tele Baritone I had made. I found someone to make me one, which took from Feb 22 to early July, about 6 weeks ago. Right before it was done, I decided I really didn't need 2 Baritones, so I thought I'd convert it to a 12 string. I was bummed initially, because Warmoth only gets to 1 3/4 inch nuts on their 12s, (and that's what I like on my regular 6s). After a few days of looking around (no idea why it took so long!) I found Musikraft (I thought they were no longer in business) and they have 1 7/8 as a stock option! So, I went with that, on a fairly fat (but not as fat as my normal '59 carve, I mean, there's just so much wideness and fatness you can do, right? neck that's wedge with a roasted birdseye fretboard, and my favorite Jascar EVO wire. (I have a bass with a wedge neck, that is just waxed, and really love its feel—plus wedge is a lower midrange neck wood, (much like mahogany) so it would help mitigate the extra treble from a 12. (Then the maple adds some sparkle to the top—at least that was the plan.)

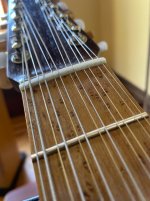
So this has just been strung up this afternoon, and I figure it'll be a day before everything is stabile enough for me to start tweaking the set up, which I largely guess at (I mean, like I just adjusted heights and intonation of the saddles by eye before stringing it up, and took a complete guess at how much to spin the truss rod. It's staying nicely in tune, doesn't buzz, and right now has action (other than the first two frets) that' I'd be completely happy with. Intonation is playable, but three of the pairs need tome adjustment. (The Gotoh has 6 "double saddles" that can be moved independently, so you can get each string intoned; I think this is great for an electric 12. In any case, I'm really not planning on playing it tonight— I'll do the real set up tomorrow and then have at it. Just listened to it straight into the amp so far, and everything works pretty much as it should.

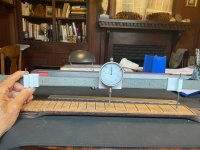
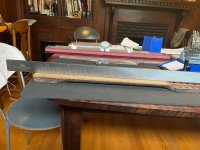
The Musikaft neck was just superb—I was a bit disappointed when I measured it, and it DIDN"T NEED ANY FRETWORK, AT ALL! Even the upper fret drop off was there, and I couldn't find any hint of rock with my fret rockers. Since I have a background in prototype machining, I have tools (even around home) that allow me to take really accurate measurements. IMG_1580.jpeg IMG_1581.jpeg

Edited: read "wenge" every time you see the neck wood described as "wedge." grrr...


While I was waiting for the neck (took about 4 weeks, 5 with shipping) I ordered the other parts I'd need: initially just a bone nut blank and a Tele 12 string bridge. The bridge came in and really was a piece of crap, so I sent it back and ordered a slightly different one. Since the main problem with the first bridge was how poor the saddles were, I also ordered a Gotoh 12 string bridge, figuring I could possibly use the saddles from that on the tele style bridge.

The second tele bridge came in, slightly different, but just as horrid as the first (I mean, not being able to cleanly adjust the intonation on a 12 string is a quick path to mental illness.) And, the saddle widths were slightly different than the Gotoh saddles, so there's be .015 gaps between them. (I did think about shims, and rejected it. I've had real issues with bridges that had any vibration in them, and fully wanted to avoid this. So, in using the Gotoh bridge, I now needed to order a new pickgaurd too!

At first, I thought I'd design and make my own—draw it up, laser cut a piece of 1/2 inch Medite and route a blank I bought. But, I've been enjoying the notion of doing as much by hand as possible, or at least practical, and I could buy an almost ready pickguard for about $20 more than just the material. The only catch was that I'd have to cut the PU holes in it.

But, the main issue with using the Gotoh bridge was that it placed the 6 string through body strings in a different location that the normal tele bridge, and I didn't want to move the ferrules. As a matter of fact, I wanted to make this transformation completely reversible.

I'll add a series of posts that describe in more detail what each of these steps involved, or at least what my solutions for therm were. Now, off to play my Baritone!
 
Last edited:
I'm in the early stages of planning a 12 string tele build myself. I'm leaning towards using the gotoh bridge and mounting the bridge pickup to the body.

I'm very curious to know how things went for you. The guitar looks lovely from here!
 
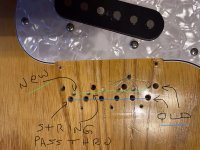
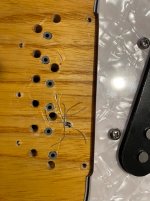
The bridge really became a puzzle. I didn't realize that the pick guard I had, which was from Warmoth, was actually cut to receive a bridge plate exactly that size, so I put the Baritone neck back on, and stated placing it via equal distances from nut to 12th fret and Bridge to 12 th fret—then I discovered that it was right there. So, I test mounted it, and drilled small divots at each of the string through body holes in the Gotoh bridge. This is what it looked like:
IMG_1577.jpeg

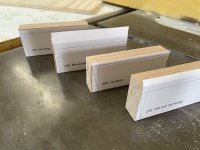
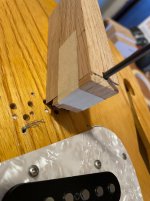
So, I needed a way to join the bottom ferrules to the new bridge plate holes. I measured the depth from the top to the top of the ferrules in each hole, and could measure, center to center each offset. That gave me the angle I needed to drill each connector hole at. I thought about bringing the body into my old shop and throwing it on the bed of the Bridgeport (vertical milling machine), but while that is very accurate, it takes a lot of time, and fixturing the body takes time, and... so I decided to drill them by hand. But, I'm really anal about stuff like this. So I made a drawing, and glued it onto some strips of scrap oak, and made jigs for the various angles. Rather than drill through the middle of the strips, I put a groove on the end, so I could see the bit in the divot. I also had an 1/8th inch bit 6 inches long, which was useful.
IMG_1589.jpeg IMG_1590.jpeg

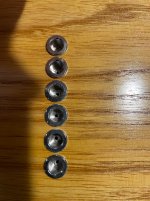
Originally, I was going to block the old holes with dowels, with a deflector angle cut onto the bottom, so that a string would be few into the angled hole. But I began to worry about stiff wires poking into basically endgrain and wearing it away. My next idea was tubing. And, I had some just the right size; ABS tubing from engineering models—I brought home scraps of stuff like this, because it comes in handy. I cut 6 tubes, then put them in those same angle jigs to sand the bottoms at that slight angle where they sit on the ferrule tops, and used a needle rattail file to open up the 3 base string bores a bit at the bottom, where the doublewrap would need to fit in. Then, I trimmed the tops flat with my sharpest skew chisel. The alignment certainly came out close enough for a guitar. And, the bridge holes the tubes in slight compression; that, along with the tight fit meant that there will be no vibration there.

IMG_1593.jpeg IMG_1592.jpeg

The wires that you see sticking up were something I had to add—basically, the tele style bridge plate is grounded by having the bridge pickup mounted on it; since I was mounting on the pick guard, I ran a wire from the grounded linings of the cavities, which were star grounded to the input jack. I repeatedly tested this with a continuity meter, yet today, during my first tests, I do get a bit of hum (but not consistently!, so a shaky connection at one end or the other), which means at some point I will need to take the bridge and pick guard off and sort it out. It is not that much hum, but still!
 
That's some engenious problem solving! I would have given up before drilling new holes.

Am I understanding correctly that the alignment issue arose because this was a baritone originally? Would the holes have lined up if you were converting a standard tele to a twelve?
 
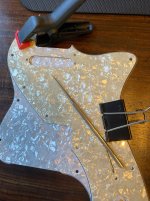
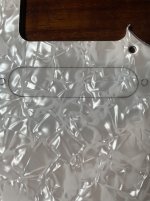
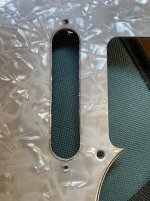
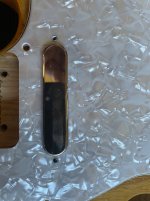
The pickguard needed holes cut for both pickups. Since I had a tele thin line plate I used that as a pattern for the neck hole. I clamped them together and scribed a line (then filled it with dry erase marker) where I needed to dremel out the opening. I then files and sanded it to the scored line. For the bridge pick up, I mounted the pickguard, sort of, since I didn't what to un solder the pickup, and it was too tight under the plastic to bring the pick guard all the way to the body. (Being lazy, which could have bitten me.) Then I mounted the old tele plate (again, sorta, since I couldn't screw it down directly onto the body. I aligned it, made sure it was square with the body end of the pickguard, and centered on the slightly smaller bridge indent that had been cut on into the pickguard. I took both the pick guard and bridge off, and held them together meeting the lines I had taped onto the pick guard—and then did the old scribe and dremel trick there.

IMG_1565.jpeg IMG_1566.jpeg IMG_1567.jpeg IMG_1568.jpeg
 
That's some engenious problem solving! I would have given up before drilling new holes.

Am I understanding correctly that the alignment issue arose because this was a baritone originally? Would the holes have lined up if you were converting a standard tele to a twelve?
Yes. Those holes on a standard tele are 6 straight across, and on the gotoh 12 string bridge they're stepped, rather than straight (sort of like intonation placement of the saddles). Plus, the string to string (as a pair, center to center, is .015 wider on the tele bridge. It starts adding up. Oh—and the passthrough strings are not at the centers of the saddles like the originals—they're offset by 1.5mm. I didn't do an exhaustive search, but that Gotoh bridge is really nice, and I didn't turn up any quality 12 string bridges besides that one.

I'm happy to send you a pdf of the drawing to make some guides like I did—you will need to (unless you find a bridge that you like that does align with the original holes).
 
Last edited:
I used as many of the pick guard holes as I could, and had to drill 3 in different locations due ti the different shape. But with the 12 string neck mounted on, The old alignment was shown to be off (In terms of having the bridge sit exactly into the shallow cutout of the pick guard, so to get the strings even on both sides of the neck, I moved it about 3/4 of a mm, using an xacto to trim a crude radius at the top end. You can see that in that closeup that shows the hole discrepancies, but it really doesn't show up when you look closely at the guitar.
 
I forgot to mention needing to buy more tuners. Two sets... I really like the open back, Hipshot "Griplock" tuners, especially the staggered post sets they make. I decided to use different colors for the main strings and for the octaves; after tuning it today, I'm also thinking about filing some small notches into the edges of the main string tuning buttons, since I tend to reach over and tune more by feel. I've used these staggered post tuners on a strat and on the prior Baritone build on this body‚ no string trees needed!

All that's left to describe is cutting the nut, and it's been a long day. (Plus, I need to do more nut work tomorrow.)
 
Thanks for the template offer. I'm tempted to try my luck with this thing. Or get a body without string-through holes and drill them myself.
That was the first one I tried and sent back. I didn’t think the octave mini-saddles were going to adjust without falling apart.

Getting an undrilled body would be a perfect solution. Very straightforward.
 
I've refined nuts on guitars for years, finally breaking down and buying some of the Japanese nut files. But this ended up being harder than I expected—both because I'm used to much thicker strings (I generally play 11s or 12s, depending on the guitar) and the .010 file I needed to use on three of the strings both took forever to cut into the bone and also fractured (luckily just the first 1/2 inch of it) almost immediately, so I went more delicately after that. Also, I ended up needing to cut through a lot of bone. This seemed harder than the bone I've worked with before.

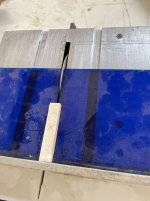
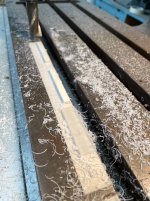
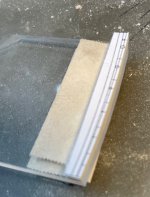
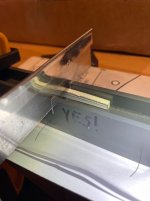
I had bought two bone blocks, and this was the one time I accepted the need for using the mill. First I sanded (on a knife sharpening stone) one flat and then squared up, via sanding and a machinist's square, two edges. Then I sliced it into two pieces on a tiny table saw. Oh, the dust stank! The neck width was specified at 1 7/8, and measured exactly 1.875. The slot was nominally 1/8th inch, but it was a hair under. I surfaced the two pieces, along with some scraps of acrylic—I used these as tests, for when I got a good fit. (It's a tight pressure fit; I had planned on using a dot of white glue to hole it in place, and may do that.)

At the bridge, the gaps between the paired strings was 3mm. I used CAD to do a drawing of the nut, and to figure out the string spacing. Also how deep I had to cut each slot to give me .005 (on treble strings) to .008 (on bass strings) clearance—I stayed above that line intil I had the nut mounted in the guitar. I spray mounted the drawing on the surfaced nut blank and rough sanded it to size. Initially, I thought about using a kerning blade in the mill to accurately cut the slots, but that seemed like overkill, so I cut starter slots using an xacto blade in a mini mitre box.

Right now the nut can still use a good bit of sanding down, but I'll wait until the first string change to do that.

IMG_1584.jpeg IMG_1585.jpeg IMG_1588.jpeg IMG_1594.jpeg IMG_1607.jpeg


Yesterday I did all the intonation and final nut work (other than that last sanding). I had played it a bit the night before, but really played it last night. I'm REALLY pleased with it!! (Especially running it into the General Tso with a bit more compression than I normally use, and the treble up a bit more too.) If I were starting without the tele, I probably would've used lip sticks or gold foils on it, but the Wilde microcoil are hi fi enough to work really well. My playing involves some sloppy harmonics (not in that "ill never be able to do it" shredders way, just the natural harmonics at 12th, 7, 5 and 4th), and this is the first 12 string I've played where those ring out so cleanly. After about 20 minutes, I forgot (in terms of feel) that I was playing a 12 string. Really cool.
 
I've refined nuts on guitars for years, finally breaking down and buying some of the Japanese nut files. But this ended up being harder than I expected—both because I'm used to much thicker strings (I generally play 11s or 12s, depending on the guitar) and the .010 file I needed to use on three of the strings both took forever to cut into the bone and also fractured (luckily just the first 1/2 inch of it) almost immediately, so I went more delicately after that. Also, I ended up needing to cut through a lot of bone. This seemed harder than the bone I've worked with before.

I had bought two bone blocks, and this was the one time I accepted the need for using the mill. First I sanded (on a knife sharpening stone) one flat and then squared up, via sanding and a machinist's square, two edges. Then I sliced it into two pieces on a tiny table saw. Oh, the dust stank! The neck width was specified at 1 7/8, and measured exactly 1.875. The slot was nominally 1/8th inch, but it was a hair under. I surfaced the two pieces, along with some scraps of acrylic—I used these as tests, for when I got a good fit. (It's a tight pressure fit; I had planned on using a dot of white glue to hole it in place, and may do that.)

At the bridge, the gaps between the paired strings was 3mm. I used CAD to do a drawing of the nut, and to figure out the string spacing. Also how deep I had to cut each slot to give me .005 (on treble strings) to .008 (on bass strings) clearance—I stayed above that line intil I had the nut mounted in the guitar. I spray mounted the drawing on the surfaced nut blank and rough sanded it to size. Initially, I thought about using a kerning blade in the mill to accurately cut the slots, but that seemed like overkill, so I cut starter slots using an xacto blade in a mini mitre box.

Right now the nut can still use a good bit of sanding down, but I'll wait until the first string change to do that.

View attachment 101791View attachment 101792View attachment 101793View attachment 101794View attachment 101795


Yesterday I did all the intonation and final nut work (other than that last sanding). I had played it a bit the night before, but really played it last night. I'm REALLY pleased with it!! (Especially running it into the General Tso with a bit more compression than I normally use, and the treble up a bit more too.) If I were starting without the tele, I probably would've used lip sticks or gold foils on it, but the Wilde microcoil are hi fi enough to work really well. My playing involves some sloppy harmonics (not in that "ill never be able to do it" shredders way, just the natural harmonics at 12th, 7, 5 and 4th), and this is the first 12 string I've played where those ring out so cleanly. After about 20 minutes, I forgot (in terms of feel) that I was playing a 12 string. Really cool.
Great work on that nut! I cut a new nut for my 12 string as well couple years ago. Last time EVER lol!.
Just an observation, those deep slots on the G, B, and E strings might give you some wolf notes. I like to leave the slots just at the top of the string on plain strings.
 
Great work on that nut! I cut a new nut for my 12 string as well couple years ago. Last time EVER lol!.
Just an observation, those deep slots on the G, B, and E strings might give you some wolf notes. I like to leave the slots just at the top of the string on plain strings.
Wolf notes. Heck, everything I play is a “wolf” note. (That’s what the W stands for)

But, you’re right, I do plan on sanding the nut down a good bit. But am waiting until I do the first string change since it would be much harder to do with the strings there. I do have the slots refined enough (which that extra depth made harder) so that the strings are all ringing cleanly. I think with the plain octave strings I’ll probably make the slots more of a vee rather than dipping the arc of the nut top, which I think would look off, if that makes sense.

I’d like to try other strings, but do like the 09s on this, and all the sets I’d like to try (pyramid flats would be #1 on my list) start at 10s—even as someone that likes to fight the strings a bit, I’m finding how easily this plays very addictive. I have 10s on my acoustic 12, which has fairly low action, and the 09s are that much easier to barre, and bending is still plausible, so I may just stick with these. I know that slight a difference in gauge will not be a problem (in terms of if I need to open the nut slots up slightly for 10s, the 09s will be fine).
 
Back
Top