

OD is Glorious
Well-known member
- Build Rating
- 5.00 star(s)
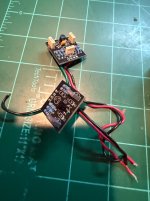
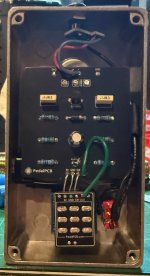
This is one of the only circuits I have breadboarded multiple times. I originally followed Josh's video and modified the circuit many times. It is such a simple circuit with 6 resistors and 3 caps - and it sounds terrific! I wanted to add a clipping stage as I did on breadboard to make it a bit more interesting... I mean this is probably the cheapest guitar pedal I have seen for sale. Dave's has one for $19 right now. I tried using the PPCB muffin crumb amp stage for clipping but it was giving me issues and pops, That is why you see some buggered wiring at the footswitch (out) and the PPCB multiple power connections DC jack.
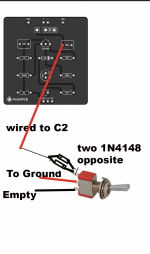
For an easier way to add clipping I settled on an SPDT on/on toggle. I attached 2 1N4148s attached to lug 1 of my SPDT. Then I ran a wire from lug one of my SPDT to the leg of C2 that goes to leg 3 on the volume potentiometer. The center lug on the SPDT is wired to ground, the third lug on the SPDTon/on switch is empty (I included a diagram). Now when the switch is in one ON position you just get the boost, and in the other position you get the clipping. Note there is a slight volume drop when engaging the clipping.
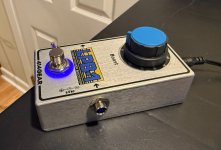
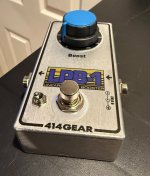
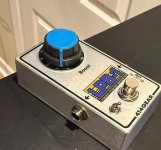
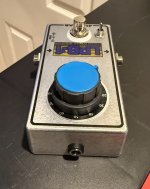
The enclosure is a bare aluminum 1590b that I applied a decal to and then clear coated with 2k matte clear. I went with a top jack for D.C. and side jacks for input/output. I used a giant blue knob and a blue illuminated LED footswitch. The SPDT on/on is a Taiway short bat because I think it needed to be short so that a foot would not engage it accidentally. I used this black dial plate under the knob because I liked it.
This is a great boost and it would be a great DIY project for a beginner!
For an easier way to add clipping I settled on an SPDT on/on toggle. I attached 2 1N4148s attached to lug 1 of my SPDT. Then I ran a wire from lug one of my SPDT to the leg of C2 that goes to leg 3 on the volume potentiometer. The center lug on the SPDT is wired to ground, the third lug on the SPDTon/on switch is empty (I included a diagram). Now when the switch is in one ON position you just get the boost, and in the other position you get the clipping. Note there is a slight volume drop when engaging the clipping.
The enclosure is a bare aluminum 1590b that I applied a decal to and then clear coated with 2k matte clear. I went with a top jack for D.C. and side jacks for input/output. I used a giant blue knob and a blue illuminated LED footswitch. The SPDT on/on is a Taiway short bat because I think it needed to be short so that a foot would not engage it accidentally. I used this black dial plate under the knob because I liked it.
This is a great boost and it would be a great DIY project for a beginner!
Attachments
Last edited: