JamieJ
Well-known member
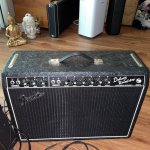
I’ve been wanting to build my own amp for ages after seeing so many amazing builds here but I can’t justify the spend at the moment. So I thought I’d have go at doing some work on my DRRI 65. I’ve done a fair bit of reading over the last couple of months (rob robinettes website is an absolute goldmine). I’ve also been watching lots of psionic audios YT channel which served as a big inspiration to give this a go.
I hate desoldering with a passion (as I’m no good at it). So I did some practice runs from
my graveyard collection of pedals.
It was good to get used to how to properly discharge filter caps. I used a 150ohm 10W resistor with an alligator clip to ground.
This DRRI is 15 years old and surprisingly the filter caps were in fairly good condition. One had the faintest hint of a bulge forming but no leaks. I wanted to recap the amp as a proactive step.

I sprang for a set F&Ts and the amp is definitely a touch louder after replacing them. After being spoilt by PedalPCB boards it was a shock to see how crappy these fender boards are - they are reasonably translucent. So I was super nervous about ruining the amp. I managed to not damage a pad which was a relief.

I then went onto desolder remove one leg of the bright cap. I did I this way so if I changed my mind it can be easily corrected. I tend to play the amp at 2 or 3 and the bright cap makes the amp incredibly bright ( even though it’s pretty bright to begin with) and not play so nice with OD pedals.
I had come across a psionic video that showed how the RI amps have some issues with the wiring with V3 as part of the reverb circuit so I corrected this.
I then decided to call it a day and put the amp back together (feeling good that I didn’t kill my self through electrocution and that the work went well) but in testing it there was a loud hum in both channels and no sound at all. This made me shit myself a little bit as I thought I might have wrecked the amp. I went back in, discharged the caps again and started looking for the issue.
Me being an idiot - I didn’t connect the pot board to the main circuit board! Take two of putting it back together went well and its sounding great.
For the amp experts - I’ve read lots online about the design flaws fender put in place on these amps by mounting the heater balance and screen resistors to the board (rather than on the sockets). Is it worth removing these in case of heat related failure?
I hate desoldering with a passion (as I’m no good at it). So I did some practice runs from
my graveyard collection of pedals.
It was good to get used to how to properly discharge filter caps. I used a 150ohm 10W resistor with an alligator clip to ground.
This DRRI is 15 years old and surprisingly the filter caps were in fairly good condition. One had the faintest hint of a bulge forming but no leaks. I wanted to recap the amp as a proactive step.

I sprang for a set F&Ts and the amp is definitely a touch louder after replacing them. After being spoilt by PedalPCB boards it was a shock to see how crappy these fender boards are - they are reasonably translucent. So I was super nervous about ruining the amp. I managed to not damage a pad which was a relief.


I then went onto desolder remove one leg of the bright cap. I did I this way so if I changed my mind it can be easily corrected. I tend to play the amp at 2 or 3 and the bright cap makes the amp incredibly bright ( even though it’s pretty bright to begin with) and not play so nice with OD pedals.

I had come across a psionic video that showed how the RI amps have some issues with the wiring with V3 as part of the reverb circuit so I corrected this.

I then decided to call it a day and put the amp back together (feeling good that I didn’t kill my self through electrocution and that the work went well) but in testing it there was a loud hum in both channels and no sound at all. This made me shit myself a little bit as I thought I might have wrecked the amp. I went back in, discharged the caps again and started looking for the issue.
Me being an idiot - I didn’t connect the pot board to the main circuit board! Take two of putting it back together went well and its sounding great.
For the amp experts - I’ve read lots online about the design flaws fender put in place on these amps by mounting the heater balance and screen resistors to the board (rather than on the sockets). Is it worth removing these in case of heat related failure?