I got nervous about the number tweaking
@SYLV9ST9R is talking about. I didn't want to goof up the order and have a weird customized hole-riddled enclosure shipped to me. So, I finally snagged a step bit and a center punch to do it myself. Wish I did that sooner.
The Dewalt step bit (#DWA1783IR) goes from 1/8" to 1/2" (~3-12mm) - suits pretty much all your pedal needs. With my cordless drill, goes through the aluminum enclosures like butter. Paired with a center punch, masking tape and some patience, you can (a) get extra creative/wacky with your pedal designs, or (b) use the printable PedalPCB layouts that aren't predrilled at Tayda.
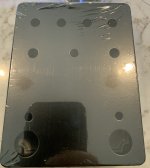
I'm past due on posting my recent builds, but my first attempts at drilling went really well. If I can do it, anyone can. Little patience, little masking tape, no problem.
FYI for my fellow noobs - the smaller 1/8-1/2" step bits are cheaper than the larger, more common sizes (duh, took me a minute to figure that one out). You don't need a step bit that goes from 3/16-7/8" (at least I don't!), and those are twice the price.