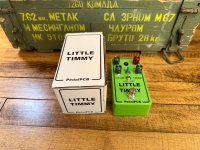
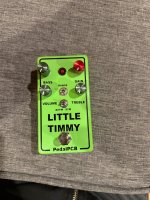
I run an MXR Timmy on my board so I knew I had to build this Tommy III. It exceeded my expectations. The pedal is number 14 because it is my fourteenth build. I will not show you my PCB scrapyard of broken dreams.
I used a Love my Switches feather touch footswitch, dress nuts for the jacks, aluminum tall thin knobs and German input and output jacks. I normally use switchcraft but I think I prefer these; they are smaller and easier to maneuver and solder. The only change from the build docs is that I added an accessible toggle for the clipping. Also can I say how much I appreciate the quality from Tayda? Simply flawless enclosures. I ordered numerous enclosures from many suppliers but the Tayda are flawless: and they packed and shipped them surprisingly fast! I have a drilling template/jig from Stompbox parts and it is also terrific - makes it so easy to line up my holes. I still fail quite a bit at building, but this one turned out just how I like it. I put a red knob for gain because that is the money switch. The graphics are just clear label thermal print.
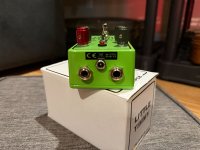
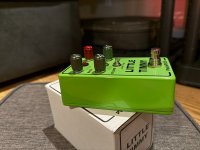
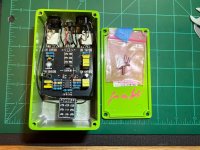
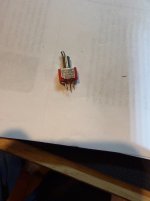
The design calls for an internal switch to change from symmetrical to asymmetrical clipping but I decided I wanted to be able to access it. To add this switch I used an on/on SPDT toggle and used my needle nose pliers to get the pins to fit the PedalPCB board. Not difficult at all. The change in tone with the sym switch is subtle. Regarding the range toggle: it is aggressive! Basically it seems to toggle between transparent low end, much more transparent to transparent od to higher end overdrive The pedal also has incredible boost which is transparent. All in all, easy build, terrific pedal. I would run this on my board and I think that is the litmus test.
I appreciate the forum and members. I have a desire to learn more about this because I am still basically a "paint by numbers" builder ATM. Thanks for letting me be a part of this community.
I buy most of my parts from Love My Switches and Stompbox Parts, Great people and great products.
I used a Love my Switches feather touch footswitch, dress nuts for the jacks, aluminum tall thin knobs and German input and output jacks. I normally use switchcraft but I think I prefer these; they are smaller and easier to maneuver and solder. The only change from the build docs is that I added an accessible toggle for the clipping. Also can I say how much I appreciate the quality from Tayda? Simply flawless enclosures. I ordered numerous enclosures from many suppliers but the Tayda are flawless: and they packed and shipped them surprisingly fast! I have a drilling template/jig from Stompbox parts and it is also terrific - makes it so easy to line up my holes. I still fail quite a bit at building, but this one turned out just how I like it. I put a red knob for gain because that is the money switch. The graphics are just clear label thermal print.
The design calls for an internal switch to change from symmetrical to asymmetrical clipping but I decided I wanted to be able to access it. To add this switch I used an on/on SPDT toggle and used my needle nose pliers to get the pins to fit the PedalPCB board. Not difficult at all. The change in tone with the sym switch is subtle. Regarding the range toggle: it is aggressive! Basically it seems to toggle between transparent low end, much more transparent to transparent od to higher end overdrive The pedal also has incredible boost which is transparent. All in all, easy build, terrific pedal. I would run this on my board and I think that is the litmus test.
I appreciate the forum and members. I have a desire to learn more about this because I am still basically a "paint by numbers" builder ATM. Thanks for letting me be a part of this community.
I buy most of my parts from Love My Switches and Stompbox Parts, Great people and great products.
Attachments

Last edited: