funky.monkey
New member
What's your opinion about printing pedal graphics using toner transfer method?
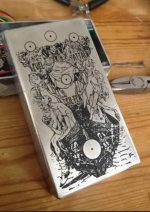
Print graphics using iron and printed paper.
(this picture isn't mine I downloaded it from diy guitar effects website)



Yeah, i want to use toners as main graphics.A lot of people use toner transfer to make a resist for etching.
I guess you’re talking about just using the toner as a finished graphic itself? Seems fine, if you like the way it looks
I’d definitely put some kind of clear coat (might have to experiment a bit to see what works) over it. Otherwise I see it flaking off pretty quickly with use/handling.


I don't want to etching the aluminum.Sealing it without melting/dissolving it is the kicker.
Also, getting a clean transfer isn't 100% guaranteed. It's without a doubt the hardest part of etching enclosures.

it's the method i settled on for both of my builds so far.What's your opinion about printing pedal graphics using toner transfer method?
They look so goodit's the method i settled on for both of my builds so far.
i wanted the full experience of doing the whole thing on my first ones... but i'm probably going to just use the tayda service going forward for new ones.. i haven't made up my mind on that one.. but the ones other people have gotten from them look nice..
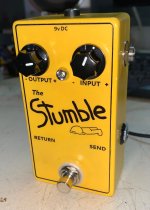
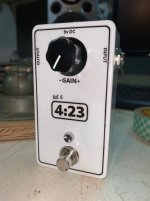
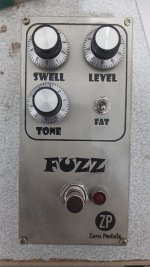
here's the ones i did.. i used a bw laserjet with avery 4.50x2.333 matte clear labels though.. it's a transparent sticker, not an iron on. the size just fits on a 125b like the stumble box without overhang.
then i clearcoated over it 2x to seal the sticker
(i cut the sticker down for the transcendence boost, that is in a 1590b2)

Thank you! here's the process i used:They look so good
I tried one on a pedal, I posted it on the website so you can check it out.
How did you print them on colorful enclosures?
Is it possible to print colorful titles with toner transfer method?
How did you print the graphics?من جعبههایی را خریدم که از قبل با رنگ پودری روشن پوشش داده شده بودند تا مجبور نباشم آنها را آستر بزنم.
جعبه ۱۲۵b سفید بود و جعبه ۱۵۹۰b2 در ابتدا خاکستری روشن بود که تا زمانی که خیلی تیره نباشد، خوب کار میکند.
ابتدا سوراخها ایجاد میشوند. فقط باید مراقب باشید که به پوشش پودری آسیب نرسانید.
سپس رنگی را که میخواستم زدم، از رنگ موتور دوپلیکالر استفاده کردم چون ارزان است و تا حدودی براق میشود و زرد و سفید همان چیزی بود که میخواستم.
اجازه دادم ۲۴ ساعت خشک شود. سپس برچسب را نصب کردم و سوراخها دوباره روی برچسب باز شدند. بنابراین لبههای سوراخ نیز آببندی میشوند.
سپس دو لایه لاک براق شفاف دوپلیکالر سطح پایه روی آن زده میشود تا از ساییدگی چاپ جلوگیری شود.
اگر از رنگ شفاف مات استفاده کنید، رسیدن به یک پوشش نهایی ثابت که به نظر نمیرسد برچسب زدهاید، آسانتر میشود

I'll test the color print and share it with youi'd imagine you'd be able to do a full color print if you had a color printer and kept the box white (because paper is also white and a printer assumes that by default); also, this method doesn't actually require a laser printer, it's just that's what i have.. you can do it with just an inkjet, because it's getting a laquer clearcoat at the end either way
i made the graphics in gimp. i started in gimp with a canvas that is 4.5x2.333 inches, and made the graphics to that format.How did you print the graphics?
I didn't get it Wright