counterdeliver
Member
- Build Rating
- 3.00 star(s)
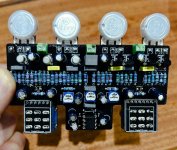
“Had” to build this TWICE. It was the first pedal I’ve built that didn’t spring to life when I plugged it in. I troubleshooted and traced it until I couldn’t take it anymore, jacked up the PCB removing my better components, and started over.
It was only later that I discovered the “issue” with the original : I made 3D printed enclosures to temporarily house 3 pedal builds while waiting for my Tayda enclosures. Two (per the wiring diagrams) had ground wires from the input jack to the power jack and the output jack, and worked great in their temporary PET-G homes. This one did not (and couldn’t use the ENCLOSURE for ground because it was plastic). Tough lesson learned!
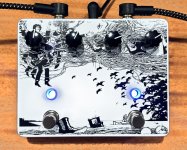
Now that it’s done, I’m thrilled though! I wanted the graphics to be unique so I used the bottom half of a pretty rare Klaus Voorman poster. Plugged it in last night, added a Keeley Abby Chamber Verb and played my best “She Said, She Said” on my Elitist Casino. I can tell already this one’s going to be a frequent “go-to!”


It was only later that I discovered the “issue” with the original
Now that it’s done, I’m thrilled though! I wanted the graphics to be unique so I used the bottom half of a pretty rare Klaus Voorman poster. Plugged it in last night, added a Keeley Abby Chamber Verb and played my best “She Said, She Said” on my Elitist Casino. I can tell already this one’s going to be a frequent “go-to!”


