Fun with Faceplates (multiple builds)

mattb33

Active member
Build Rating
5.00 star(s)
I've been having fun lately spending some time learning PCB faceplate design (huge thanks to some of the conversations happening here for tips and tutorials). I've posted these in order of evolution in learning and experimentation.

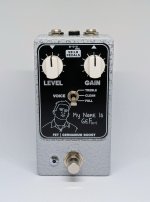
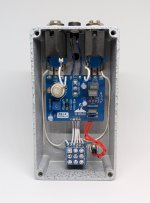
First one, the FET/Germanium boost - thank you to @Chuck D. Bones for the circuit design. Simple circuit in terms of number of components, but sounds fantastic, my favourite boost.
On the faceplate, the 9V text is not in alignment for that special OCD eye-twitch moment, but it's a small detail I can live with. I printed slightly different designs on each side so I had options and in case there were scratches on one side, but I preferred this design.

PXL_20260102_062919826~2.jpg
PXL_20251116_003009070.jpg

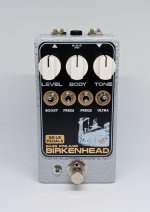
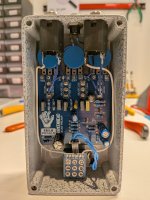
#2 - Bass Preamp and EQ shaper, based on the now out-of-production (I believe?) Southampton Icteo. A very handy utility for bass.
Played around with the ENIG surface finish for this one to get the gold colouring.
PXL_20260102_063217359~2.jpg

PXL_20251203_080507498.jpg
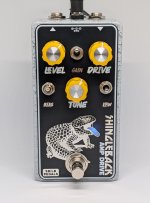
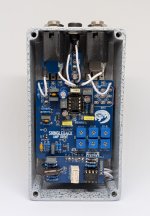
#3 - The Shingleback - based on the ROG Supreaux Deux, with the Bias switch to allow for the change over to the Taqueria/TacoBolt.
For this one, the experimentation was in having a backlit faceplate (see here for a tutorial from @szukalski). It might be hard to tell in the picture since it's well-lit, but the tongue is the on/bypass indicator - yes, shingleback lizards are species of blue-tongued skink, so it's not just our blue-tongues that have blue tongues.

PXL_20260102_064141442.jpg
PXL_20260102_065026441.jpg

One of the biggest benefits to all this is that for designs with some uniformity (like the 3-knob design of the FET/Ge boost and Shingleback here), I can have enclosures drilled covering different pedal designs, and can cover up any unused holes with the faceplates.
 
Real cool! Do you just use/expose the copper layer to give you that second color on the faceplate?
 
Those faceplates are great. I really like the two tone one with the gold/metallic component. If you have time, would you share how that is done? Thanks!
Thanks.

Yes, to get the gold/metallic component, I put the image/shape on both the TopLayer and TopSolderMaskLayer. That's in EasyEDA - I believe the equivalent layers in KiCAD are F.Cu and F.Mask (?), but someone will need to fact-check me on that.

For gold, you want the ENIG surface finish.
For silver, I went with Leadfree HASL.

Ideally you want the PCB thickness to be less than your standard PCB thickness to ensure there is enough thread poking through on your pots to secure the nuts, which means ~1mm ideally. However, when I was experimenting, I was using a standard 1.6mm PCB thickness since it's cheaper and it worked out fine.
 
Very cool. I've been doing waterslide forever and I'm feeling inspired to try this out next time I put in an order for PCBs.
 
I'm looking in JLCone and I see where I select one or the other, how did you get both on one plate?!
You can only do one or the other, not both at the same time - for the builds above, the Birkenhead is the ENIG finish and the Shingleback is the HASL. The white text/images are on the top silk layer.
 
You can only do one or the other, not both at the same time - for the builds above, the Birkenhead is the ENIG finish and the Shingleback is the HASL. The white text/images are on the top silk layer.
AHHHHH! I feel dumb now! That's so awesome looking though. I just got the notification that my first faceplates just got shipped. I'm going to have to try this technique out on the next round!

Also, for the faceplates, who are you ordering them from? I know JLC has a minimum order of 5. So if you only plan on making one of them, do ya just bite the other 4?
 
AHHHHH! I feel dumb now! That's so awesome looking though. I just got the notification that my first faceplates just got shipped. I'm going to have to try this technique out on the next round!

Also, for the faceplates, who are you ordering them from? I know JLC has a minimum order of 5. So if you only plan on making one of them, do ya just bite the other 4?
Post them up when your first ones get delivered!

I use JLC and I just wear the cost of the minimum 5 run even if wanting only one, but there are ways to make it work for you - you can have different designs on the front and back so if you have different pedals with the same knob layout and spacing, you can make a reversible design. Or if stay generic enough with the labelling, you would find multiple pedals with the same control layout so you could reuse the spare faceplates.
 
Post them up when your first ones get delivered!

I use JLC and I just wear the cost of the minimum 5 run even if wanting only one, but there are ways to make it work for you - you can have different designs on the front and back so if you have different pedals with the same knob layout and spacing, you can make a reversible design. Or if stay generic enough with the labelling, you would find multiple pedals with the same control layout so you could reuse the spare faceplates.
Will do! Thanks for the advice on this. I've been messing with Cricuts, Paint markers, water slides, even did a little screen printing test, and I hated all of it. I think if I can get the results I want from this is going to make my life so much easier!
 
For someone like me who enjoys extreme minimalism in graphics i guess I could do a generic overdrive/distortion faceplate with no pedal name, just the basic Volume-Gain-Treble-Bass, 9VDC, In, Out layout. Then I could do the name some other way if necessary.

What you and @szukalski are doing is quite impressive!
 
Post them up when your first ones get delivered!

I use JLC and I just wear the cost of the minimum 5 run even if wanting only one, but there are ways to make it work for you - you can have different designs on the front and back so if you have different pedals with the same knob layout and spacing, you can make a reversible design. Or if stay generic enough with the labelling, you would find multiple pedals with the same control layout so you could reuse the spare faceplates.
Man that two sided thing is a great idea, never thought of that.
 
Man that two sided thing is a great idea, never thought of that.
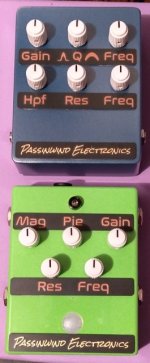
I used that idea on both of these pedals to keep cost down a bit:

IMG_0851.jpeg

Those are OSHpark’s “After Dark” boards, I didn’t use screen printing too but I certainly could have. In general I just prefer UV printing from Amplifyfun, but this was an interesting diversion.
 
These are really cool! What’s the cost for one of these faceplates?
This could change at any point, but I stepped through the ordering process again to check out current prices:

The HASL (lead-free) ones are around USD$5 for a minimum run of 5. Cheaper if using JLCONE Desktop.
ENIG around USD$21

There are some extra fees added once you exceed a certain size in at least one dimension, I think it's currently >100mm:
HASL (lead-free) ~USD$9
ENIG ~USD$25

Not including shipping costs.

I don't seem to be getting the extra board fee charge I used to get for changing the PCB thickness choice to something thinner (1mm, 1.2mm), which is nice.
Prices per faceplate drop a fair bit if jumping up to a quantity of 10+
 
Back
Top