darwin999
Well-known member
- Build Rating
- 5.00 star(s)
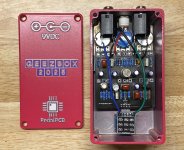
Here's my build in a Tayda Viva Magenta colored 125B w/ purple knobs and LED.
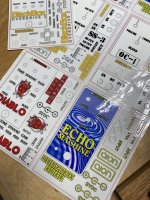
I've switched to UV printed vinyl stickers for my enclosure art, followed by 2 layers of sprayed satin lacquer.
Super easy to install, very crisp fine details (printed from SVGs), and wonderful colors. (Also quite affordable!)
And absolutely no bleed through from the enclosure's color underneath.
The stickers probably wouldn't hold up under a ton of hard gigging, but my effects get an easy life at home where the hardest shoe they'll face is probably a flip flop.
Q1 is a metal can 2N4393 JFET.
Q3 is a reclaimed TI 2N1306 I picked up years back, w/ hfe=100 and 35µA leakage.
A very easy build - another great PCB from @Robert.
(Only teeny quibble is that I think the build doc's schematic has reversed the labels for pins 1 and 3 of Q3.)


