Crunch Captain Deluxe low volume?

ragamuffin

Member
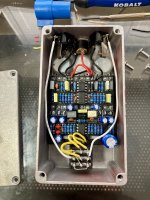
I recently built a Crunch Captain Deluxe and it sounds good and seems to be working but overall volume is low.

With the Mode switch in the middle (classic Crunch Box/high gain) and clipping switch to the right (LED clipping, the lighter clipping option) with Gain at noon I have to nearly max the volume to get unity level. In the heavier clipping setting (to the left) I can hardly reach unity.

Does this sound normal, or is something off?

IMG_2507.jpg
 
Last edited:
Ok so I put on "10 hours of relaxing sleep music" on Youtube and traced the circuit with the audio probe, I noted where the sound was noticeably different

-On IC1-7 I I first get a terrible nasty screechy noise (hereafter referred to asTNSN)
-R10 TNSN on the North-most leg (I don't know which is leg one or two, so I listed things as North South East West)
-C7 TNSN on East leg
-C8 wah-like and distored
-R11 TNSN both sides
-Clipping toggle TNSN E lug
-Presence pot TNSN all three lugs
-C9 TNSN non-grounded lug
-R12 crazy and squealy on S leg
-C11 low volume on S leg
-R15 very quiet S leg
-C14 W leg quieter
-Mid pot lug 2 quieter
-IC2 6 and 5 no signal
-R23 tiny signal on S leg
-Bass pot tiny signal lug 2
-IC2 2 and 3 no signal
-D101 D102 South legs fizzy/static-y

Am I right in thinking that the problem might originate with IC-1? Or C8? Or C11? or D101/D102?
 
Last edited:
Ok so you start to get low volume after the vol control, which is the most likely component to cause volume issues when it fails. I would remove the volume pot and measure it across lugs 1 and 3, then 1 and 2, as well as 2 and 3. Get measurements both at full CCW and full CW so you can get an idea of whether the pot's resistance track is working.

Also inspect that area for anything weird. Then look closely at the circuit board and follow the traces that go to lugs 1 2 and 3 of the vol pot and find where they connect to the next components in line. Check for continuity between the pot's lugs and these components, and you may check for resistance in the solder traces as well.

If everything comes out ok I would still put a new volume pot in.

Also, check the value of R13 and make sure it is not shorting to ground
Thanks, I desoldered the vol pot, 1-3 stays at 94ohms, 1-2 max 94 min 1.3, 2-3 max 1.3 min 94. So that seems normal right?

Volume lug 1 trace to ground 0.1ohms, lug 2 to C11 0.1ohms, lug 3-R13 0.1ohms, also normal right?
 
Thanks, I desoldered the vol pot, 1-3 stays at 94ohms, 1-2 max 94 min 1.3, 2-3 max 1.3 min 94. So that seems normal right?

Volume lug 1 trace to ground 0.1ohms, lug 2 to C11 0.1ohms, lug 3-R13 0.1ohms, also normal right?
Yes, that's normal.

What happens if you leave the vol pot removed and solder a jumper wire from lug 2 to 3?

Also, what did R13 read? You'll have to remove it as well. Maybe test for volume with that removed and with the vol control jumper
 
Yes, that's normal.

What happens if you leave the vol pot removed and solder a jumper wire from lug 2 to 3?

Also, what did R13 read? You'll have to remove it as well. Maybe test for volume with that removed and with the vol control jumper
I jumpered lug 2 to 3 and pulled R13 and now there is plenty of volume on tap! Woohoo!!

R13 measured 10.01

So I guess I order up a new volume pot and see if that fixes things?
 
Last edited:
Ok, that's cool. Now we have to figure out if the problem was the vol pot or something to do with R13. Check with your meter if there is continuity from one solder pad of R13 to the other (like if the board is allowing resistor to short). If there isn't, then try reinstalling it (or installing another) and see how it affects your volume. It should be a bit quieter after this, but you shouldn't have the problem like before.

If that all works out then,

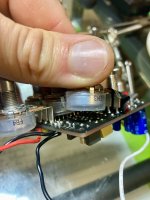
Try to look really close at your vol pot and see if you see anything weird, like solder that's flowed (flown?) to where it shouldn't be, or anything else weird. You may be able to reuse it if you figure out why it's acting weird. It measured ok so there has to be some other reason it's not working.

Maybe one of the legs is touching the inside of the enclosure and grounding out, and not letting the signal pass
 
R12 and R13 along with the caps around them are making up EQ filters, and as a byproduct of how they are arranged these two resistors create a voltage divider. A voltage divider is a thing that you can use to change the volume of a signal by setting the way those two resistors are proportioned. In the schematic they are both 10k so they should not affect the signal at all (they are doing some RC filter stuff), but now we have eliminated R13 and as such none of the signal is going to ground anymore and it is all going thru the circuit, so it is going to be louder. The idea with removing R13 is to see if either the resistor or anything around it is allowing the signal to short to ground, which would cause an issue with volume. That's why we messed with it and need to inspect the area.

To a lesser extent, check out C10 the same way.

You want to try to look at the schematic while you're looking at the circuit board and try to figure out the traces. For example, if we check out the schematic we see that R13 has pins 1 and 2, but those aren't indicated on the board, so you need to look at the traces and follow them to see where they go. Doing this will help you map out the circuit as it is on the board, which will help you learn what to look for when troubleshooting. In this instance we are interested in finding if there is a short to ground anywhere from pin 1 of R13 to pin 1 of C11, including C10 as it goes to ground, and the lugs of the vol pot. The volume pot and R13 are the obvious components to fail in this region, but it's possible there is a short to ground anywhere in or around those traces. This could be from literally a strand of solder the thickness of a hair and very difficult to see connecting one pin to another. These components are all in the same area and that kind of thing is likely to happen.

We want to be careful not to treat the volume pot as the "aha!" moment because it could end up being a red herring, which we can deduce by investigating the whole area.

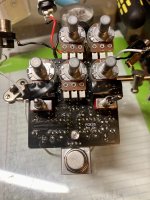
Can you post a pic of the back of the board?
 
Last edited:
I soldered the volume knob back in to see if anything had changed; still lower volume, hard to get unity on si clipping.

Playing around with the knob I noticed two things: volume was bunched up towards the the end of the sweep (clockwise) and that there is considerable high end roll off at lower volume settings; the volume knob is almost functioning like a tone knob as well. Not sure if that's useful information
 
Try giving the solder side of the board a thorough but gentle clean, avoiding the pots and switches. There's an excess of flux on that side, which can cause all sorts of issues. Will be much easier to spot any cold joints and what have you if the board's cleaned up.

People have different approaches to this task (IPA and a toothbrush, and so on). Have a look at the various methods on the forum.

If you have clipped the leads too close to the solder joint it's worth carefully reflowing these. I see several examples of this on the top picture (joints look 'square,' and so on). This may not necessarily solve the immediate problem but as before you may spot problems more easily.
 
Back
Top