Dan0h
Well-known member
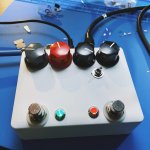
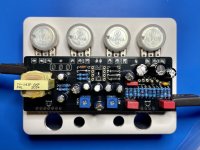
Super stoked on this one. Only subs were the 2x 100uf for 120uf and my 10ohm resistors were around 15ohms. 4th success in a row. Thank you to this kick ass forum. ??
Not even mad about the knobs slight overlap, the gorva is a wee bit tight for my sausage fingers on this build.
Not even mad about the knobs slight overlap, the gorva is a wee bit tight for my sausage fingers on this build.
Attachments
-
 13B5AD88-CC50-443F-B619-A916235C595B.jpeg1.5 MB · Views: 81
 -
 0F690C18-3B43-462F-897F-7B87FC7C9E0C.jpeg1.7 MB · Views: 115
 -
 889CF9D0-59BD-4065-AA3C-7CE9D5ADB704.jpeg3.2 MB · Views: 113
 -
 EBDE908C-7442-4FE7-AB56-66CCAB4A233C.jpeg2.9 MB · Views: 115
 -
 C57875E9-9C02-4787-B9EC-ACD397BAAFFB.jpeg1.7 MB · Views: 87
 -
 C8EF8064-D69E-4A9C-834D-10C91562D53F.jpeg2.4 MB · Views: 92