My first FV1

Fishbonetabby

Active member
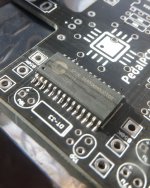
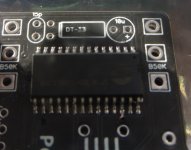
I was pretty nervous about banging this up but I feel like it was a lot easier than I anticipated. I used .5mm 2% silver solder & took my time. I alternated sides and took breaks in between pads. I scratched a little of the silkscreen on the pcb but other than that I feel pretty good about it.

I lurk here quite frequently and I gotta say thanks to everyone. I've learned a lot and have been able to troubleshoot just reading thru other people's posts.

Be good everyone!
 

Attachments

  • 20220206_140132.jpg
    20220206_140132.jpg
    979.4 KB · Views: 28
  • 20220206_135953.jpg
    20220206_135953.jpg
    613.8 KB · Views: 26
That looks pretty tidy
Thanks! This is a Haarp build. I'm really hoping I can get this right because I just sold my EQD Rainbow Machine and I'm gonna replace it with a Leprechaun after I finish this one.

I have little to no idea how to read schematics but I actually have been able to use the schematic on this build to test continuity with my multimeter by seeing where each pin on the FV1 leads to. So far so good.
That's a good start!
 
I recently finished my first FV-1 too and you are right, soldering the chip is a lot easier than first thought. In fact, I think I used the same solder as you (really small diameter stuff leftover from Radio Shack days). I used the smallest tip that I had with my soldering station, but recently watched a YouTube video that suggested that you should use a larger tip and generally something with plenty of surface area to burn in the solder more quickly. It makes sense and if I do another one, that's what I am going to do.

I wasn't too worried about my soldering the first time through since I was going to use solder wick to clean up each of the pads. No reason to fear SMD.

Hell yeah!! You're definitely never going to solder SMDs if you don't try. I'm lucky to have an old school electronics shop near me that had the solder and then I used this method that I saw here in another thread. The 2% silver flowed very nicely and when it didn't I stopped, cleaned my tip and returned after a short break. Def no reason to fear SMDs!!!


I tried to get a larger tip for the same reason but my local shop didn't have any. Personally I really can't say I would do anything any different next time. I don't think feel confident enough to try the drag method I've also seen here although it looks cool as hell!! The pads on the pcb are like 1mm wider than the legs of the FV1. I found that really centering the legs on those pads gave me a little spare pad space outside where the legs touched down and that's where I was able to apply heat.
I think that is exactly the video I watched. Ha.
 
Back
Top