OD is Glorious
Well-known member
Terrific build. Lots of fun to make a pedal in a day and have it come out great!
Previously I made the PedalPCB Sproing Reverb which only had one knob. That build came out great and I gave the pedal to a friend who plays. I built this one for a producer in Nashville.
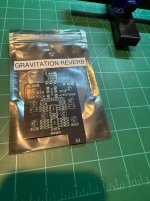
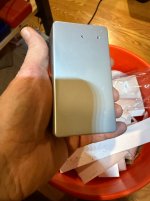
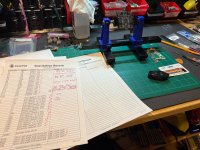
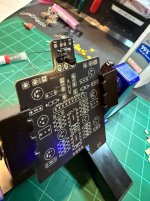
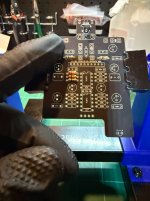
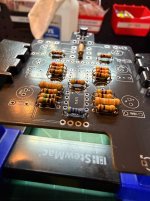
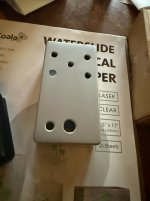
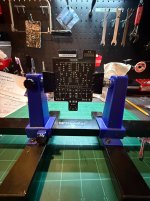
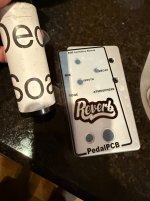
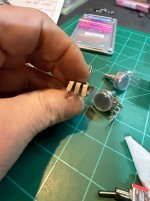
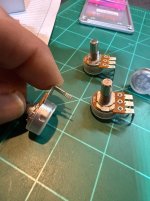
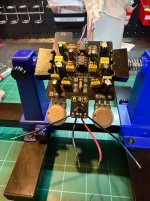
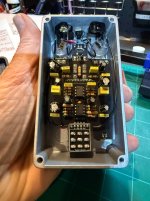
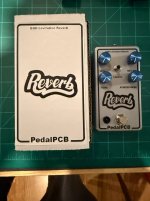
Unlike the PedalPCB Sproing Reverb this one has four knobs and a switch. No worries because they all fit nicely into the footprint on the board.In fact the board layout is excellent and it has room on the sides for my pcb holder to grab without bending compenents near the edges. I took pictures along the way for the build report. I would say it is a pretty easy build but you will need the $15 IC3 BTDR-3H Accutronics/Belton Reverb Module, Other than that I again used the Lumberg jacks and anodized knobs. The PedalPCB top jack plate is super and really makes the build look professional. I think of reverb like water so I went with blue knobs and blue LED. Inside the case there is a feather touch footswitch from Love MY Switches. I have been transitioning to the 1/4w resistors and it is so much easier and cleaner, The enclosure is from Tayda and I drill my own holes with a ̶S̶t̶o̶m̶p̶b̶o̶x̶ Love my Switches template. The PedalPCB top jack plate does not line up with the ̶S̶t̶o̶m̶p̶b̶o̶x̶ Love my Switches drilling jig. I mark the bottom two and then for the DC jack layout I line that up without the jig.
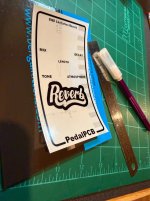
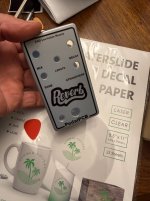
For the graphics I use a thermal ink label on clear media printed with my QL-1110NWB printer. I douse the enclosure and label with soap water and then position it. Works great and makes very professional looking labels.
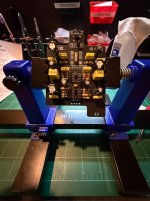
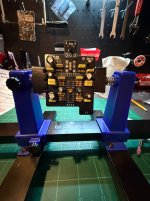
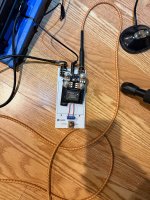
I suggest the PedalPCB Auditorium Platform before boxing. It saves so much time. I have four extras so if anyone wants one I can sell you all the parts and the board for $18 shipped. I bought five of them when I wans just purchasing like a wildman!
I took a little video for you to hear the different settings.
Previously I made the PedalPCB Sproing Reverb which only had one knob. That build came out great and I gave the pedal to a friend who plays. I built this one for a producer in Nashville.
Unlike the PedalPCB Sproing Reverb this one has four knobs and a switch. No worries because they all fit nicely into the footprint on the board.In fact the board layout is excellent and it has room on the sides for my pcb holder to grab without bending compenents near the edges. I took pictures along the way for the build report. I would say it is a pretty easy build but you will need the $15 IC3 BTDR-3H Accutronics/Belton Reverb Module, Other than that I again used the Lumberg jacks and anodized knobs. The PedalPCB top jack plate is super and really makes the build look professional. I think of reverb like water so I went with blue knobs and blue LED. Inside the case there is a feather touch footswitch from Love MY Switches. I have been transitioning to the 1/4w resistors and it is so much easier and cleaner, The enclosure is from Tayda and I drill my own holes with a ̶S̶t̶o̶m̶p̶b̶o̶x̶ Love my Switches template. The PedalPCB top jack plate does not line up with the ̶S̶t̶o̶m̶p̶b̶o̶x̶ Love my Switches drilling jig. I mark the bottom two and then for the DC jack layout I line that up without the jig.
For the graphics I use a thermal ink label on clear media printed with my QL-1110NWB printer. I douse the enclosure and label with soap water and then position it. Works great and makes very professional looking labels.
I suggest the PedalPCB Auditorium Platform before boxing. It saves so much time. I have four extras so if anyone wants one I can sell you all the parts and the board for $18 shipped. I bought five of them when I wans just purchasing like a wildman!
I took a little video for you to hear the different settings.
Attachments
-
 IMG_9518.jpeg412.6 KB · Views: 35
 -
 IMG_9519.jpeg249.9 KB · Views: 18
 -
 IMG_9520.jpeg554.4 KB · Views: 15
 -
 IMG_9521.jpeg403.6 KB · Views: 15
 -
 IMG_9522.jpeg343.8 KB · Views: 18
 -
 IMG_9523.jpeg445.2 KB · Views: 16
 -
 IMG_9524.jpeg386.4 KB · Views: 14
 -
 IMG_9525.jpeg399.5 KB · Views: 14
 -
 IMG_9526.jpeg427.2 KB · Views: 14
 -
 IMG_9527.jpeg235.7 KB · Views: 15
 -
 IMG_9525.jpeg399.5 KB · Views: 16
 -
 IMG_9526.jpeg427.2 KB · Views: 19
 -
 IMG_9527.jpeg235.7 KB · Views: 20
 -
 IMG_9528.jpeg434.7 KB · Views: 20
 -
 IMG_9529.jpeg301 KB · Views: 22
 -
 IMG_9530.jpeg337.1 KB · Views: 21
 -
 IMG_9532.jpeg291.4 KB · Views: 23
 -
 IMG_9533.jpeg417.8 KB · Views: 24
 -
 IMG_9540.jpeg713.7 KB · Views: 26
 -
 IMG_9541.jpeg407.7 KB · Views: 28
 -
 IMG_9542.jpeg391.9 KB · Views: 34
 -
 IMG_9543.jpeg308.5 KB · Views: 39
Last edited:
