Post Your Workbench Setup!

Well, the second drawer bin arrived and I got it set up with all my resistor values. Man, this is so much easier than the bags. I'm going to live with this for a while and work out the kinks so this summer I can make a better desk with a shelving unit and drawers underneath

zgG3Eas.jpeg
 
An embarrassing mess at the moment. Hopefully posting it here motivates me to clean it up.
View attachment 108887
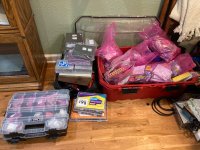
The main workbench is even messier now, because I finally cleaned off the auxiliary bench.
Moved the 3D printer over so there’s room for my laptop to go next to it when in use. Still haven’t used it at all, but I’m hoping to get it running soon. Also got a bench top drill press yesterday that’ll go on the other end, so I don’t have to constantly switch the configuration of the one in the garage from wood-speeds to metal-speeds (plus a crank-operated table height adjustment will be a nice change).
The back wall is currently an art gallery for newsprint proofs and stuff, but I’ll probably have to take some of it down so I can put French cleats up for printer and drill accessories
IMG_6684.jpeg
 
I like being able to see out the window into the front yard.
Straightened the bench top yesterday, and still have my bins of crap to my immediate left. Love this thing, husky branded adjustable height, with two rather reasonable sized drawers. They are shallow with respect to height, but quite wide and deep enough front to back
Need to straighten the components and work a system out.

Drill most enclosures out front, but have a IMG_1342.jpeg reasonable sized barn style shed out back with my drill press, airbrush setup,
 

Attachments

  • IMG_1344.jpeg
    IMG_1344.jpeg
    1,014 KB · Views: 3
Drill Press is assembled. Need to spend some time this weekend getting the pillar gear aligned and stuff. Probably also should:
  1. Bolt it down
  2. Build an extension table with:
    1. Replaceable MDF sacrificial center inserts
    2. T-track for hold-downs
    3. A fence
  3. Modify a Rubbermaid bin or something like that to act as a swarf collector that can slide under the table
IMG_6690.jpeg

Seems pretty decent so far, 12am, so I can’t really run it right now to test the runout, but it seems solid. The table crank seems *slightly* less sturdy than I’d like. The table itself is rock solid, but it has some wobble when cranking up and down, meaning it wouldn’t be ideal to use the crank as a way of getting more stroke depth than the 2” quill travel allows for. The 2” stroke is really the only downside I see, but upgrading to a 12” drill press with a deeper stroke and better table mechanism would be almost 3x the price I paid for this, and I think it would be a bit too big for this workspace. 2” of quill depth shouldn’t be an issue anyway for pedal stuff where everything is 1/8” thick at most— only thing I’d use this for where I need more depth than 2” is when I’m drilling pen blanks, but I can do that on the floor drill press in the garage anyway since now I’ll be able to keep that one permanently at the right speed for drilling hardwoods like that.
 
Drill Press is assembled. Need to spend some time this weekend getting the pillar gear aligned and stuff. Probably also should:
  1. Bolt it down
  2. Build an extension table with:
    1. Replaceable MDF sacrificial center inserts
    2. T-track for hold-downs
    3. A fence
  3. Modify a Rubbermaid bin or something like that to act as a swarf collector that can slide under the table
View attachment 110122

Seems pretty decent so far, 12am, so I can’t really run it right now to test the runout, but it seems solid. The table crank seems *slightly* less sturdy than I’d like. The table itself is rock solid, but it has some wobble when cranking up and down, meaning it wouldn’t be ideal to use the crank as a way of getting more stroke depth than the 2” quill travel allows for. The 2” stroke is really the only downside I see, but upgrading to a 12” drill press with a deeper stroke and better table mechanism would be almost 3x the price I paid for this, and I think it would be a bit too big for this workspace. 2” of quill depth shouldn’t be an issue anyway for pedal stuff where everything is 1/8” thick at most— only thing I’d use this for where I need more depth than 2” is when I’m drilling pen blanks, but I can do that on the floor drill press in the garage anyway since now I’ll be able to keep that one permanently at the right speed for drilling hardwoods like that.
You may want to keep the drill press away from the bench where you solder and assemble. The aluminum chips produced when drilling enclosures will go everywhere and they are sometimes difficult to get rid of. Don’t ask me how I know…
 
Back
Top