- Build Rating
- 5.00 star(s)
As I mentioned previously, my recent Aion Quartz build was mostly just to have a reference circuit handy for any necessary debugging of my own custom PCB spin of the Diamond Compressor. This build, my Carbon Squish is my first take on that circuit. Turns out I didn't need the debugging reference, as it worked on first power-up. However, it was nice to be able to take advantage of the various additional functions the Quartz offers (switchable EQ center frequency, high cut enable/disable, and EQ defeat). My intent is to make a simplified or "opinionated" Diamond Compressor, so that build definitely had value in helping to form my opinions.
No issues or self-sabotage (like my last build). The comments I made about the Diamond Compressor circuit in the Quartz build report still hold, so nothing to add on that front.
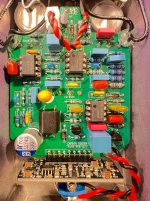
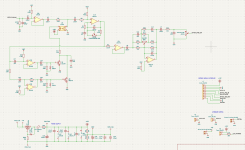
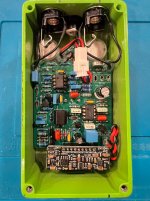
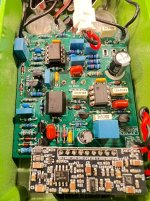
One thing I realized: this circuit has two internal buffers, that use two BJT transistors: one for the buffer, and one as a constant-current source. In some cases, the constant current source can lower distortion. It seems most people say this is overkill in a guitar effect circuit - but I appreciate overkill. However, according to Rod Elliott, just about any modern opamp makes for a better buffer than most discrete transistor circuits. So I already have a revision of the Carbon Squish queued up that replaces the discrete transistors with opamps. While it's cool that it theoretically improves noise performance, the main benefit is that it lowers part count and PCB space. My ultimate goal is to fit this in a 1590B or - if I'm feeling brave - maybe even a 1590A. So anything that reduces the circuit footprint is a step towards my goals.
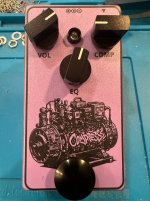
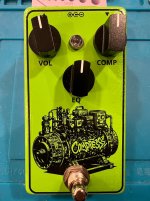
The enclosure is from Tayda, it's "lawn green" IIRC. I recycled the steampunk compressor clip art from my Median Compressor build (note: that's not my artwork, I found it on the web).
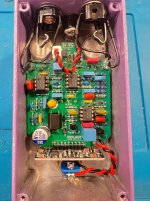
The attached mini-PCB at the bottom is my buffered electrical MCU-based quasi-IC bypass module.
Edit: see post #3 below for a build with an updated PCB.
No issues or self-sabotage (like my last build). The comments I made about the Diamond Compressor circuit in the Quartz build report still hold, so nothing to add on that front.
One thing I realized: this circuit has two internal buffers, that use two BJT transistors: one for the buffer, and one as a constant-current source. In some cases, the constant current source can lower distortion. It seems most people say this is overkill in a guitar effect circuit - but I appreciate overkill. However, according to Rod Elliott, just about any modern opamp makes for a better buffer than most discrete transistor circuits. So I already have a revision of the Carbon Squish queued up that replaces the discrete transistors with opamps. While it's cool that it theoretically improves noise performance, the main benefit is that it lowers part count and PCB space. My ultimate goal is to fit this in a 1590B or - if I'm feeling brave - maybe even a 1590A. So anything that reduces the circuit footprint is a step towards my goals.
The enclosure is from Tayda, it's "lawn green" IIRC. I recycled the steampunk compressor clip art from my Median Compressor build (note: that's not my artwork, I found it on the web).
The attached mini-PCB at the bottom is my buffered electrical MCU-based quasi-IC bypass module.
Edit: see post #3 below for a build with an updated PCB.
Attachments
Last edited: