SYLV9ST9R
Well-known member
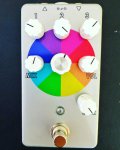
This is my take on the Arachnid platform, with the addition of the clock module.
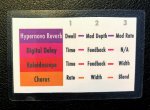
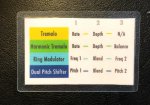
I loaded it pretty straight forward with Chorus; Tremolo; Harmonic Tremolo; Ring Modulator; and Dual Pitch Shifter, + some DLY/REV (Hypernova Reverb; Digital Delay; Kaleidoscope). I mainly wanted a multi-effects to give me some mod capabilities, as it was replacing a Zoom MS-50g on my main board, with the zoom going on a new mini-board I had to create with all the new pedals I built recently!
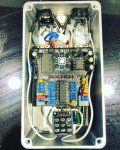
The build went smoothly, but boxing it gave me a bit of grief... For starters, I made the hole for the LED lens a bit too large and I had to hot glue it inside. Secondly, I just realized the rotary switch needed a bigger hole after applying the decal and clear coat, but I was able to enlarge it without damaging the decal too much, and the washer hides it well. With all this manipulation, I managed to sever some (solid) wires from the main pcb to the foot switch pcb. I should’ve used stranded, but finally, I went with leads cutouts.
I also scratched the decal at the top while applying it, but as it was my last sheet, I went with it as is.
I made this « cheat card » with these self sealing laminating pouches I had at hand (I used them with my sons to make homemade bookmarks).
I’m pretty happy with my selection, and having the clock module really makes it more flexible IMHO.
The only caveat si that now, I’m wanting to get a programmer and delve into SpinCAD for more crazy effects (or maybe just build the FV-1 dev board).


