Dali’s Custom Telecaster build

EGRENIER

Well-known member
Some of you may remember that Dali mandated me to build him a custom telecaster to his liking….

see this post to refresh your memory…

Guitar description

So I figured I would document our progress here.

First because this build will included a Sustaniac to allow Dali to keep a note on forever :D…. I had to route a pocket for the battery enclosure.

B942FB41-58BD-4708-B8C9-720E0D444072.jpeg
70EE9874-CE74-4E89-901F-2A2B2F453963.jpeg
73D709F4-E427-44F6-8710-C04CBDBDFFC5.jpeg

Next we needed a pocket in the back that would connect with the traditional telecaster component route in the front. This pocket needs to be big enough to fit the PCB and a 2 switches module to control the sustainiac.

9C39DA29-A266-4FDA-AF80-EEDFE563F84C.jpeg
26DFEF7F-B8DB-4537-9C38-3FE8F3090D95.jpeg A034DE99-7BDE-474D-88FF-672BFFDF0D23.jpeg

Of course that pocket requires a cover, no problem. A piece of single ply pickguard, patience a bit of fit and resize will do….

576D0412-4163-495C-BAFB-50862EA6DEDB.jpeg
Now for the sustainiac pickup. Fitting it in the neck route obviously didn’t work. The sustainiac is more shape like a strat pickup than a tele neck pickup. So let’s open up the route.

19463DA1-A738-4029-B58C-7D61DAD7E227.jpeg
2FA37966-04C0-4AEC-9421-329618CFD814.jpeg
F2DB85FA-E9AC-48B2-A307-D0257A639270.jpeg
Now that all the routing is done, I was just happy I didn’t screw it up…. ;)

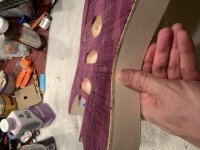
Next post… the colour….
 
Last edited:
For the colour Dali wanted Egplant, if you’re like me the first question that came to mind was WTF is eggplant…. So I had to ask, is eggplant violet ? Is it mauve ? What is it ? So using a picture of the body and after a bit of photoshop work, Dali sent me this as a guide…

4B329F4A-5591-4D8B-82DE-F4A4A29E48C8.png

I did a bit of testing (3) with a piece of scrap maple that I had and to figure out what was the best way to achieve this color. At the end it was to use a coat of eggplant dye covered by a coat of violet with a water wash to even out the dye.

D3D9F868-9DCD-4EEF-B497-544244FF5771.jpeg
I also wanted to keep some of the original wood color, a beautiful spalted maple, in the build. So I taped the edges and create a fake binding line.

4C23ACD8-AFE9-4144-BBB7-976E72D8436B.jpeg
Next for the back, wich is made of pine, I didn’t want to try to match the color. So I elected to only use the eggplant dye, this way with the fake binding, it is somewhat reminiscent of a mahogany body of a Gibson LP.

CAE46297-8138-4E63-AE53-B06637E2126A.jpeg

After keeping Dali in the loop, we were both happy with the end result.

AC340394-5752-495B-B2D6-274077BE5DAE.jpeg CF1EB091-B975-469C-8C81-06D7E4D84A2D.jpeg

Next step is the clear… more to come !!!!
 

Attachments

  • C0B189C9-CCC2-473B-A153-4408E3185588.jpeg
    C0B189C9-CCC2-473B-A153-4408E3185588.jpeg
    101.5 KB · Views: 8
Shore iz a trick 'caster, Pa!

I wish my Tele-top's finish was that good (you may have seen it in 'nother thread). Nearly the same colour, but mine's all blotchy. 😿
 
Shore iz a trick 'caster, Pa!

I wish my Tele-top's finish was that good (you may have seen it in 'nother thread). Nearly the same colour, but mine's all blotchy. 😿
I don’t recall seeing it… do You have a link ?

believe it or not this was dyed with Rit Dye…. It’s water based and yes can get blotchy as well. What I found is that once you have applied the dye, you finnish It with a soaked rag with water to even it out. It also clears it a bit. Also depending on the wood you use, some grain soak in the dye like crazy and give a much darker tone. In the case of the Patrickaster, being spalter maple, this is what make all those different tone between the eggplant and Violet.
Here in the "Guitar Projects?" thread: https://forum.pedalpcb.com/threads/guitar-projects.6528/post-54814

Mine came to me already "finished". To fix the blotch, I'll have to strip the clear-coat.
 
Part 2 of the build:

Spent a lot of time spraying the water base polyurethane and letting dry between coats until I felt I had enough for level sanding and buffing.

0A6EB057-8798-4C89-B1CD-8A9F6E0F682F.jpeg

Then it was a sequence of 800-1200-2000 wet sanding ….

92B05A58-5F78-4973-8031-FEB885E35F29.jpeg
Once I felt I had nice and level…. Git the buffer out and Meguiar’s Ultimate compound.

86E3BCE8-3D40-4B10-90CD-00504328BB6D.jpeg
I was quite happy with the result. One small regret is that I should have used an epoxy levelling for the spalted side. Spalted is quite uneven and even with pre-sanding and loads of coats or polyurethan, there were still grooves too deep to perfectly level. Still I’m happy with the result, the texture on the front is what I now call character :D

FEC4D835-3097-47F3-978E-54DC8B7432DB.jpeg
Back side turned out great…

62001B76-2B5B-42C1-88D2-705209CD2A5E.jpeg
next, let’s fix the neck on…

A435C40E-F5AC-4526-B87E-366A3FBA4F27.jpeg

Install the lock tuners….

DC8D3CEB-0F7D-4E35-AEA6-A51E3C97E816.jpeg

When time came to put in the pickguard and pickups, there was a few challenges. First the sustaniac pickup does not fit the standard neck slot in a vintage pickguard. So I had to enlarge the slot and also drill holes as it needs to be mounted on the pick guard. Also, Dali requested a duckbucker as mid pickup. Sort of a Nashville set up, so I also had to cut a slot in the pickguard for the mid, which is also mounted on the pickguard. On the next picture, I had not drilled the sustaniac screw holes yet, but I got it right. You’ll see…

2B61407D-1D3D-4D0B-869B-58A6CD67CC5D.jpeg

For my next trick, I had to drill 2 holes for the Sustaniac AUX-TT switch. This switch include a board and 2 different switches, on-off and on-off-on. Drilling 2 holes in the body with a perfect match is somewhat stressful. I prepare a paper template to make sure I would be at the exact distance, and yet, my heart was pounding as I put the drill bit to the body.


17CB32F1-EDE4-4330-BE63-B5CF29AA0883.jpeg

More on my next Post !!!
 
So how did the holes worked ? Perfect IMHO….

5CF753AD-52EF-488B-B735-9938BADAEA8C.jpeg
The circuit board of the AUX-TT switch fit perfectly flush with the cover groove. You may also noticed that the battery enclosure is already installed.

6C1B5C1A-42CD-4B80-A508-B17788333A16.jpeg
I had just enough thread to screw the nut and the guide washers. —Phew !


Then the time to fix the bridge and the Lil’ 59 humbucker came up. That was much easier then the sustaniac and duckbucker…
Landed perfectly on 25.5, that was a relief !

88112B49-C4C1-4044-BFAB-04ABE0B4D15E.jpeg

4 holes drilled to secure the bridge and that was a wrap !

B472C344-9A9C-4C38-9E59-582C31F73F24.jpeg

Drill more holes for the backplate and the battery enclosure. A few screws and that’s dealt with….

AD0882D7-390B-4F1E-A574-E339DED1FBAE.jpeg

For those with a keen eye, you may have noticed that the string ferrules are not in. Turns out I had ordered the wrong one. I put an order in, but they will have to wait.

Also, the pickguard is now screwed in, these were the last holes I had to drill, or were they ?

Next steps will be the wiring, for those of you who wonder, installing a sustainiac is not simple. You can see below the recommended wiring, but as Dali want to be able to split the 2 Humbuckers with push-push knobs, it will be a bit more complicated.

4C6A84A8-0F1D-4EF8-8EAC-649480E79FFD.jpg
Wish me luck !!!
 
When you're done please post a 10-minute long track of playing a single note.
I will be very tempted to do that!

But I currently can anyway since I got 2 Sustainers guitars. One bought by @EGRENIER in 2000 for his sister (my wife at that moment) so she could give it to me for Christmas. :)

The very same guitar borrowed by Adrian on this pict:
1624805433439.png

That day I got a slapt in my face and was never able to blame my guitar for my lack of talent anymore... :rolleyes:
 
Back
Top