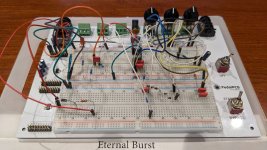
Working to increase my collection of soft clippers I'm doing a build on this one. I like the design - a TS without buffers and some tweaks to the filtering and clipping. Not sure why the original TS needed transistor buffers anyway, given that the input impedance of an op amp stage is huge. Anyway, I breadboarded it with the PedalPcb prototyping board to see what it sounded like:

...and was frustrated for a few days as I couldn't figure out why it had no gain. On about the the third attempt at checking the circuit I noticed that the negative feedback loop to the first op amp stage was connected wrong way around. Swapped two wires and wow - that was better.
I've now spent a few hours swapping caps and resistors to see what matter and what doesn't. Verdict: the cap in the tone control and cap in path to ground off the negative feedback loop in first stage both make a big difference. The tiny resistors don't seem to matter. I used a 20kB pot for tone like original TS vs 5kB for the E and it sounds great. Drive pot 250k seems to be overkill, 100k would work for a lot of players I think. I didn't try an A pot instead of the B specified but that might work even better. I also don't think volume pot size shouldn't matter at all as its a voltage divider. So there is a lot of flex if you don't have exact values.
I'll wait for my next mouser order to arrive and build it next week.


