Mountain Oyster (Chuck D. Bones Designed circuit)

steviejr92

Authorized Vendor
Build Rating
5.00 star(s)
Man what an awesome boost! First off thanks too @fig, @Chuck D. Bones and @cooder for making this happen! When i tell you this is my favorite pedal ive built.....I mean it! I have been anticipating building this and im not disappointed! This boost i can imagine is going to be a favorite around here it literally just makes EVERYTHING sound better. Im having so much fun with the dirty boost side with the ge transistor doing the clipping. I have to agree with @MichaelW this this has enough boost to get you into beautiful sweet overdrive! I figured id keep this build report short @MichaelW already told you guys the specifics. The only thing with mine is i jumpered socket pin 1 to pin 2. Jumpered socket pin 3 to pin 8. As were @Chuck D. Bones instructions. This basically just permanently leaves the pedal on. Im just waiting on my PIC chips to come in and i will be removing those pins and putting the the chip to have the stomp switch working properly again. This also means no chip no LED so dont get discouraged if you plug it up and no LED turns on.


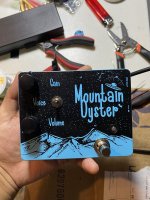
Oh and the reason the 3 scrws are sticking up Tayda didnt tap the screw holes all the way down! :rolleyes: what a way to bring a guy down! So im going to but some taps and tap the rest of the way down for the 3 holes.
And that back "Y" on the "oyster" is driving me crazy it didnt stick for whatever reason but hey at least the front came out alright!

UPDATE: I forgot to mention I used a 3108 ge transistor with an hFE of 125 and .03ua of leakage. Chuck designed this so you can use any ge tranny with it!


IMG-0964.jpg

unnamed (3).jpg

IMG-0962.jpg
 

Attachments

  • IMG-0961.jpg
    IMG-0961.jpg
    296.4 KB · Views: 9
Last edited:
What a great looking pedal- awesome build!

That poor steer though..
Thanks man...what a shame on the back though idk why the "Y" didnt stick and Tayda needs to step up their tapping skills! I cant believe my screws wont screw in i took a flashlight nope not tapped all the way down only 1 of 4 screw all the way in! Check your enclosure before you commit only to find out you back plate doesnt screw on all the way!
 
  • Like
Reactions: fig
Very cool! I agree, this is a fantasitc circuit. I'm digging the art work too.
An incredible one for sure. I just checked out your build report and man I love it! Forgive me for not seeing it before it’s beautiful! I think the color blue really compliments this pedal haha
 
An incredible one for sure. I just checked out your build report and man I love it! Forgive me for not seeing it before it’s beautiful! I think the color blue really compliments this pedal haha
No Worries, I did this one first so my one working chip was in there. My Cowpoker I did second and just randomly discovered the jumping of pins 1&2 caused the Relay to flip, so I too have an always on pedal. Then I was talking to Micheal and he said you had the same issue and he did too. I didn't know about the pin 3-8 but havn't tried it in the poker yet because pin 1&2 did the trick. What a cool set of pedals. @fig rules.
 
No Worries, I did this one first so my one working chip was in there. My Cowpoker I did second and just randomly discovered the jumping of pins 1&2 caused the Relay to flip, so I too have an always on pedal. Then I was talking to Micheal and he said you had the same issue and he did too. I didn't know about the pin 3-8 but havn't tried it in the poker yet because pin 1&2 did the trick. What a cool set of pedals. @fig rules.
Dude @fig is amazing to send these out on his own will! Huge thanks to him! And yeah Chuck sent me instructions on how to go about keeping it on for now until I get my chips in. Tbh it doesn’t bother me much cause this circuits so awesome! 🤙
 
Last edited:
That artwork came out real nice. I had some adhesion issues last time I did a no film too
Yeah idk what happened it never happened before when I was doing bare enclosures. My guess is the clear coat they use, it seems so make the decal harder to stick too. Also it’s much easier to rub off the decal on a colored enclosure than it is on a bare. I know this because I use dotted lines as my border for a frame of reference when applying. Then use isp and a q-tip to rub it off after the first heat treatment. Definitely being more careful next time!
 
I started being more deliberate with how I prep and handle the enclosure before applying the decals. The face gets wiped down with 91% iso, and then scrubbed with dish soap and hot water, wipe it down with a clean cloth and let it dry. The last one I did was a 1590DD and huge decals are a pain
 
I started being more deliberate with how I prep and handle the enclosure before applying the decals. The face gets wiped down with 91% iso, and then scrubbed with dish soap and hot water, wipe it down with a clean cloth and let it dry. The last one I did was a 1590DD and huge decals are a pain
This is great to know! Just bookmarked this! So I literally just clean with 91% isp and thought that was good enough but this is much better prep. I can already tell cleaning with dish soap is going to allow the decal to stick better. Thanks for the info man!
 
Back
Top