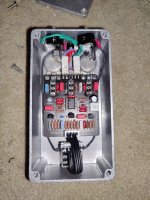
Gut shot:

I haven't quite hit my stride with my wiring yet, I'm thinking I'm going to start using bare buss wire between the footswitch and the PCB. I like the way it turns out on other builds I've seen posted here.
I'm also starting to experiment with a combination of solid and stranded wire...we'll see how that all turns out here.
I was able to jam a 1uF PPS cap on the output...schweet. others are mostly Polypro, with a C0G thrown in there and mylar in filtering roles.
PRP PR series resistors and vishay RN55'S AND CMF55's...I think that second series beer is correct.
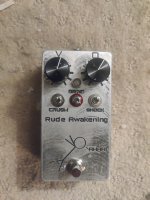
Enclosure...took three passes on my CNC. first pass got progressively deeper on the y axis, so by the time it got to the footswitch it completely faded away. So it took a couple of passes on my mini mill with a fly cutter...the top half of the knobs were still there after I shaved away about .1mm...So I ran the program again, except from the bottom half of the knobs down.
Welll....that came out well, but the damned thing flexed into the N while it was engraving the I in "grind", so that it read "Grnd". Yeesh.
Given the distressed aesthetic, though, I figured that I could run the I through again, knowing that the I wouldn't line up perfectly...cause hell, it's not supposed to be perfect.
So I did. Coat of black dupli-color engine enamel, 400 grit sandpaper, Viola!
I should really take another photo without it being covered in UHMWPE dust...


