Tommy III W/ Wooden Storage Box

I decided to build two of my best friends pedals for Christmas. Neither of them are huge pedal guys, but figured they needed at least a nice overdrive in their lives.

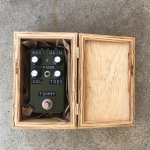
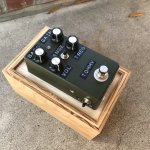
I ended up going for the Tommy III for both of them and both of their favorite colors are forest green, so I took influence from old military radios and went with that– this is the first of the two.

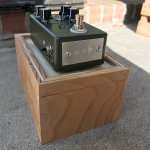
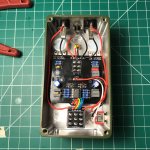
I used the matte army green enclosure from Tayda and boss style knobs and an orange led with one of the led lamp lenses. The only modification I did was to mount the Clipping switch on the side of the enclosure rather than inside of the pedal on the pcb. To finish it off I made these aluminum tags that I stamped their initials into and then riveted to the heel of the pedal. I did drill a wrong hole on the side of the pedal where I thought I would put the clip switch, but it ended up being too high– I guess it just adds to the aesthetic? Ha!

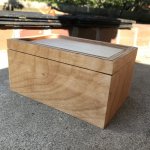
The boxes are made of birch plywood and finished with Teak oil.

IMG_1160.jpg IMG_1163.jpg IMG_1164.jpg IMG_1161.jpg
 
Absolutely gorgeous pedal and box. The black and silver boss knobs work perfectly with the black and silver label maker labels.

May I ask about the aluminum tags? Do you have a link to those tags or a description? Also, did you stamp that with common metal stamps and a hammer, or by some other means? Thanks!
Thanks! I actually made them myself out of a piece of thin aluminum sheet metal that I picked up from Home Depot. I scored them into 1 inch strips and then I bent them between two pieces of plywood that I put in my vice until they snapped off. After I bent them I was left with 1"x6" strips of which I then repeated the same process lengthwise until I was left with 1"x2" plates. The edges of the plates are very straight and just need a bit of sanding/filing to smooth them out. For the stamping, I did what you mentioned and used a 3/8" set from harbor freight and a hammer. Using graph paper as a guide I was able to drill evenly spaced mounting holes.
 
That looks amazing! I wonder if you could use that hole to rivet a "serial number" to? If not I think it's ok - if they're a christmas present they can be holy.
 
Thanks! I actually made them myself out of a piece of thin aluminum sheet metal that I picked up from Home Depot. I scored them into 1 inch strips and then I bent them between two pieces of plywood that I put in my vice until they snapped off. After I bent them I was left with 1"x6" strips of which I then repeated the same process lengthwise until I was left with 1"x2" plates. The edges of the plates are very straight and just need a bit of sanding/filing to smooth them out. For the stamping, I did what you mentioned and used a 3/8" set from harbor freight and a hammer. Using graph paper as a guide I was able to drill evenly spaced mounting holes.
Stellar job man. Your friends are going to be stoked.
 
That looks amazing! I wonder if you could use that hole to rivet a "serial number" to? If not I think it's ok - if they're a christmas present they can be holy.
haha! now that's funny! That's a great idea– putting another tag with the serial number, but I think I'll just pop a led lens in there just for the sake of keeping the two pedals somewhat identical.
Just pop a LED lens in that hole
I think I am going to do that. Thanks for the idea!
 
Back
Top Bottom