EisengesisFX
Well-known member
My dude, is there any way you'd be willing to send Gerbers to a US PPCBer to print up and sell some of these on this side of the pond without us paying out the ass for tariffs?
My dude, is there any way you'd be willing to send Gerbers to a US PPCBer to print up and sell some of these on this side of the pond without us paying out the ass for tariffs?
I'm sure there is, still working on a few things, but it's on the to-do!My dude, is there any way you'd be willing to send Gerbers to a US PPCBer to print up and sell some of these on this side of the pond without us paying out the ass for tariffs?

I wouldn't have thought that it would make enough kerrrrrrrrrrraaaaang for you......I found a univibe lamp in an old lab I was pillaging. So of course I spend tons of $ to build a pedal around a 99¢ part. I don't think I've ever made a univibe before.

I have to say, other than the very satisfying layout and building process, I’m underwhelmed by its weak, lopsided phasing. I like how rubbery the vibe setting is though. It’s like a fretless simulator.I wouldn't have thought that it would make enough kerrrrrrrrrrraaaaang for you......
Well one could make the argument that a "weak lopsided phaser" is exactly what a vibe is hahahaha. Honestly though, I have yet to be able to integrate any of the vibes I've built (4 and counting) into actually make MUSIC. I mean, after about 5 minutes of playing the only Robin Trower lick I know, I'm kinda done and back on the shelf it goes......I have to say, other than the very satisfying layout and building process, I’m underwhelmed by its weak, lopsided phasing. I like how rubbery the vibe setting is though. It’s like a fretless simulator.

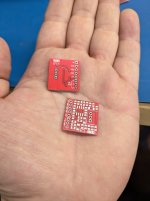
View attachment 114900
Staining on the bench. It’s black dye on pores and blueberryjuice with isopropyl for purple. Thinking about adding some deep yellow with curcumin. Maybe?


 O
O
View attachment 114909
Still drying to be sanded before pore filling with oil sanding, but more colours! Bare sides went through turmeric treatment and also added it on top and back. Also more blueberry juice went in.
Maybe sides will get some black? Gonna do pore filling with hempseed oil to get slight green tint there.


Levely as always.White Russian with Civil War inspired artwork
being a Deadhead, especially an appreciator of Bobby.. yeah!!!!First of two ready to be boxed, just waiting on the customer to get back to me with his custom enclosure
View attachment 114915
Things amazing, though- so many sounds and the interactivity with other circuits pre and post is awesome. Of course, I'll just be setting mine for maximum clangg
Levely as always.
Is that one of Maggie's boxes?


It probably wont be as quiet once it's populated!New creation almost nobody will buy... Just a 1 or 2-band (configurable) onboard EQ. Claim to fame: probably the quietest around (least hiss). Otherwise just another Baxandall.