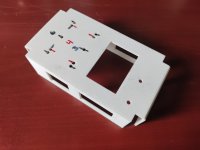
Enclosure Drilling

I recently got that drill press from harbor freight and it is awesome. Definitely a huge improvement from my handheld drill.
Which one did you get? I saw that they replaced the central machinery line of benchtop drill presses with Bauer machines that look pretty nice for the price. Thinking of grabbing one in the future to keep on the workbench so I don’t have to futz around with the belts on the big old Rockwell that I use for woodworking stuff.
 
Which one did you get? I saw that they replaced the central machinery line of benchtop drill presses with Bauer machines that look pretty nice for the price. Thinking of grabbing one in the future to keep on the workbench so I don’t have to futz around with the belts on the big old Rockwell that I use for woodworking stuff.
Yea that's the one I got, just the 8 inch 5 speed one. It's rad, compact enough to keep in my office when I'm not using it and then I can take it out to my workspace outside when doing the drilling.
 
First I hammer a nail in the right spots (marked with pen on masking tape). Then I drill the hole with the smallest drill I got that doesn't break too easily (1,5mm), and check alignment. Then I grab the actual hand drill bit, but always 0,5mm too small. I then use along elongated cone file to fix those miniscule mistakes up/down/left/right, whatever way the drill would slightly slip. Not slick without the nuts, but beats buying a press drill (I have limited space).
 
Last edited:
I picked up a used drill press for next to nothing years ago, when I really didn't have the space for it, but am so glad I've kept it alive.

These days I eyeball the markings (unless it's a complex pedal or something I can easily use one of the PedalPCB guides for), use a center punch then a stepped drill bit, checking and adjusting as I go.

Amazing how often I still screw up by rushing though

When I eventually leave this dorm-y home, the drill press is my first hardware purchase. Screw the dryer and other convenient household items!
 
I use pre-drilled whenever possible. But when I have to do all drilling or partial, I use the paper template to see which holes to use my Keech Designs 3d printed template which I use to mark holes with a center punch.
I then go on the drill press and use a small center drill to do pilot holes where I punched. Finally I drill to size with a Christmas tree bit.
I did spring for the upgraded Harbor Freight drill press which has a CV speed control, so I can reduce speed on the fly as progress to the larger sizes on the Christmas tree bit.
And use kerosene, WD40 (which is kero based) or aluminum cutting fluid as aluminum LOVES to gall up bits otherwise!
WD40 is usually my go-to for machining aluminum, but on enclosures I use rubbing alcohol since I letter and clear coat after drilling, and I don't want to deal with residue. It's not 100% as good as WD40, but with the zero clean-up I think it's a good trade off.
 
WD40 is usually my go-to for machining aluminum, but on enclosures I use rubbing alcohol since I letter and clear coat after drilling, and I don't want to deal with residue. It's not 100% as good as WD40, but with the zero clean-up I think it's a good trade off.
Wonder if a mild dish soap would provide the same benefits? That would also wash off w/o residue.

That said for enclosures I need to paint, I always clean with acetone first, so I rarely have to worry about cutting oil residue, but if I can avoid it in the first place I’m willing to try the alcohol or maybe soap


I've only ever used water with a bit of dish soap in it, it's fine.
 
Huh 🤔
I’ve used cutting oil at work, when I had to
drill thick steel (some old-timer would always pipe in and say you should use mustard or something dumb like that).

But it never occurred to me to bother with it for aluminum. Seems like I’m always through it before much heat has time to build up… 🤷‍♀️
 
Since I got my drill press drilling enclosures is easy. As I have mentioned before I use a short straight piece of timber as a fence, so the I only have one direction to get the hole wrong in.

Say you have an enclosure you want to drill for a four-knob circuit. Two at the top, two an inch lower, as is common with many PCBs. I put some masking tape on the enclosure where I want to drill the holes and mark them using a rule and a set square. I'll mark the distances with the rule and use the set square to draw a line. I use the lid of the enclosure, hold it against the side of the enclosure and press the set square against it. Across the enclosure I draw a line 15mm from the top edge and then 40.5mm. Then down the enclosure I draw lines for the horizontal alignment of the pots - often 33mm apart. So if the 1590b enclosure is 59mm wide I drawn the first line 13mm fro the left edge and 13mm from the right edge. I check that the space between them is 33mm. The holes I drill with my step bit are just a hair wider than the 6mm shaft width, so I have a little wiggle room.

Then I set up the drill press with my "fence". I set it so that the top edge of the enclosure pushes up against the fence and clamp the fence so that the drill will hit the line I drew at 40.5mm from the top. Drill the two holes where the vertical lines intersect with the horizontal lines and then your lower two pot holes are drilled. Then I have a 25.4mm wide length of timber which I hold against the fence as a spacer, use it as the fence and drill the top row of holes. I don't need to move the fence at all. It's quick and efficient and as accurate as I'll ever need. I'l flip the enclosure around to drill the hole for the stomp switch at the halfway point along a line 15mm from the bottom. The fence and spacer are already in the right place.

Then I do a similar process for the top side of the enclosure for the sockets.

Thanks for reposting your fence method, I've read it elsewhere on the forum and
I've taken your advice and been trying to work a fence into my equation.
 
Back
Top