Help With Abyss

FRS

New member
Hello. I’m really new to pedal building and electronics and need some help with an Abyss pedal. I have successfully built a Cujo fuzz and decided to try the Abyss.

Symptoms are the D2 will not light up. I have sound when bypassed. When switched on, D1 lights up. At first, I thought there was no sound whatsoever, but if I turn the Level pot all the way up, I almost get to unity volume. My initial thought was that I installed D2 incorrectly, as it was not flashing. Although I was very careful to measure all resistors before installing, I did not check the polarity of D2 before installing. I plead Inexperience. I removed the pot covering access to the D2, changed the orientation of D2 and resoldered. Same results. D1 lights up, D2 does not, full Level pot gets me almost to unity. Is D2 just bad? How can I troubleshoot? Is there such a thing as a wrong value for D2?

I’m really tempted to just populate another Abyss pcb rather than deal with desoldering the Throb pot again.

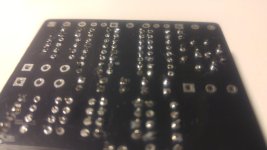
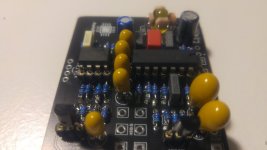
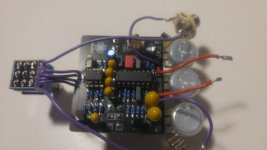
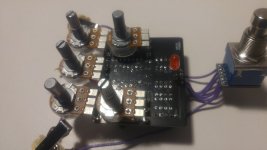
I’ve attached pictures from where I populate the pcb before adding wiring and pots, as well as other pictures after I pulled the pcb from the enclosure. I was very careful to only use minimum solder, so with the wrong angle, some joints may look cold, but if you rotate the board in the light, they really are shiny. I don’t think a cold joint is the issue—I don’t think I would get continuous sound if the joints were bad. I could be absolutely wrong though.

Again, I’m new at this, and I would appreciate any help or suggestions.

Thanks,

Frank Abyss01_frs.jpg Abyss02_frs.jpg Abyss03_frs.jpg Abyss04_frs.jpg
 
Welcome to the joyous world of troubleshooting!

Here’s where I’d start. Close visual inspection after taking a break: are all values correct? Are all components oriented properly? Using Mpsa18 and sure of the pin out?

Dual gang pots are notorious for being sneaky sources of grounding shenanigans. How well insulated is that rate pot?
 
I echo the welcome...

We are here to help. This is absolutely the best pedal PCB troubleshooting community anywhere.

Take zero offense to the following.

What the heck is "being very careful to only use minimum solder???" never heard that one before... I put on PLENTY of solder with a good two seconds of heat and make sure the solder flows.. it's a zen thing. minimum solder is not a goal that I've ever heard of.

The second most common recommendation in pedal troubleshooting is "reflow the solder connections" eventually you will get so annoyed by the suggestion that you just take the time to do it perfect. (I botched dozens of pcbs before learning this.)

Take a deep breath, clean you camera lens. seriously, (it's kinda blurring your images), and post nice clear, in focus pictures of your board as it is right now. take pictures perpendicular to the board rather than oblique, nice and well lit. Think "if someone posted this for me to check out, would it be giving me the information I need to help?"

Worry about the LED's last. that is the least of your issues.

OK, so where does that leave us?


  1. ensure all of your components are correct
  2. check every damn solder joint - reflow with PLENTY of solder
    1. 99.999% of issues with pedals are a bad solder joint
  3. Do those two and then I'll tell you with number 3 is.
 
Welcome to the joyous world of troubleshooting!

Here’s where I’d start. Close visual inspection after taking a break: are all values correct? Are all components oriented properly? Using Mpsa18 and sure of the pin out?

Dual gang pots are notorious for being sneaky sources of grounding shenanigans. How well insulated is that rate pot?
Thank you; appreciate the things to check.
 
I echo the welcome...

We are here to help. This is absolutely the best pedal PCB troubleshooting community anywhere.

Take zero offense to the following.

What the heck is "being very careful to only use minimum solder???" never heard that one before... I put on PLENTY of solder with a good two seconds of heat and make sure the solder flows.. it's a zen thing. minimum solder is not a goal that I've ever heard of.

The second most common recommendation in pedal troubleshooting is "reflow the solder connections" eventually you will get so annoyed by the suggestion that you just take the time to do it perfect. (I botched dozens of pcbs before learning this.)

Take a deep breath, clean you camera lens. seriously, (it's kinda blurring your images), and post nice clear, in focus pictures of your board as it is right now. take pictures perpendicular to the board rather than oblique, nice and well lit. Think "if someone posted this for me to check out, would it be giving me the information I need to help?"

Worry about the LED's last. that is the least of your issues.

OK, so where does that leave us?


  1. ensure all of your components are correct
  2. check every damn solder joint - reflow with PLENTY of solder
    1. 99.999% of issues with pedals are a bad solder joint
  3. Do those two and then I'll tell you with number 3 is.
Thank you; appreciate the education.
 
Welcome to the joyous world of troubleshooting!

Here’s where I’d start. Close visual inspection after taking a break: are all values correct? Are all components oriented properly? Using Mpsa18 and sure of the pin out?

Dual gang pots are notorious for being sneaky sources of grounding shenanigans. How well insulated is that rate pot?
I checked the pots, and the dual gang pot looks bad. One half of the pot only went up to 66K when it should go up to 100K; had no movement on the other at all; just stayed at 66K no matter which two lugs were tested. An uninstalled spare tested good. I think it's safe to say I need to install a new pot. Still more checking to do though. Thanks again.
 
Also, when testing the circuit, I'm pretty sure you have to make sure the photoresistors are in darkness or you are having them at max resistance. If the LED surrounded by the photoresistors is not lighting up, I think it just won't modulate. But that is a pretty easy diagnosis and fix. Look at an unclipped LED and notice if the pointy wedge inside the LED is associated with the longer lead (A, or Anode) or the shorter lead (K or Cathode), and then check to see if it's installed in the proper orientation. I honestly can't remember right now.
 
Back
Top