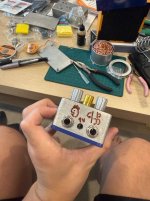
Misdrilled the holes...

bokchoi1124

New member
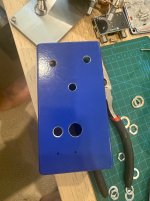
Hi all. Misdrilled the holes on my pedal and wondering if there's a solution(?) to fixing it. Can I cover it up with something? And if I do will it cause problems with static coming through or anything? I don't care about it being visually pretty haha. I'd call it a battle scar and move on but wondering if anyone had any advice. The 2 bottom holes r the ones I needta move. I used the template but realized i shouldve drilled using the lower template holes to fit this build🤣
 

Attachments

  • IMG_7311.jpeg
    IMG_7311.jpeg
    782.3 KB · Views: 16
JB weld or epoxy (or anything similar) with masking tape covering the hole on one side, scrape away the excess, then sand it smooth

I reuse a lot of the same enclosures, I got one thats like 50% jb weld😭
 
JB weld or epoxy (or anything similar) with masking tape covering the hole on one side, scrape away the excess, then sand it smooth

I reuse a lot of the same enclosures, I got one thats like 50% jb weld😭
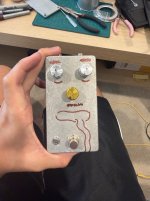
HAHA yeah this is my 2nd pedal project but my first one i went through so many different hole situations🤣 for this one i actually was too impatient to get an answer so i just used a new enclosure i had and drilled it properly🤣
 

Attachments

  • IMG_7314.jpeg
    IMG_7314.jpeg
    754.5 KB · Views: 23
Really clean! imo bare enclosure looks better with those knobs and bezel! Whats the circuit?
Either way its always handy to have a spare three knob case around
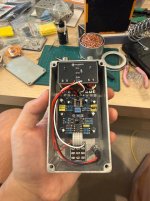
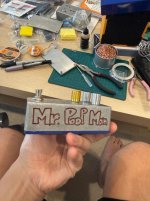
It's the solodallas replica! I actually made the exact same pedal for my first project but theres so many issues with it from melted components (was my first time soldering) to it only working if i hit it really hard HAHA. So this is take 2 and im still waiting on 1 part to come in the mail but just need to place that one in (one of those 8 legged amp parts and i already soldered in the legs to just place it in)
 

Attachments

  • IMG_7312.jpeg
    IMG_7312.jpeg
    796 KB · Views: 17
  • IMG_7318.jpeg
    IMG_7318.jpeg
    757.4 KB · Views: 17
  • IMG_7319.jpeg
    IMG_7319.jpeg
    718.4 KB · Views: 17
One option is to use a faceplate - it depends on what kind of tools and materials you have access to.
Personally I do this by ordering PCBs with holes cutout and silkscreened labels.
But other people do it with thin acrylic or thin wood using woodburning or lasercutting.
I suppose it's probably even 3d printable.

I get enclosures pre-drilled by Tayda and just have a crapload of holes drilled in all of the
possible positions, and then just use a faceplate which covers up the holes I "didn't use".
PedalPCB boards are almost always in one of two standard layouts - either the (usually)
less-than-5 "close" controls which are ~16.5mm from center, or 5-or-more "far" controls
which are ~20.5mm from center. (And 25.4mm vertical rows).

example: https://photos.app.goo.gl/o4bxoxDRCbELx47SA
 
JB weld or epoxy (or anything similar) with masking tape covering the hole on one side, scrape away the excess, then sand it smooth

I reuse a lot of the same enclosures, I got one thats like 50% jb weld😭
This is exactly what I do. I tape the outside and fill on the inside. It’s very tough to completely hide the hole outlines but it works. Make sure you do the mix ratio correctly. When I reuse one I flip it over to avoid drilling near the original holes. If the epoxy mix is not hard enough the filler will pop out.
 
One option would be to redrill the holes then use a laser printer vinyl sticker the size of the entire pedal face as a graphic to cover the mis-drilled holes. Just seal in the ink with a thin coat of matte clear spray paint.
 
Back
Top