Soldering Belton Brick

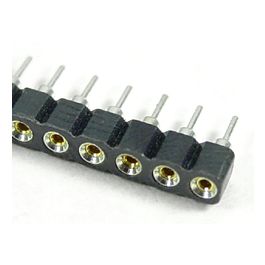
I'm about to solder my first Belton Brick in place on the Gravitation Reverb. I've seen the term "leaf socket" mentioned but not really sure what that socket is. Definitely sure that I don't have one on hand. Would prefer to solder straight to the board but want some feedback from some more knowledgeable builders on this. And if it is best to socket the brick could someone send me a link to purchase it? Thx
 
Here's how I did it:

 
Here's how I did it:

Ok, thanks for the links. I'll get on it.
 
Here's how I did it:

I just looked through my bag of sockets and realized I have a couple of those 14 sockets. What did you use to cut those down to size? Maybe a hacksaw blade?
 
Could use a saw, but the saw I suggest is also a choice of what else ya want tot cut with it. I have a jewelers saw(how usually advertised) that I use for cutting the female side of header strips and a razor saw from my other hobby of model making. Either 1 should make short work of ripping a leaf socket to size.
 
Hmmm interesting, I didn't know that you couldn't just solder them directly. That's what I did. The brick itself seems well insulated and not subject to heat damage very easily.
Nothing says that you can't solder it directly and most people do. But if you end up needing to troubleshoot a problem then you have to bend it out of the way and the pins are a little thin, so I opted for the better safe than sorry approach.
 
Here's how I did it:

I have a question about using a socket... does elevating the reverb module a little higher, because of the socket, affect the mounting of the pots, switch, jacks, etc?
 
I just solder directly. One pin at a time, dwell a couple seconds at most, give each one a few seconds to cool before doing the next one. Worked ok for me! YMMV, as the kids say. Fortunately I haven’t had to desolder one.
 
I have soldered them directly, and then had a diode get smoked. The brick was on top of the diode. Oh that was fun.... NOT.

That's why I bought this, you just snap off however many you need:

Those sockets’ ID are too small for the belton brick pins. Leaf sockets are specified because they can accommodate the larger pin size.
 
I took "leaf" sockets and cut in half using a box cutter. Carefully and round and round since one cut got a bit too eager.
I made two pieces of 3 and one of 4 since I have been able to desolder 4 pins. But 7 might have been a challenge.
I then filed them down on the top a little bit so there would be minimum plastic edge sticking up (only the side facing the brick). Then the same on the side that would face the belton brick. I began with a file I use for filing pots after cutting off the little pin-holder I rarely use anyway.
But I found that emery cloth (?) was most effective. This to avoid having to bend the Belton pins too much.
I then cut the Belton pins carefully and in several steps after measuring approximate distance using old resistor cut off pins.
I also confess that I filed a bit on the solderpoints on the board to bring them down, but this is probably quite orthodox since fine metal filings appeared everywhere. Some clean up with alcohol made it better I think.
With it in place but not soldered yet, I placed all in the box and soldered the pots and SPDT in. Not much of their pins sticking up, but enough.
The Belton seems isolated enough without any tape to protect it.
Works well.
 
Back
Top