Depattern
Active member
People who use transfer paper with laser printers: Please help!
I cannot figure out what i'm doing wrong here.
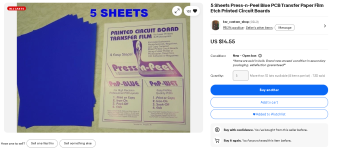
first of all, im using blue press n peel paper from ebay:

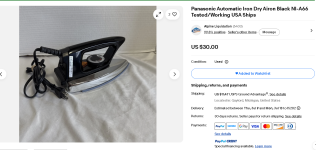
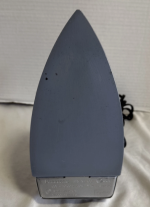
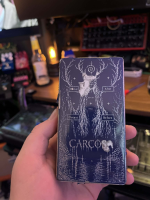
My first two pedals came out fine, it took 2 or 3 attempts each but had 2-3 pretty large blobs where it didnt stick. aside from that, they were fine. for these, i used a cheap iron i got from amazon which had a relatively flat plate but all of them have a 30 second shutoff, so i couldnt set it down flat for any real amount of time, i had to immediately and constantly slide the iron around and hope not to smear anything. I could never get it perfect but the results were actually better than what im getting ever since
1st couple:
 ,
,
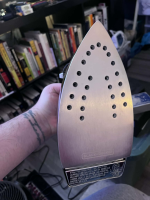
after this I was trying to eliminate ANY blobs/little spots which the transfer did not stick to, so the first thing i did was to buy a heavier iron which i thought had a 10 minute auto shutoff since I couldnt find one without. it turns out, that was only when it was sitting in a vertical position, and it still had a 30 second shutoff when placed face down. this pedal wasn't any better and actually had worse results:
(and it turns out that caustic soda eats right through sharpie marker and posca paint marker, but using an exacto knife to clean up missing white parts post-transfer does work relatively well)
so this morning i got my Heating Plate. I first tried setting it to 275 degrees, taping the transfer on two sides (either top and bottom or left and right) with Kapton heat resistant tape, placing it down on the transfer for 15 seconds, removing it, flattening the transfer paper with another pedal enclosure or a flat piece of wood, then sitting the heating plate back on it for about 90 seconds while applying force. next i tried just setting it to 355 degrees and placing it down on the transfer for 110 seconds without moving it at all, and applying some downward force while holding it completely still. this produced worse results than the first iron i had. the one with paper towel next to it was when i attempted to lay a folded paper towel flat over the pedal and under the heating plate to make it more even as suggested by some online. that seemed to make it worse in the center probably:
i put the heat resistant pad that came with the heating plate under the pedal, but for some attempts, i tried using a wooden block like i used to with the old iron. couldn't tell which method is better there. the heating plate has the ability to set an exact temperature and even has a timer. and it doesn't have a terrible auto shutoff feature. it can go 13 minutes without shutting off. it also allegedly distributes the temperature across the entire ceramic heating plate evenly. but it is $100. so the fact that it didn't work much better is disappointing
even with waiting for it to cool before carefully peeling, or even once trying to dump cold water on it immediately, the center came off completely (the Grind pedal design was where i tried that). and on these last attempts, I used two different pedal enclosures.
for the record , i sand very hard, maybe too hard. i know shiny is suggested, so i used to go from 230 to 400 grit to sometimes even 1000 or 1500, but now I'm going only to 400 grit then stopping because apparently super shiny mirror finish isn't great for sticking transfer. i also use water to rinse it off after sanding, sometimes a little wet sanding, then acetone, wipe it down, sometimes a steel wool wipe, then rinse with water again. i am very careful not to touch the top at all after cleaning. all of these attempts shown in this post have been very well sanded, acetone scrubbed, cleaned, and not touched with fingers after cleaning
one thing i haven't tried is pre-heating the enclosure but that seems tough. maybe worth a shot though.
I would really like to hear what your process is, which heating element you use, how long, do you move it or leave it still, which paper do you use, etc.
What i really want to narrow down is:
1. is the best method, to lay the iron at its highest temp down on the transfer paper for a few minutes, then lift it and start running it across the transfer for like 5 more minutes? because thats the general advice, but i think blue transfer paper is only supposed to take like a minute or two at 350 degrees
2. does more heat for longer make it worse and potentially smudge?
3. do i just need to leave the heating plate on longer? the max time ive had this heating plate on these is just under 2 minutes, stationary, never moving. maybe i should kind of run it across the pedal to smooth it out after a little while of sitting stationary
4. whats the best heating tool for this
5. whats the best paper
6. how do you sand your pedals pre-transfer
7. is there a better type of paper to be using with laser printers for this purpose
I cannot figure out what i'm doing wrong here.
first of all, im using blue press n peel paper from ebay:
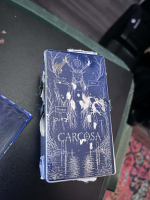
My first two pedals came out fine, it took 2 or 3 attempts each but had 2-3 pretty large blobs where it didnt stick. aside from that, they were fine. for these, i used a cheap iron i got from amazon which had a relatively flat plate but all of them have a 30 second shutoff, so i couldnt set it down flat for any real amount of time, i had to immediately and constantly slide the iron around and hope not to smear anything. I could never get it perfect but the results were actually better than what im getting ever since
1st couple:
 ,
,
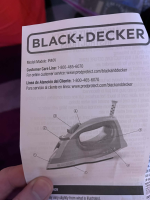
after this I was trying to eliminate ANY blobs/little spots which the transfer did not stick to, so the first thing i did was to buy a heavier iron which i thought had a 10 minute auto shutoff since I couldnt find one without. it turns out, that was only when it was sitting in a vertical position, and it still had a 30 second shutoff when placed face down. this pedal wasn't any better and actually had worse results:
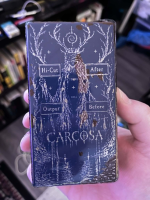
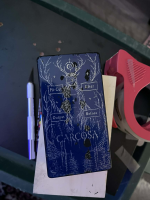
(and it turns out that caustic soda eats right through sharpie marker and posca paint marker, but using an exacto knife to clean up missing white parts post-transfer does work relatively well)
so this morning i got my Heating Plate. I first tried setting it to 275 degrees, taping the transfer on two sides (either top and bottom or left and right) with Kapton heat resistant tape, placing it down on the transfer for 15 seconds, removing it, flattening the transfer paper with another pedal enclosure or a flat piece of wood, then sitting the heating plate back on it for about 90 seconds while applying force. next i tried just setting it to 355 degrees and placing it down on the transfer for 110 seconds without moving it at all, and applying some downward force while holding it completely still. this produced worse results than the first iron i had. the one with paper towel next to it was when i attempted to lay a folded paper towel flat over the pedal and under the heating plate to make it more even as suggested by some online. that seemed to make it worse in the center probably:
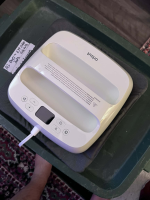
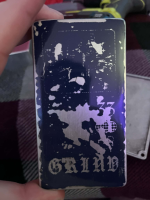
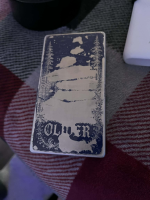
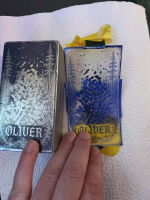
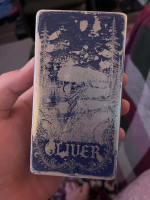
i put the heat resistant pad that came with the heating plate under the pedal, but for some attempts, i tried using a wooden block like i used to with the old iron. couldn't tell which method is better there. the heating plate has the ability to set an exact temperature and even has a timer. and it doesn't have a terrible auto shutoff feature. it can go 13 minutes without shutting off. it also allegedly distributes the temperature across the entire ceramic heating plate evenly. but it is $100. so the fact that it didn't work much better is disappointing
even with waiting for it to cool before carefully peeling, or even once trying to dump cold water on it immediately, the center came off completely (the Grind pedal design was where i tried that). and on these last attempts, I used two different pedal enclosures.
for the record , i sand very hard, maybe too hard. i know shiny is suggested, so i used to go from 230 to 400 grit to sometimes even 1000 or 1500, but now I'm going only to 400 grit then stopping because apparently super shiny mirror finish isn't great for sticking transfer. i also use water to rinse it off after sanding, sometimes a little wet sanding, then acetone, wipe it down, sometimes a steel wool wipe, then rinse with water again. i am very careful not to touch the top at all after cleaning. all of these attempts shown in this post have been very well sanded, acetone scrubbed, cleaned, and not touched with fingers after cleaning
one thing i haven't tried is pre-heating the enclosure but that seems tough. maybe worth a shot though.
I would really like to hear what your process is, which heating element you use, how long, do you move it or leave it still, which paper do you use, etc.
What i really want to narrow down is:
1. is the best method, to lay the iron at its highest temp down on the transfer paper for a few minutes, then lift it and start running it across the transfer for like 5 more minutes? because thats the general advice, but i think blue transfer paper is only supposed to take like a minute or two at 350 degrees
2. does more heat for longer make it worse and potentially smudge?
3. do i just need to leave the heating plate on longer? the max time ive had this heating plate on these is just under 2 minutes, stationary, never moving. maybe i should kind of run it across the pedal to smooth it out after a little while of sitting stationary
4. whats the best heating tool for this
5. whats the best paper
6. how do you sand your pedals pre-transfer
7. is there a better type of paper to be using with laser printers for this purpose
Last edited: