MichaelW
Well-known member
@benny_profane
There's a couple of old threads where this was done up in a lot nicer template but this is how I do my 1590B top mount jacks.
Couple of considerations:
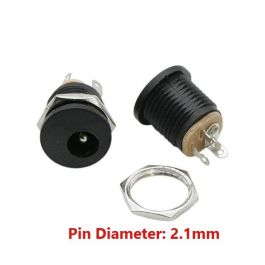
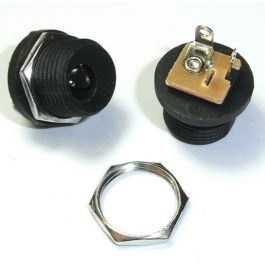
1) I've only used these measurements for Switchcraft mono jacks and Rean Neutrik mono jacks. They "should" work with other types but these are the only jacks I used for 1590B and 1590BB enclosures. Also, I've only used the small Lumberg style mini DC jacks (although I use an off brand from Amazon, not real Lumbergs)
2) Generally, MOST of the boards that measure 1.95" in width (or 2') will work with this method, however, note the LENGTH of the board as well, some boards are longer than others and may not leave enough room for the footswitch without some serious gymnastics (See my Kings Hand V2 build of an example where I got into trouble and had to tap dance my way out of it)
So to start with I'll use the PPCB drill punch template jig where possible, which is most of the time.
I start by overlaying the jig on the drill template page in the build docs to figure out which holes to use. Then I move the WHOLE jig down from the top of the enclosure by 9mm. This gives you the clearance to angle the jacks in after the pots are mounted.

Next, I'll move the drill punch jig back up so it lines up with the bottom of the enclosure and mark the footswitch and status LED holes.

For the top jacks these are my measurements.
From the bottom lip of the enclosure without the back lid on, I come up 11mm.

Then from each side ***At the 11mm mark*** I'll come in 17mm. (Keep in mind the slope of the enclosure, the 17mm measurements have to be right at the 11mm mark)

Use some kind of a flat edge to place your ruler against to you are measuring to the flat of the enclosure and not the radius. The radii are different from brand to brand of enclosure and will mess you up. After measuring in from both edges 17mm to locate your jacks it "should" leave you 25mm in between the jacks. Bisect this number and mark it.

This should give you the center of the enclosure from side to side.
Then I move this towards the top face of the enclosure 6mm. This is your DC jack location.

And there you have it. You have your top mounted jacks for "most" 2 inch or less width PPCB boards.

Sorry for the crude presentation, I know there are super smart people here that can do layouts, CAD drawings, etc. I am not one of them")
There's a couple of old threads where this was done up in a lot nicer template but this is how I do my 1590B top mount jacks.
Couple of considerations:
1) I've only used these measurements for Switchcraft mono jacks and Rean Neutrik mono jacks. They "should" work with other types but these are the only jacks I used for 1590B and 1590BB enclosures. Also, I've only used the small Lumberg style mini DC jacks (although I use an off brand from Amazon, not real Lumbergs)
2) Generally, MOST of the boards that measure 1.95" in width (or 2') will work with this method, however, note the LENGTH of the board as well, some boards are longer than others and may not leave enough room for the footswitch without some serious gymnastics (See my Kings Hand V2 build of an example where I got into trouble and had to tap dance my way out of it)
So to start with I'll use the PPCB drill punch template jig where possible, which is most of the time.
I start by overlaying the jig on the drill template page in the build docs to figure out which holes to use. Then I move the WHOLE jig down from the top of the enclosure by 9mm. This gives you the clearance to angle the jacks in after the pots are mounted.

Next, I'll move the drill punch jig back up so it lines up with the bottom of the enclosure and mark the footswitch and status LED holes.

For the top jacks these are my measurements.
From the bottom lip of the enclosure without the back lid on, I come up 11mm.

Then from each side ***At the 11mm mark*** I'll come in 17mm. (Keep in mind the slope of the enclosure, the 17mm measurements have to be right at the 11mm mark)

Use some kind of a flat edge to place your ruler against to you are measuring to the flat of the enclosure and not the radius. The radii are different from brand to brand of enclosure and will mess you up. After measuring in from both edges 17mm to locate your jacks it "should" leave you 25mm in between the jacks. Bisect this number and mark it.

This should give you the center of the enclosure from side to side.
Then I move this towards the top face of the enclosure 6mm. This is your DC jack location.

And there you have it. You have your top mounted jacks for "most" 2 inch or less width PPCB boards.

Sorry for the crude presentation, I know there are super smart people here that can do layouts, CAD drawings, etc. I am not one of them


")