burger-patty-and-bacon
Active member
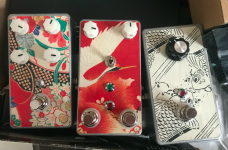
my first build has and will have no markings on it. (see super generic image attached).
For the next ones I do want to put graphics/text on.
I have read the "no film waterslide" tutorial and am not sure if that is the way I want to go.
I have a color inkjet and a black and white laser printer. I am ok with the first few being black and white.
Can I buy a "sticker" sheet that I can print directly to? Can anyone link me to some tutes or wikis?
Ideally I would graduate to full color later and do some really goofy looking stuff down the road just not sure where to begin.
What is the best free software package to use in order to take the PedalPCB PDF file and use that drill template as basis for placing text and graphics? Is that the main technique, take the drill template and modify that? How do I know the sizing is right, etc.. So many noobie questions, so much free time.