DEMO rosamp SLO-100

This post contains an audio or video demo

owlexifry

Well-known member
Around Jun/Jul Rosamp sold out of these - and then reopened with revised kits in September, and I reckon I probably got one of the first 100W kits off that batch, because when i opened the box, the transformers were off-gassing like a mofo 😷
Honestly the vapours were that strong I didn't wanna touch it for a while, so I left the transformers in the open air for about a month or so near an open window (it was stinking out the room) before I got started.

To save potential embarrassment from unforeseen errors, I wasn't gonna post anything til i had at least had it running...
but this damn thing has been consuming any spare moment ive had that isn't guitar practice/set rehearsal or whipper-snipping the entire yard because it's getting hot down here, so i thought i'd share a little teaser.

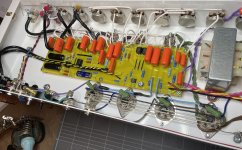
i don't have a nice camera or a sexy workspace to show off any nice "chronological progress shots" (it's an eternal abysmal mess and there's bits of tape everywhere) but here goes
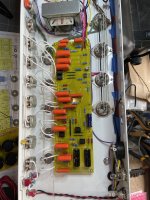

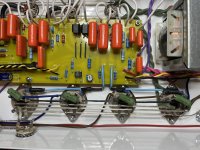
5490F939-5E7C-411A-91F9-F62870152935.jpeg
 
I am quite envious of the wiring job here. Very well done indeed.
KL0k5hl.gif
 
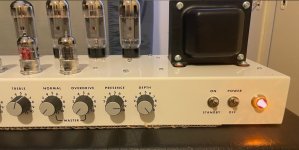
update: just fired it up last night! 🥳 🎉
CE8E7339-E5B1-4B2E-A5C6-0EBF5DCBB086.jpeg

ever since I got into DIY a few years ago, all I've ever really wanted to build is a proper SLO100 clone.
back then rosamp wasn't a thing, the slocloneforum was impossible to get into, C3amps was/is ludicrously expensive, and those weber 'heather' kits just look like trouble.
I told myself eventually I'd just cough up and get a C3amps kit.
and then i started really getting into pedal builds..
Along the way I rolled my own 40W SLO-inspired single channel build (OD channel-only), following one of Rob Robinette's wiring layouts, which surprisingly turned out to be a fantastic and incredibly loud amp (for something that essentially tacked a SLO lead channel preamp onto a 40W super reverb power amp). this kept me pretty content for some time, and has served its duty well.

But then along came some legend on this forum and pointed out the rosamp option, i think it was @jjjimi84
Saw their offerings and I was like holy guacamole - it's time.

As far as the kit goes, everything you need to build the amp is provided (minus head cabinet).
I ordered the 'no-tubes' kit, as I already had a treasure chest loaded up ready for this bodacious day.

however, because I'm one of those idiotic / neurotic builders that insists on everything being needlessly above minimum spec, there were a few components I wanted to replace (mostly so I can get that part of my brain to shut up and just get on with building)
so ordered some upgrades from mouser:
filter cap bleeder resistors 0.5W metal film - ⬆️ 3W
B+ dropping resistor 3W metal film - ⬆️ 5W
plate resistors 0.5W - ⬆️ 2W
cathode resistors 0.5W - ⬆️1W

there were some discrepancies, and one that I wasn't really that happy about - again because I'm that guy - but you'd think it's not that hard to provide components that actually match their own BOM list:
- all of the 22nF coupling caps were actually 20nF caps. (yes, marked 203) lol wtf rosamp.
i pondered over this for some time, compared charts, and yeah there's a bees dick of a difference in the bass rolloff between the two, but then consider that difference multiplied 7 times or whatever it is, and then there's the mid and bass caps, and I was like, nah fuck this, this is gonna bug me forever, so I went ahead and added some actual 22nF caps to the order.

other discrepancies:
- PI output caps, supposed to be 47nF, kit provided 50nF caps. meh.
- depth cap, 5nF (supposed to be 4.7nF). not really an issue.

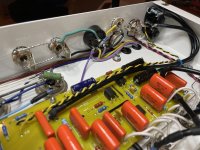
- with exception to the power supply side of things, almost all of the wiring is solid core. life is already frustrating and complicated enough without stranded wire adding to that, so didn't use any of the wire from the kit, except the provided bus wire)
- the shielded cable that came with the kit was very small and sad, so I used RG174 coax instead.
- plastic input jack replaced with switchcraft open frame.

B73D91CC-7F53-4203-873B-38EA77C72972.jpeg

F6355FEB-0946-4890-BE0D-1BBD4E5E9DC9.jpeg

A60E4B8C-40B0-4523-A9F9-FF4A26AACF45.jpeg

2D440AE3-9CD4-4A84-BB62-36647E3CD5F3.jpeg

still gotta do some more measurements to get the bias set 'correct', but holy crap, even now, it sounds so good.
I can't believe nothing went wrong.
LDR switching works perfectly. what a neat little circuit.

now I just gotta sort out a cabinet..
 
Wow - so cool! Great work!

I've seen pics or Soldanos which have that style of wiring the power tubes and I'm amazed it doesn't cause noise. But obviously it doesn't otherwise Soldano wouldn't do it that way.

FWIW I like using silod core wire but usually end up with stranded because in the long run it's probably less likely to cause problems. The few problems I have encountered with my builds has been solid core wire eventually failing at a joint. Never had that problem with stranded. Mind you, that's only twice that solid has been a problem! And it was both times the filament wiring coming loose at a socket after tubes were changed. The wire stayed in place but the joint cracked - I guess because the socket pin moved but the wire didn't.
ayy cheers 🤙🏻
yeah i’ve always thought the parallel wiring method would be noisy, but it seems to be fine. can’t say it really saved me any time though..
on previous amp builds i’ve always used stranded (except for solid heaters), this is the first build i’ve gone all in on solid core. so i guess we’ll see if i end up regretting that later on 😅
sounds like i’ll need to keep an eye on the socket fasteners..
 
Cool looking Build!
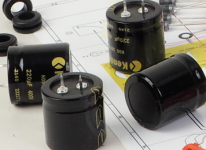
What brand of Electrolytics were used in the build?
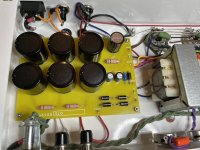
They are huge Black Caps!
Kendeil. an Italian-based manufacturer. makes sense considering where the kit came from (Milan).
1702420601906.png
rated 400V each. with 4 in series/parallel, we're looking at 800V rating (just as well with a 500V B+)

however the provided 47uF filter cap was some dismal 50c chinese special - and this thing is supposed to directly filter the supply for V3, V4, and V5! so i used a nichicon instead. seemed odd to include such a cheap cap when they provided F&Ts for the downstream nodes.
 
Looks beautiful!!!! Everything is done exceptionally well, I am taking notes!

Leg end. Ha.
too kind. big praise from the guy that got the ball rolling 😉
probably wouldn't have this sitting on my bench right now if you hadn't planted that seed.

i legit referred back to your build a couple times when i had a few of those "what am i gonna do with this?" moments..
 
17D2839C-7B6F-4179-A2D5-6DD2D5BF760C.jpeg
more SLO spam :) (sorry guys, this is my dream amp, im very excited)

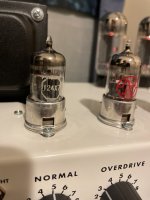
i've been meaning to roll some tubes in V1, and tonight i tried out an old philips miniwatt ecc83/12ax7 - that happens to made in a plant (hendon) in my city, probably 1960s (got real cheap in an ebay bundle auction)
sounds great! probably better than the JJ ECC83S i reckon. maybe the slightly longer plates helped? idk. but impressively low noise, so i’m keeping it there.
to celebrate, i did a ‘clean’ demo (and also to make up for the offensive overdrive channel chug behaviour in the previous demo)

i always kinda very quietly scoffed cheekily when i heard mike soldano talking about how he was real proud of his pristine clean tones with the SLO normal channel, and how it does the fender thing. but what did i know? i'd never played it. but given known associations (copying) and personal experiences with 6505 and 6505+/6534+ (= 5150/5150+) i assumed they would be all too similar.
but they're really not.
that SLO normal channel's got some pretty crisp cleans, not gonna lie.
[featuring deep blue delay & CE-2]
 
alright, I finally have a 'complete' demo of the normal channel that goes through it's full range of available gain 🥳
this time with an SM57 + 2i2 into iphone (i would hope an SM57 can offer a better impression than iphone mic as in the demos above)
i'll admit this took me a long time to get down, getting the output volume under control and under clipping threshold while increasing the gain was tricky to get right, as well as just playing guitar in general hahah
im not very good at the noodly lead guitar thing, so i hope some rhythm guitar / riffs are interesting enough to showcase the tones.

again featuring deep blue delay & CE-2, plus an ibanez STL at the end for some boosting.


also, here's the demo for the overdrive channel (just in case there's anyone here that's down with some drop C high gain action 🤓)
- boosted with the STL for the entire segment. it's just how use it (i need the the bass cut at the front of the amp for articulation + the mid boost is just right for the tone and overdrive texture that i like).
 
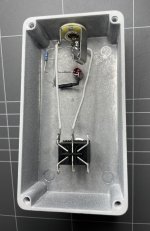
had my biggest pink bag day ever on Monday - so first thing I got onto was sorting out a footswitch / remote channel switcher.

241C9A4F-412E-419E-B5F3-1626CDAF885B.jpeg
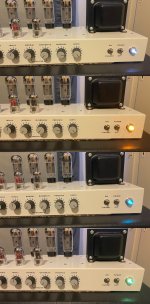
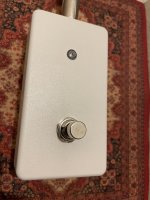
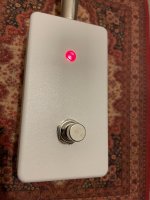
first go at trying out one of these plastic Fresnel lens type LED holders.
they’re alright, they look excellent, but boy howdy if I hadn’t drilled and filed the hole as tight and flush as I did, I dunno how well they'd stay in...

E1AA0814-84F3-4587-BC54-AE117B6E596F.jpeg D14DD075-E51A-42A4-AAED-39DD10942005.jpeg

LED off = normal channel
LED on = overdrive channel
 
Back
Top