Tid Bit's of Helpful Hints or Beneficial Habits in Your Builds Anybody?

djmiyta

Well-known member
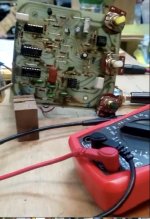
Just in case your like me and love tidbits of "Hey I wish I thought of that" or "that's a great idea" or not so great I think someone somewhere can benefit. I do all the time. For instance here I was told I should clean my nasty ass board with rubbing alcohol ( he didn't really say nasty but ). I've been building for years and never heard of that. Since then any troubleshooting is soooooooooooooooooooooooooooo much easier with a clean board just a great simple idea

I use sockets for everything modifiable on all (almost) my builds and since I swap out parts different lead thickness can make reusing the sockets difficult mainly when the sockets holes are too big (actually for me that's the only problem) and so what I do is melt some solder onto my hot iron and spread a thin layer of lovely melted solder on each leg /lead I'm putting in the socket if its too thick a few strokes of a needle file and your golden.
Some times the original part is the best and in swapping parts I liked the first one only now the socket holes from the previous swap are too big and the original part just swims in the holes sooooo.......
 
Sometime I will solder just one of the legs of a component then turn the board over to make sure it's positioned straight (or oriented how I want) on the other side, bend or twist it if needed, then I'll turn it back over, solder the remaining leg, then reflow the solder on the first leg to make sure the connection is good. It keeps things tidy. I mainly do this on electrolytic caps. I could see it being useful for something like the LED resistors on univibes other parts that end up in a standing configuration.
 
HotHolderProThreeQuarter_1024x1024.jpg
You can buy a $$$50 silicon rubber thingy pic’d above: https://www.diyrecordingequipment.com/products/hot-holder-soldering-aid


Or just take some scrap wood and drill a few holes or saw a few slots …


836c8caa-df4c-4432-a93b-103afddbc1a3-jpeg.24217


Quick cardboard jig for easy-peasy mock-up…

23CFEAE8-F985-4C56-BB0C-02741D63D3E3.jpeg
I do the same as above for pedals.


Here’s a DPDT switch-nut, below, put to use getting rid of an unwanted middle SIP-pin — needle-nose pliers and press down, et voila, middle pin popped out without damaging it nor the surrounding pins. SIP now ready to sub out caps.


2C559B46-7365-49FC-9336-9D19D0189D56.jpeg

After removing the pin as above, I save it. Then I can do stuff like this…

D1600BDA-B1AE-4561-B803-3AECE1671062.jpeg

A drop of solder to attach the SIP-pin to an alligator clip, with the other end of the wire having a breadboard pin (the silver shard sticking out between my middle and index fingers) and you’ve got a way to send a signal or power etc to/from a PCB hands free as the
toothed-alligator clips on the PCB’s through-hole pad.

The pins are still a little fragile but easily replaced if damaged during wrangling.

3702D89F-2CEF-46B4-83E9-877F6DE5EBEB.jpeg


[EDIT Oct 28 '22: Further to the alligator-clip-tip, two more...

1) It can help to take a blade to the inner jaw of the alligator maw and scratch it up a bit, which gives the solder a little something to stick to. Maybe a Dremel-like bit could get in there, but I just use the tip of my utility knife. Usual solder procedures, pre-tin everything and add more solder as needed during surgery.

2) Also, I've taken to clipping the tip of the "tooth" the teeniest bit, as this helps get the jaw on and off the PCB more easily as there's moah-better maw-room — I break less pins off the alligator clip this way and the jaw-pin still gets seated properly-enough to conduct.

Easier on/off, less breakage, and the pin-nub still centres itself in the pad — what's not to like?
 

Attachments

  • 836C8CAA-DF4C-4432-A93B-103AFDDBC1A3.jpeg
    836C8CAA-DF4C-4432-A93B-103AFDDBC1A3.jpeg
    91.1 KB · Views: 447
Last edited:
There's a version of that silicone thing for pedals called the Pedal Port that "only" costs 30 Euros on Musikding. Expensive but silicone doesn't burn, it's flexible and it actually sticks to your work surface.

It seems useful, especially since I've never been satisfied with third hands, even the Quad Hands are weird. If I had a large metal base I could space the tentacles out enough for them to actually be useful.

I really like the alligator clip thingy!

I always use painter's tape to secure sockets and caps before soldering.

I'm decent at populating PCBs. Off board wiring is where I mess up, especially the 3pdt wires. Any tips for that are appreciated.
 
I use a panavise for holding the board while soldering components. I tent to put all resistors in, solder the most accessible leads, then trim them, then repeat. Then I move on to caps. That way I can do most of the soldering in a few passes. I also use blutack (fun-tak if you’re in the US) for things like sockets and wires.
 
I know there’s advantages to the silicon-moulded helpers, I’m just too cheap/broke to spend the money on ‘em. I need the money for parts and enclosures…

If you mix imperial and metric sizes you can get enough friction-fit to hold, for example, 1/4” jacks securely in the wood. The wood sometimes gets scorched but never burned and who cares, it’s scrap!

Don’t have my computer or I’d post a pic of me with a 2x4 drilled out a bunch for 1/4” plugs, “mass”-producing some patch cables for a friend.

I’ve used blue blutack for ages, looks grey now and I’m finally getting better at using less (just enough to hold components) without melting it into a gooey mess.

I’ve got loads of painters tape, so will try that, too, now. Thanks to the many who have suggested it.
 
Speaking of painter tape, if you drill your own enclosures you must cover them with tape before doing so otherwise the metal scraps will chip the finish.
I drill my holes1st then steel wool then paint. No chipping of finish ever I do use the painters tape on the box to layout where holes get drilled . I will say that for me drilling holes with cordless drill has led me to several boxes where my holes are off. Off center to the box ,off center to each other etc.
All I know is the more time I take the better the end result Problem is ,is I don’t make the time ,much like my entire builds it’s not so much a “rush job but I go as fast as I can cause I can’t wait to try it out. I know there are others who do the complete opposite and their builds show that extra effort. I said this before I know but I’ve populated hundreds of boards and maybe 150 made it to boxes rest are in bags waiting……… but I build solely for myself ( except 2 for a friend) and as long as everything works as it should I’m not real picky. All the boxes with misaligned holes they all got boards in em
 
I had the same problem with misaligned holes and I fixed by using a hole punch and drilling a small pilot hole before starting with the step bit. Holes always well aligned since then!
Awesome I have used tiny bits for pilot holes also it’s my measuring and laying out where I mess up I think and I’ve heard several people mention using step bits giving high praise to them. I guess I gotta trip to the hardware store in my near future
 
Awesome I have used tiny bits for pilot holes also it’s my measuring and laying out where I mess up I think and I’ve heard several people mention using step bits giving high praise to them. I guess I gotta trip to the hardware store in my near future
Do you use the PPCB template for aligning the holes? And do you use a hole punch to mark the position? I find that both of those things improve my accuracy. It’s never 100% accurate and a couple times I had to slightly enlarge one of the holes in one direction using a metal file, but overall I haven’t messed up any enclosure with this method (I did without pilot holes in the past).
 
Forgot these ones:

I use PCB cleaner to remove flux residue. Take it outside, spray it on whilst scrubbing with the brush attachment, lots of cleaner and let it run off. No need to use a toothbrush, no paper stuck on the PCB.

I use Wago connectors for the DC jack for off-board testing. The 3-conductor one makes for a simple troubleshooting ground point to connect a DMM or audioprobe.
 
Do you use the PPCB template for aligning the holes? And do you use a hole punch to mark the position? I find that both of those things improve my accuracy. It’s never 100% accurate and a couple times I had to slightly enlarge one of the holes in one direction using a metal file, but overall I haven’t messed up any enclosure with this method (I did without pilot holes in the past).
I’ve not heard of the PPCB I’m assuming it’s a template for many different stomp box hole drilling? Where would one go looking if one so desired to purchase said template? And hole punch is on my hardware store run! Thanks
Step bits have their place and I use them all the time, but for some things I prefer a regular bit — lots of "depends on...", 'cause every build is different for me. I haven't branched out into doing small runs, that's a whole other level I'm not even sure I want to reach (though I used to think I would).
By small runs you mean building several of the same boxes yes? If so yeah that’s something I’ve never even considered doing maybe 25 years ago if someone had mentioned it to me. I definitely missed the boat seeing I built my first pedal a year or two before the internet was born maybe I coulda been Mr PEDALPCB no.1? Anyways hindsight is always 20/20 they say and I enjoy the hell outta my pedals. Even my ugly babies.
 
I’ve not heard of the PPCB I’m assuming it’s a template for many different stomp box hole drilling? Where would one go looking if one so desired to purchase said template? And hole punch is on my hardware store run! Thanks

By small runs you mean building several of the same boxes yes? If so yeah that’s something I’ve never even considered doing maybe 25 years ago if someone had mentioned it to me. I definitely missed the boat seeing I built my first pedal a year or two before the internet was born maybe I coulda been Mr PEDALPCB no.1? Anyways hindsight is always 20/20 they say and I enjoy the hell outta my pedals. Even my ugly babies.
 
Back
Top