Tried my hand at Inkscape today and it was going well until...

peccary

Well-known member
I tried to print!

fail.jpg

:ROFLMAO: :ROFLMAO: :ROFLMAO:

Inkscape was actually pretty easy to use with a bit of Googling, at least for simple stuff like I wanted to do to get started. But my printer had some other ideas.

I'm using an older Brother laserjet printer. First one (the crumpled one) came out not terrible, but there was a lot of white still remaining. I crumpled it up before I thought about printing it a second time on the same paper. The others are attempts at running the paper through twice. Bottom left got the best coverage, but I put the paper in wrong so it printed on the correct side, just upside down. After that, each attempt at re-printing ended up in the paper getting jammed up and ruined.

It also seemed that the more I printed the less coverage happened, so I may need to let the printer cool down or something.

Anyways, I thought I would share my misfortune for a few laughs here, but if anyone has any pointers let me know!

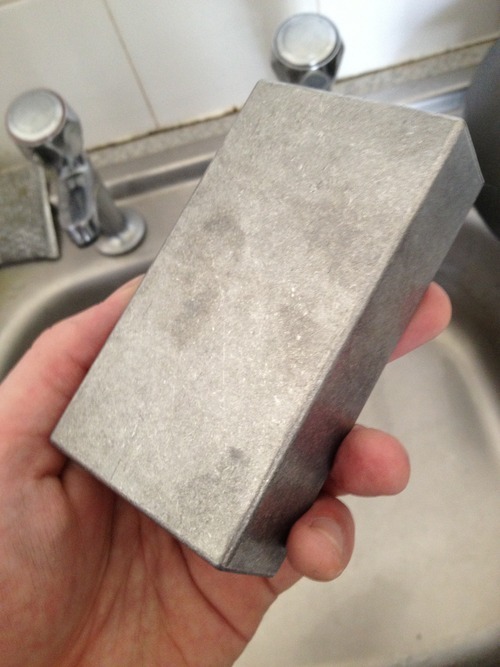
Just so you know what I'm trying to do here: I'm planning to etch using ferric chloride and would like the letters recessed while the rest is unetched (maybe it'll be better to reverse that starting out). If there's a better method/workflow I'm all ears. And a quick thank you to @Danbieranowski and @dmnCrawler for sharing their methods and art/previous work as it's what got me going to give this a shot.
 
Last edited:
The other guys have far more experience than me, but it might be easier to focus on the areas with detail then mask the larger solid areas by hand with nail polish or some other form of resist.
 
The other guys have far more experience than me, but it might be easier to focus on the areas with detail then mask the larger solid areas by hand with nail polish or some other form of resist.
That's a good idea, and I'm a little embarrassed that I hadn't thought of it since I do remember reading about others doing that now that you mention it. I might just tape it up with packing tape and give it a go. I should try it both ways (raised and recessed lettering) and see which I like.

I'm planning on using this to etch copper sheets that I will then attach to the enclosure as a kind of face-plate so I don't even need the full length of the image.
 
Ahh okay, I've done a fair amount of etching copper clad, but never aluminum enclosures.

I always used Sharpie to make corrections / fill in any pinholes.
 
Ahh okay, I've done a fair amount of etching copper clad, but never aluminum enclosures.

I always used Sharpie to make corrections / fill in any pinholes.

Does Sharpie work well enough to cover larger areas than filling in pinholes? If that's the case I might try stencils, too. These first few I make will be more experimental than anything to get a feel for things and see what works for me.

I should have saved my first print, given it a go, and filled it in with sharpie/tape. I was too hung up on perfection. I get perfectly jet-black coverage on plain copy paper so I was expecting the same with this fancy transfer paper but was obviously mistaken.
 
For some reason I feel like pinholes and imperfections look even cooler, but I realize that's an aesthetic choice.

I will say, I have a similar laser printer, and I have had that black coverage issue when printing on certain types of surfaces. What I realized was that I was printing on the WRONG SIDE of the paper (lol), and it wasn't the right surface to accept the toner, and I ended up with similar results. I just had to flip the paper to the other side and it worked fine. I don't know if that's the same issue you are experiencing bc I've never used transfer paper, but maybe?

I have a couple of different ones printed tonight for me to try my hand at tomorrow. I just need to do it, I think.

I feel like pinholes and that kind of thing can look good as long as it's somewhat consistent across the area it's covering. I printed the negative image from the photo I posted and it came out totally fine, so I think that this printer just has an issue with laying down lots of toner with how slick the paper is.

The transfer paper I'm using has a slick side and a paper side and it says that you should print on the slick side. I know others use photo paper and I believe some use plain ol' office paper, so I think I am just going to have to experiment a bit to see what works for me. I don't have any photo paper but I'll try the transfer paper and plain stuff and see how it goes. Rest assured that I will post all of my future failures in this thread :D
 
That yellow eBay paper is awful. That’s Tip #1. I had it wrap around my printers fuser roller and brick it essentially, I haven’t been able to get it running again. Buy some glossy thin cardstock paper and try again!
 
Though I have heard from countless people that Brother printers are no bueno for this purpose as they fuse the toner to the paper in a different way or something weird like that.
 
That yellow eBay paper is awful. That’s Tip #1. I had it wrap around my printers fuser roller and brick it essentially, I haven’t been able to get it running again. Buy some glossy thin cardstock paper and try again!

I got this stuff because it was cheap and I am cheap lol. It's from Amazon - they had some that was ridiculously priced for like 10 sheets and then some knock off no-name had 100 sheets for like half the cost of the fancy stuff so I went with it, so you are probably correct. It's what I get for being a cheapskate.

And regarding Brother printers, that's good to know: this wrapped around the roller but it was easy to pull out each time. I could just be testing my luck, though.

I'll buy some glossy cardstock like you suggest and give that a go. Thanks!
 
I think your problems may well be your printer I've heard a few people on forums saying the toner doesn't adhere to the transfer paper well with a brother printer

I use the yellow paper with no problem on an old hp 1015

I'm taking it you've seen the tutorial from the master etcher @Hexjibber


Deadastronaut also an excellent etcher has a vid on his channel


I don't cover the whole enclosure with toner transfer just the parts I actually want etched

20210313_025619.jpg
Excuse the wonky hole a little off centre so elongated it a wee bit

The parts that don't adhere I cover using black nail varnish

I then use cheap packing tape to mask the rest of the enclosure as you're planning to do, once I put the tape on I'll use the nail varnish which also helps seal the edge of the tape

20210313_025546.jpg

I then apply the ferric using a plastic pipette as per hexjibbers tutorial effectively targeting your etchant to the bits you want done I find submerging it in ferric means more pitting because you don't see the bits of transfer coming off as easily

20210313_025651.jpg

I etch for around 10 minutes rinsing every 3 minutes and stop when I see the tiny black bits of toner coming off

Anyway here's the finished etch with this one, not perfect by any means but it'll do

20210313_025635.jpg

And painted
20210312_011802.jpg

When I spray it I also use paper masking tape and just spray the etched parts it's a lot less paint to sand off

If you think you're a cheapskate meet the master I use as little etchant and as little paint as I can, I like to think I'm practical but I'm just cheap! Mind you I use a lot of tape but.......

That's cheap
 
Last edited:
I think your problems may well be your printer I've heard a few people on forums saying the toner doesn't adhere to the transfer paper well with a brother printer

I use the yellow paper with no problem on an old hp 1015

I'm taking it you've seen the tutorial from the master etcher @Hexjibber


Deadastronaut also an excellent etcher has a vid on his channel


I don't cover the whole enclosure with toner transfer just the parts I actually want etched

View attachment 10323
Excuse the wonky hole a little off centre so elongated it a wee bit

The parts that don't adhere I cover using black nail varnish

I then use cheap packing tape to mask the rest of the enclosure as you're planning to do, once I put the tape on I'll use the nail varnish which also helps seal the edge of the tape

View attachment 10324

I then apply the ferric using a plastic pipette as per hexjibbers tutorial effectively targeting your etchant to the bits you want done I find submerging it in ferric means more pitting because you don't see the bits of transfer coming off as easily

View attachment 10325

I etch for around 10 minutes rinsing every 3 minutes and stop when I see the tiny black bits of toner coming off

Anyway here's the finished etch with this one, not perfect by any means but it'll do

View attachment 10326

And painted
View attachment 10327

When I spray it I also use paper masking tape and just spray the etched parts it's a lot less paint to sand off

If you think you're a cheapskate meet the master I use as little etchant and as little paint as I can, I like to think I'm practical but I'm just cheap! Mind you I use a lot of tape but.......

That's cheap
Dude, thank you for putting this together, I appreciate it. I'm going to spend a few hours on sunday trying a few things out and I will keep all this in mind. It'll take me a few times but I'm sure I'll be able to figure out something that works for me.

And I really think that taping things off and using a little bit of ferric chloride on top is a great idea, I think that's what I'm going to do. I'm going to try it on some copper I've got first to try to make a faceplaye for my Obsidius before the enclosures. I'll post my results, win or lose, here (y)
 
Alright, so today I had some free time and decided to give a go at etching a face plate for my Obsidius.

All in all I am happy with how it came out, but there is obviously a lot of room for improvement. My first issue is that I did this without any kind of guide lines around the lettering and so was a bit blind when I did the cutting and it's all lopsided and a bit too tall at the top. I thought I'd want to color it somehow but I am really digging the way the copper looks after etching and the toner/Sharpie kept the letters relatively shiny.

I feel like I can fix those things without a lot of trouble since when I make another one I will do it while I am making the enclosure and can be sure that everything is lined up and measured out properly. I didn't want to pull the Obsidius out of the enclosure since this was an experiment, but I believe that will safe time and make things look better going forward.

Initially I intended to do like you said, @Mcknib and use a pipette but they won't be here till tomorrow so I ended up jerry-rigging some tape to allow me to agitate the copper plate in the ferric chloride. I left it in for about 30 minutes and am happy with the amount it etched, but it could have gone a bit more. It's tough to tell while the process is happening.

I also need to use a better/different font. This font did not hold up well around the edges and I ended up having to go over it all in Sharpie.

Anyways, as promised, here are some photos:

The final product:
1.jpg

Kind of reminds me of an old sign you'd see hanging in a mine or something. Maybe I'm just a weirdo.
two.jpg

All praise the Ove' Glove!
three.jpg

Success!
four.jpg

I also succeeded in copying the ironing board pattern on to the copper lol
five.jpg

Don't tell my wife I took these containers from the kitchen!
Actually, she doesn't care. She's the one who suggested using them.

Also, old weed containers make handy thingamajig holders.
six.jpg
 
I use the same paper and printer- it can totally be a bummer sometimes but I manage to get okay results out of it.
The other guys already mentioned extra masks- I use electrical tape and nail polish, myself, but something that you can do to up your chances is laying out 4 copies of your design on each sheet rather than just 1 or as you see here, multiple designs:
zvAQVbdl.jpg

I also lower zero the brightness and max out the contrast in my Photoshop print settings.

That is a great idea - printing four like that. I'll have to play around with it a bit, thanks for the tips!
 
i see rocket sockets!
I was doing an order from LMS and decided I might as well. I was a little bothered having to keep my sockets out of their set 😄

They worked pretty well, but you can see around the toggle switches they actually left a little circular mark which I didn't expect.
 
  • Like
Reactions: fig
That looks damn good for a first effort I'd say

+1 on what @dawson said I print as many as I can get on an A4 sheet
Thanks man, and thanks again for the help. You and the couple dozen or so other people on here who have helped to educate and motivate me to try and step it up.

I expect my second one to be a lot better. I'm the type who just has to do it that first time kinda wimgin' it to see what and how much goes wrong. Get that first one out and then figure what to improve and what I took for granted.
 
Today I etched an enclosure and wishing I had more unfinished aluminum ones. I've got nearly a dozen different colored ones, but just the one unfinished. I'll have to pick some more up.

I don't think this turned out too bad for my second etching. The aluminum etched much more quickly than the copper did. Also, for some reason the Sharpie did not hold up well at all. The little pitting here and there I kind of expected, but the larger ones were decent gaps in the toner that I covered up with Sharpie. When I did that with the copper plate above it held up well and I had it in the mix for about 30 minutes whereas this one was in for about 10. I may have to steal some nail polish from my wife next time.

Anyways, I betcha can't figure out what this is for! Finished pedal and paint job forthcoming.

Just wanted to add: I used Hammermill gloss card stock and it worked much better in terms of printing, but I am wondering if the toner for Brother printers is just not as good for this task as other brands. Maybe I'll head to Goodwill and see if I can't find a cheap HP B&W laserjet or something.

arrowed.jpg
 
Last edited:
Back
Top