So I finally finished my shed/workplace! Shes small inside but i think i made some good use of the space! Im an amateur with all the insulation so if something looks out of wack blame it on me!

Chicken Wing Audio is back in business!
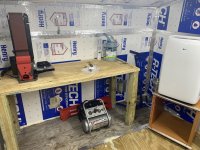
Left side:
This side consists of my belt sander for when i need to shape my enclosures and I left extra room to work on that side if need be. I will be working on that side most of the time!
View attachment 53459
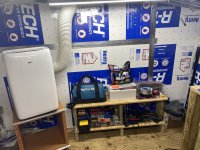
Center back wall:
As you can see the A/C unit is on a cabinet. The A/C exhaust hose is only 5 ft in length not allowing the unit to sit on the floor :/
The solution will be to order a longer hose and replace it. For now though this is the only thing bumming me out! Today I built a 2 tier shelving unit that is but 1ft x 4ft. I wanted to put the left over wood to good use and not have it go to waste so i think this was a good move. This holds all my various tools and whatnot.
View attachment 53460
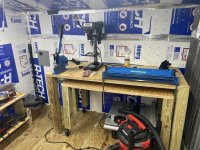
Right side:
This is where most of the enclosure building will be happening! Here we have the bench shears, drill press, and metal brake. Today i also built an extra workbench that has casters to roll it around. I keep it under this workbench so i can easily pull it out when i need more room to work on.
View attachment 53461
This was my first time doing anything like this so blame me for any ugliness that you may see but its my little workshop and im pretty happy!