Cybercow
Well-known member
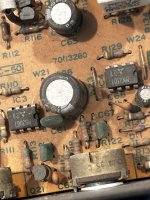
That is a rather spiffy find. Good on ya.Picked up this Kay 703C amp from a yard sale for twenty bucks. It's in nice cosmetic shape, except for the mouse nest stuffed inside the chassis. Cleaning it out revealed the intact original circuit. I'm planning to recap and install an isolation transformer later this fall.
As an old fart, I remember the Kay 703 being known as a "widowmaker" - because of its transformer not being isolates. (Or something deadly like that. I've slept since then.)
Even tho you're getting an isolated x-former for it, for safety's sake, please sniff around real good at the AC input, transformer(s), chassis and large caps.
")