Journal: C2C Supersonic build (from scratch)!

cris_mas

Member
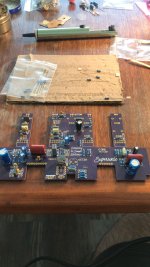
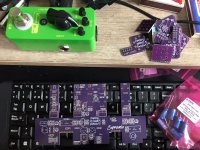
Well, i will start this post by saying that i'm so excited to have received the most difficult parts to get for this challenging (for me) project and i just couldn't wait more to begin. This is something I've been waiting for a long time, a pedalboard friendly tube pre that has 2 channels and fx loop and doesn't take a whole rack to put on. I was waiting the corrected version to fit properly on the 1590DD enclosure and now i have the 80% of the parts to put it together. First post of this journal (not sure if this is allowed but here i go).

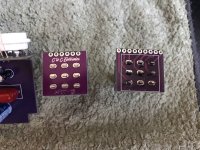
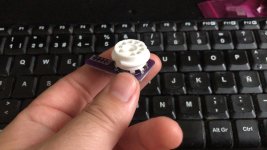
It took me a month to wait for the tube bases, found them on aliexpress, and i wanted them made on ceramic rather than plastic, so the wait was worth it.
I have the tubes from an Laney Cub 12 chasis that's laying around in the closet (not working properly) so i will test the preamp with them.
It also took a month or so to get the pieces that i bought from Tayda, which weren't easy to get here (Chile) so now i only have to buy the resistors and capacitors that aren't high voltage.

Now, i have to implement a relay based channel switching with an external control input and this will be perfect.
Thanks @vigilante398 for the fun!
Let'sa go!
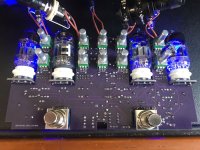
WhatsApp Image 2023-12-28 at 16.24.31.jpeg WhatsApp Image 2023-12-28 at 16.33.51.jpeg
 
Second part of the journey:

Today arrived some small value components so I began to populate the circuit. I didn’t find the uf4007 diode so I bought an 1n4007 but reading the properties of it, now I don’t know if it’s compatible so I’ll wait on that one. Apart from a resistor value that’s a bit exotic here, I will progress rather fast. A picture on the progress
A74F775C-6A80-47AE-B83B-EAF712460F98.jpeg

I’m trying to find out the orientation of the tube pcb part, but will solder it at a late stage of the build. I’m not sure also on how I should proceed with the enclosure. Food for thought, huh?

Hope to have results very soon!

PS: sorry for the hairy leg, at least solder will fall to hair first and not the skin.
 
good news everyone!

Some advances have been made from the last time. It's been a while, lots of things going on. Unfortunately my dad had to be hospitalized (now he is fine) so that took some time from working on this.
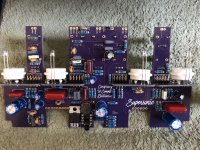
Populated the PCB and i'm about to finish to solder last components. I have some doubts about the position of the switch pcb's. I'm replicating the positions on the photos that @vigilante398 posted on his prototype, but not sure if i'm f'in it up:
WhatsApp Image 2024-02-13 at 11.32.18.jpeg

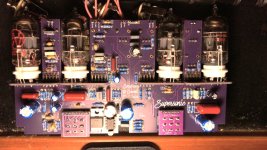
The rest of the board looks like this:
WhatsApp Image 2024-02-13 at 11.32.29.jpeg

If all goes well, today will be fired it up!! Wish me luck!

PD: I will try to make my own enclosure drilling, but i don't know were the drill template could be. I've read somewhere that there is supposed to be drilling templates on Tayda. Does anybody know how to find them? i did a fast search and couldn't find them. I know that C2C offers the enclosure already done, but i have to import some other PCB's for other projects and i have to work under import fees limits ATM
 
good news everyone!

Some advances have been made from the last time. It's been a while, lots of things going on. Unfortunately my dad had to be hospitalized (now he is fine) so that took some time from working on this.
Populated the PCB and i'm about to finish to solder last components. I have some doubts about the position of the switch pcb's. I'm replicating the positions on the photos that @vigilante398 posted on his prototype, but not sure if i'm f'in it up:
View attachment 68342
The intention with the footswitch boards is that the logo goes on the opposite side of the switch and the rectangle goes on the same side of the switch, so the 3PDT-TB is correct and the 3PDT-BO is upside down. That being said, because the 3PDT-BO is just a break-out of the 3PDT connections, it will function the same upside-down.
 
Well, when reality strikes...

I've completed the soldering of the elements, turned the pedal on and...
NADA
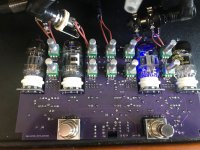
The leds turn on but no sound comes from the preamp. I boosted the gain on both channels and i just hear crackle and no signal from the guitar, also the second led from right to left keeps lit while i switch to bypass. Bypass sounds. Although i'm not really good at debugging i'll try to search for the problem. I was a bit impatient to make it happen.
WhatsApp Image 2024-02-13 at 16.15.40.jpeg

WhatsApp Image 2024-02-13 at 16.15.09.jpeg

PD: i've tried with fx loop both closed and open
 
Well, when reality strikes...

I've completed the soldering of the elements, turned the pedal on and...
NADA
The leds turn on but no sound comes from the preamp. I boosted the gain on both channels and i just hear crackle and no signal from the guitar, also the second led from right to left keeps lit while i switch to bypass. Bypass sounds. Although i'm not really good at debugging i'll try to search for the problem. I was a bit impatient to make it happen.
View attachment 68363

View attachment 68364

PD: i've tried with fx loop both closed and open
Can we see the other side of the board? Look through for solder bridges, cold solder joints (especially on the tube PCBs), etc. Also please show how you have the loop wired up, if that's miswired it will ruin everything.

Then the question I always have to ask, what power supply are you running it with?
thanks for the help!
Sure, this is the other side:
WhatsApp Image 2024-02-14 at 21.20.24.jpeg
Some Spots are gold colored, but there is solder at the center (I was thinking in measure conductivity there but today had no time)
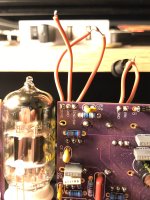
Right now i don't have the switch jack connected, only the return one is, and i've wired those as this picture shows:
WhatsApp Image 2024-02-14 at 21.16.08 (1).jpeg


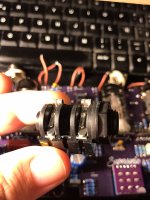
This is the jack with switch. It's the only one i've found here:
WhatsApp Image 2024-02-14 at 21.16.08.jpeg
it has four legs and switch for both tip and ring. I've soldered the tip switch to the Send switch wire.
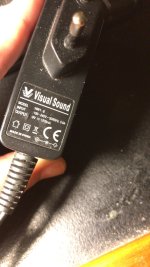
And this is the supply I'm using, a visual sound One Spot, it delivers 9.6-9.7 volts

I will check some things in this while and inform my progress. Also i will check plate voltages on the tubes and solder points,
 

Attachments

  • WhatsApp Image 2024-02-14 at 21.18.28.jpeg
    WhatsApp Image 2024-02-14 at 21.18.28.jpeg
    178.7 KB · Views: 9
Back
Top