Clark Gainster aka Hoochie Mama using Red Herring Board

psb962

Active member
For my first pcb build of a pedal I decided to build a Clark Gainster / Hoochie Mama clone. The closest pcb available is the Red Herring, and other members figured out how to do this a while back:

If someone wants to double-check me, to do a Gainster on the Red Herring Board:

IC1 - JRC072
R2 - 10K
C1 - 100n
C2 - 120p
R6 - 10K
C5 - 2n2
VOLUME - A500K

C4 - OMIT
CUT - replace with a 22K resistor between pins 1 and 3

And you’ve got a Gainster (the “BITE” is the “PRESENCE” control)

I breadboarded it successfully and played it for a few days using the Protoboard:
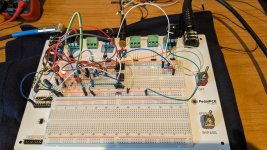
PXL_20230929_200248053.MP.jpg
Protoboard was awesome!

I decided that the 3 knob version of this pedal worked fine. For the build I will be using one of the pedalpcb / Tayda 3 knob 125B boxes but the pcb is made for 4, so I have to wire the third pot manually.

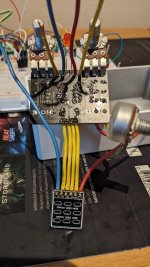
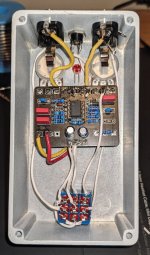
Today I populated the pcb and did almost all of the offboard wiring such that I can drop the almost complete pedal back into the Protoboard to check it out before boxing it.

Here is how it looks atm:
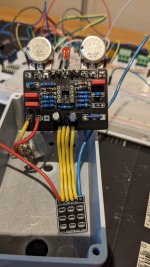
PXL_20231002_181842657.jpg

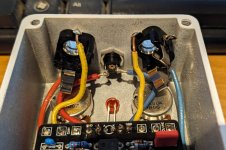
PXL_20231002_181929878.jpg

Lessons learned so far:

1) If doing a modification to a documented build, write a new document. I managed to solder in 2 resistors intended for the Red Herring that are different values in a Gainster. However, one is the input resistor (1k vs 10k) which changes nothing according to my LTspice model, and the other is a 6k8 coupling resistor instead of 10k at the inverting in to second gain stage. Result: more gain - not a problem I hope.

2) Desoldering parts or wires from one of these tiny pcbs is a real PITA. I screwed up the diodes and the do-over took FOREVER.

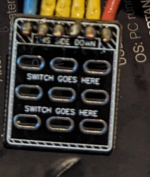
3) When soldering the 4 wires from the switch to the main board, check both boards are correct way up. If not, see #2.

4) 5mm LEDs just fit the hole in the enclosure. Should be a solid enough fit.

Hopefully I'll have this rocking out of the box later today.
 
Well it worked when I connected up the power, in, and out to the breadboard. So I put it in the box, soldered up the input and output jacks, and the power jacks, and now it works only in bypass. LED is on, but no sound.

Only change was soldering up the jacks and putting it in the box. So I know that there is continuity from the jacks to the switch as it works in bypass. The power connections are correct at the board and the LED lights. I found that the Out from the board made it to the switch PCB connection for Out, but now, for some reason Out wasn't connecting across the switch PCB or with the lug that is wired to the Out jack. I resoldered but no change. I moved the Out wire off the switch PCB and soldered it straight to the switch lug. Now Out from main pcb connects to Out jack when switch is on, but it still doesnt work.

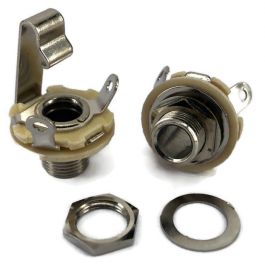
This is my first non-kit build. Is there something I'm missing about wiring up i/o jacks and power on these builds? I think I've missed something stupid but cant figure out what it could be. I seem to have placed the stereo jack on output rather than in, but only the tip and ground are used on each jack so does that matter?

This is what the jacks look like. Apologies for using random colors for all the wires.

PXL_20231003_015607526.MP.jpg
 
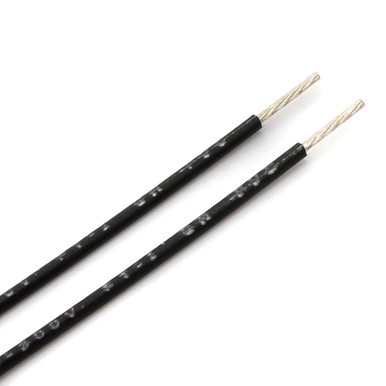
It's the correct side up. (That was one mistake I made earlier then fixed it before those shots were taken). However, after a lot more testing I've decided that the problem is in the switch or switch pcb as 95% of the time the connection to Out isn't made when the pedal is switched on. With pedal out the box, in about 30 switch operations it worked twice. I have no doubt that its my soldering or use of the wrong wire (16AWG) that has led to a failure of the switch pcb or even the switch. The other lesson I'm learning here is that my eyesight (I'm 62), even with a magnifying headset, isn't helping with these microscopic pcbs so I think for future builds I will go to stripboard.

As this is my first non-kit pedal it's all good lessons learned, so I've cut the switch off, have ordered 100' of 24 AWG prebond wire and 3 more switches, and will rebuild the pedal in a couple of days. But this time I wont be using a switch pcb.
 
Is it 16 stranded wire or solid ? In any case it's huge ! If it's stranded you could have some strands making contact where they should not. You may also have put too much heat on the footswitch, but you can test it in continuity mode with a multimeter.
 
It's solid and it's horrible. When my 24 AWG gauge turns up I'll rip it out and replace it. I decided not to screw around with a two-dollar 50 switch and 50 cent circuit board I'll just replace it with another switch.
 
  • Like
Reactions: Nic
Update: almost all of the old wiring has been replaced, a new switch hand-wired in (no pcb) and results tested. No output. After some continuity checking I found that the Out pin on the main pcb was not connected to the wiper lug on the volume pot - and there is a pcb trace going between the two. I guess I destroyed the end of the trace changing the wire. I decided to fix this by running a wire from the switch 'board out' lug direct to the wiper on the volume pot. It now works.

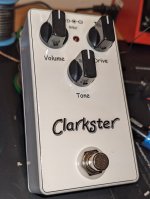
I've applied a decal to the enclosure and I'm now clearcoating it. I expect to post the complete pedal tomorrow.
 
The first non kit build can be a pain, but you made it through even needing to troubleshoot that broken trace. Nice job.

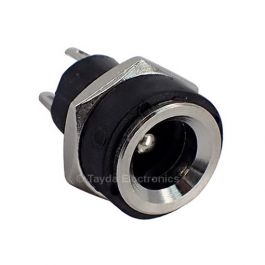
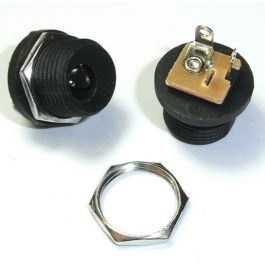
Unfortunately you can't use a metal DC jack because of the center negative power supply.

What soldering iron are you using? It looks like some of the solder joints are cold. When I switched from a dinky little 20w iron to a Hakko station it made a world of difference to my soldering quality.
 
Weller WLC100. However, I had some major tip issues and also had serious problems replacing the wrong wire with the right wire without overheating the pcb holes.

The tip of my iron seemed to melt away - I guess my efforts to clean it using solder braid and a mass of copper stranded cable was a mistake. I guess people use brass for a reason. New tips ordered.
 
I mostly prefer using solid core wire. I have had a hard time in the past getting the stranded wire cleanly into the holes. If it was tinned it wouldn't fit in the hole and if it wasn't tinned there were always oddball strands left hanging out on the entry side. Probably an issue using 20 awg or 22 awg wire. The precut and prebonded stuff stompbox parts sells works really well though. I've switched to using that when I'm using 3pdt breakout boards and I save the solid core for the jacks.
 
I mostly prefer using solid core wire. I have had a hard time in the past getting the stranded wire cleanly into the holes. If it was tinned it wouldn't fit in the hole and if it wasn't tinned there were always oddball strands left hanging out on the entry side. Probably an issue using 20 awg or 22 awg wire. The precut and prebonded stuff stompbox parts sells works really well though. I've switched to using that when I'm using 3pdt breakout boards and I save the solid core for the jacks.
Yes I did my research and bought some 24 AWG stranded pre-bonded wire from LoveMySwitches. It seems to work very well but seems expensive at $16.99 for 100 feet. I have a wire stripper tool so at least stripping the ends is easy.
 
This is what I have been using:


It's pricer than buying rolls of wire, but the convenience of having precut and stripped wire is worth it to me. I'm have arthritis issues with my hands and squeezing the wire strippers repeatedly is no bueno.

Last time I ordered some I got 1.5in pieces and they work great for the 3pdt switch to main pcb connections.
 
The Tayda pre-drilled enclosures have an 8 mm hole for the DC jack. Are there any DC jacks out there that fit an 8 mm hole other than the Lundberg?

Also what input output jacks are people using? From all the photos I've seen of others builds there seems to be a popular choice but I can't find it....
 
Looking back, this was my first non-kit pedal. I can now see that my build quality is awful and, fortunately, my later builds are way better. However, this pedal is by far my favorite of them all so far. The woody tweedy tone this cranks out with the Tone knob at 11 is to die for. My Eternity Burst sits next to it in embarrassed silence. Now I need to find another OD that sounds even better....
 
You should try the ADHD (OCD Clone). It's an awesome pedal. And congratulations off getting through your first non-kit pedal. The ADHD was mine, and I still think it was the best pedal I've built so far.
 
pxl_20231008_001637915-jpg.57965

BUILD QUALITY?

Looks dang good to me!

My suggestion:
Build a Chop Shop
 
Back
Top