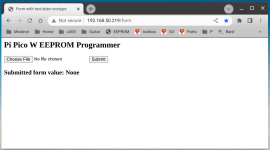
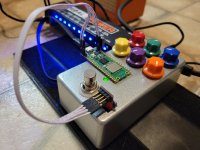
Here is the current code. It will read and write .bin files. It started life as one of the example scripts from the adafruit_httpserver library. I just tweaked some stuff and added the EEPROM code.
With this code you can write starting at the first sector, up to the whole chip.
It currently only works with binary files, not Intel Hex.
So your file size should be 512 bytes or a multiple of 512, up to 8x512 = 4096 bytes.
The current adafruit_24lc32 library is pretty slow. It takes about 4 seconds to write a program, and about 30 seconds to write all 8 programs. Reading is faster.
Once you have flashed a new program(s) to the EEPROM, you must signal to the FV-1 that it needs to re-read the updated program from the EEPROM. So you must flick the program select switch to signal this to the FV-1. It is possible to have the pico strobe FV-1 pin 13 and trigger a reload, but not currently implemented.
Software Install:
Download and Install CircuitPython
Download CircuitPython Bundle
Download arachnid_web_programmer.py
Install CircuitPython on Pico
Find all the Libraries needed in the Bundle and copy them to Pico
Rename "arachnid_web_programmer.py.txt" to "code.py" and copy to Pico
Create a settings.toml file on Pico containing your WiFi Credentials SSID and Password
Open a terminal window to Pico so you can see the IP address (mdns support hopefully coming soon)
Type that IP address into a web browser
Hardware Install:
Currently the 3.3V regulator in my arachnid is only rated for 100mA, and the Pico draws about 200mA when first connecting to WiFi. Once connected it draw much lower current. Because of this you will need to either upgrade the regulator or install a second one. I would recommend installing a second one and a switch to turn it and the Pico on/off.
In my demo video I was using a micro USB cable to power up the Pico. Once it connected to my router I could unplug the USB and it could run/read/write all while powered up from the internal 3.3V regulator on arachnid. Just needed the extra oompf to connect initially.
Pico Wiring:
VSYS = 3.3V
GND = Ground
GP0 = SDA
GP1 = SCL


