mkstewartesq
Well-known member
This will be kind of long because hopefully it can provide some useful tips for others.
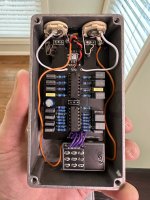
This was a fun build (until the end, see below)– mainly because it was so different from most of the PedalPCB builds I have done. It was fun working with sliders rather than pots for a change, as well as assembling the two boards, almost like a model kit.
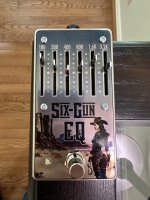
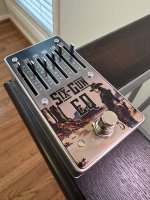
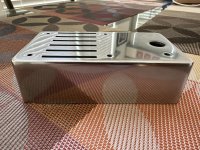
As some may recall from the “workbench” thread, I started with a raw aluminum enclosure and sanded it and polished it to with an inch of its life, to the point where I got a mirror finish. This was actually a bad call as far as applying a film-free decal. It was TOO smooth, because the glue actually beaded up on the surface and was a complete bitch to spread around evenly. Since the glue didn’t like the smooth surface, there were a few tiny spots where it did not adhere and lifted. So I was left with a somewhat fragile decal even after applying clearcoat. Bear with me, this is going somewhere.
The key to this build is to PLAN AHEAD. I did not do this and I paid the price in frustration. Because the boards are stacked, certain wires (powerlines, ground wires to the jacks) must be soldered onto the board before you combine Combine the boards and solder the pin headers. Even once you have done that, you must test fit EVERYTHING before committing it to the enclosure. This is a TIGHT fit – depending on the jacks you use, they are only going to fit into the enclosure with the board in a very, very specific way. Long story short, I put the board in and realized that there was no way I was going to be able to put the jacks or the power jack in afterward so I actually had to disassemble this multiple times (a scary process given how fragile the decal on the surface was) before I finally figured out the exact right sequence of steps to get everything into the box and to fit Because I used open frame jacks, I also had to snip off the pin headers because they not only obstructed the jacks but they would’ve fouled the guitar cables plugged into the jacks.
Like I said – plan ahead. Then find out your plans don’t work, scrap them, and make a new plan. Over and over again.
Thanks again to Nick @Bricksnbeatles for supplying the drill template – this is the first enclosure I had Tayda drill for me in at least seven or eight months, but the results were well worth both the $4.00 extra and saving my sanity.
SOUND - I built this stock – meaning I didn’t try to change any of the band frequencies, etc. As far as the sound – it does exactly what it’s supposed to. The effect of moving the sliders on each band is quite noticeable and I think it’s going to be a very useful tool to put at the end of my signal chain. My Fender Blues Junior amp can be a bit bright sometimes even with the trouble rolled mostly off – this will help me tame that even further and bring back some of the low end that I feel like I am missing.
Mike


