Erik S
Well-known member
- Build Rating
- 5.00 star(s)
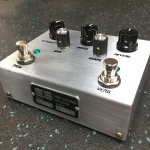
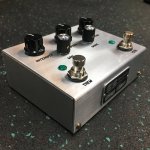
Finished this up earlier today. I made a few of these sheet metal enclosures last month, but this is the first one to get finished.
I used pin headers to attach the switch boards which I had never tried before. Seemed like a good idea, but didn’t work out great. The headers were just barley long enough, and the line up wasn’t perfect, so I had to bend them a little.
I made up a bunch of these black plastic foot switch washers. The outer diameter was right, just had to bore out the inner diameter to fit. Hopefully they’re less offensive to the washer police than the WWs.
Pedal fired right up and sounds great. I could see it spending a lot of time on my board. Only complaint is I’m not quite at unity volume even with the gain knob maxed. I skimmed through some posts and saw some stuff that looked relevant. I’ll give them all a more careful read through when I’m ready to open it back up.
EDIT: - I opened it back up, and read through some build reports on this unit and the Trembling Loon. There are no build docs posted for this, but Robert did post a parts list, and it clearly listed a 3mm LED along with the LDR. Not sure why I went with a 5mm yellow. Looking at everyone else's builds, they used the 3mm red, and either folded it over to point at the LDR, or folded the LDR over to the LED. (There are markings on the silkscreen that would suggest to do that). I left a big gap. Some people actually complained that there was too much gain...
When I was testing the pedal before I put the back of the enclosure on, I flipped it over wanting to watch the internal LED blinking, and it got SUPER loud when the room light hit the LDR, so it seems like the amount of light there is a big factor.
Unfortunately, the backside of the LED/LDR combo is trapped behind the Belton Brick, and I really don't want to desolder that thing. I was thinking about snipping the LDR from the top and tacking another one to the stubs with the LDR pushed up against the LED, but I don't love that option either...
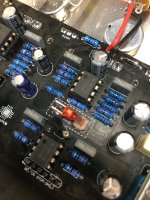
Edit 2: I managed to get the brick out without any catastrophic damage, and swapped the LED for a 3mm red one sticking up out of the board so I could jam it into the LDR. HUGE volume difference. I actually pulled it back off the LDR a little and unity is now around 9 o’clock on the gain pot. Tons of boost on tap now like others mentioned. I’m stoked. I’ll add a pic of the new LED arrangement.
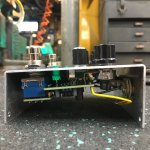
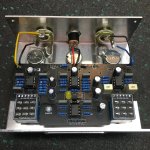
New corrected LED arrangement:
I used pin headers to attach the switch boards which I had never tried before. Seemed like a good idea, but didn’t work out great. The headers were just barley long enough, and the line up wasn’t perfect, so I had to bend them a little.
I made up a bunch of these black plastic foot switch washers. The outer diameter was right, just had to bore out the inner diameter to fit. Hopefully they’re less offensive to the washer police than the WWs.
Pedal fired right up and sounds great. I could see it spending a lot of time on my board. Only complaint is I’m not quite at unity volume even with the gain knob maxed. I skimmed through some posts and saw some stuff that looked relevant. I’ll give them all a more careful read through when I’m ready to open it back up.
EDIT: - I opened it back up, and read through some build reports on this unit and the Trembling Loon. There are no build docs posted for this, but Robert did post a parts list, and it clearly listed a 3mm LED along with the LDR. Not sure why I went with a 5mm yellow. Looking at everyone else's builds, they used the 3mm red, and either folded it over to point at the LDR, or folded the LDR over to the LED. (There are markings on the silkscreen that would suggest to do that). I left a big gap. Some people actually complained that there was too much gain...
When I was testing the pedal before I put the back of the enclosure on, I flipped it over wanting to watch the internal LED blinking, and it got SUPER loud when the room light hit the LDR, so it seems like the amount of light there is a big factor.
Unfortunately, the backside of the LED/LDR combo is trapped behind the Belton Brick, and I really don't want to desolder that thing. I was thinking about snipping the LDR from the top and tacking another one to the stubs with the LDR pushed up against the LED, but I don't love that option either...
Edit 2: I managed to get the brick out without any catastrophic damage, and swapped the LED for a 3mm red one sticking up out of the board so I could jam it into the LDR. HUGE volume difference. I actually pulled it back off the LDR a little and unity is now around 9 o’clock on the gain pot. Tons of boost on tap now like others mentioned. I’m stoked. I’ll add a pic of the new LED arrangement.


New corrected LED arrangement:

Last edited:

