3 pedals in 1 Plus 8 Clipping & 8 Bandwidth options!
Mods: Battery & Stereo Input Jack.
View attachment 636
View attachment 637
Mods: Battery & Stereo Input Jack.
View attachment 636
View attachment 637

Updated last message!.ah. Thanks for that.

With the Battery option, The 3 LED's need to be drilled inline with the Led's on the PCB.For those who want the Battery option, this is what used under the Battery.
The wires are longer & pass through the Middle to be soldered from the back side of the Centre Footswitch.
It is cut to the size of the Battery.
I used a 6mm Adhesive back Sponge on the Back Plate around 10mm larger in Width & Length as it forms a impression into the Foam.
It will not move once the Screws are in place.
I buy the Adhesive back foam in 400mm x 400mm Sheets from a local Foam & Rubber supplies shop.
View attachment 674
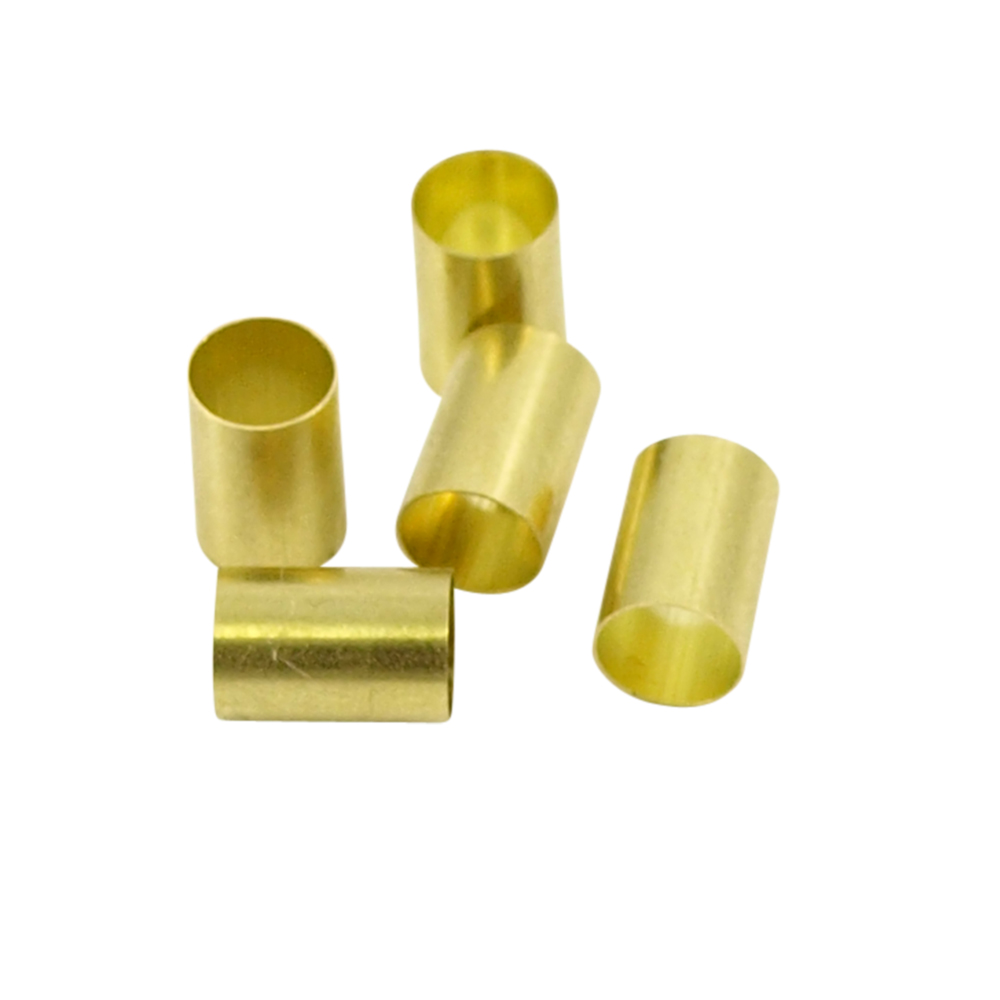
Brass Sleeve :This is what I use if if Splined Knobs are not available. Make sure the piece of Cable tie is a firm fit, this is to stop snapping the spline tangs off.
For the 1P8T Rotary pots, the splined shaft is solid plastic so no Slit support is required. A 1/4'' Knob fits real nice with the sleeve in place
Mine are from WD Music products.
View attachment 675
Cheers music6000
3 pedals in 1 Plus 8 Clipping & 8 Bandwidth options!
Mods: Battery & Stereo Input Jack.
View attachment 636
View attachment 637
It now has Independent Boost thanks to the Man, ''PedalPCB''You could wire it up so the boost is independent. I'll take a look at the schematic and draw up a diagram.
How do you do the graphics? Is that a decal? Looks great!3 pedals in 1 Plus 8 Clipping & 8 Bandwidth options!
Mods: Battery & Stereo Input Jack.
View attachment 636
A4 Clear Gloss Sheet with Adhesive Back for Inkjet Printers.How do you do the graphics? Is that a decal? Looks great!