steviejr92
Authorized Vendor
Hi everyone!
I first want to thank all of you for the knowledge you guys have provided on this forum without you guys i couldn't have made it this far!
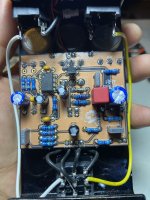
Man its been a long time coming with this pedal and to be honest i don't even know what to say about other than its a RAT circuit that's been modified! Lets start off with the diode selection I went with a 1N5237B for the first diode being clipped. This diode has a 120R resistor in series with it. You then have the option to select a RED or BLUE led being clipped as the 2nd diode. This time when i built the board i put an ON/OFF/ON so you can have the 3rd option of killing the 2nd diode being clipped. Sounds almost like a boost in this mode!
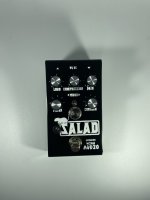
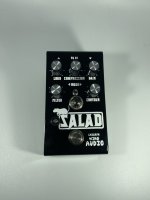
The GAIN, LOUD, and FILTER all behave the same as a normal RAT. The LOUD (volume) knob has been moved in front of the Jfet in order to not overdrive it. The COMPRESSION knob allows you to clip the diodes harder without driving the OPAMP harder. Useful when you have the pedal at low gain but want the diodes to clip a little harder. The CONTOUR knob is @Chuck D. Bones modification to the RAT. Its basically a BASS control allowing you to add more or less bass, again useful for lower gain settings!
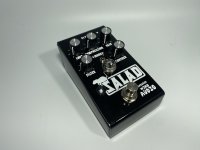
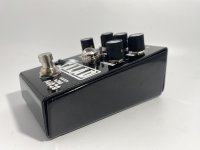
As for the enclosure I made it myself and is one of the few wedges i have left. This was among my first powder coat job and you can tell i have gotten much much better since then but its not too shabby. I tried getting a good pic of the red metallic flake that's embedded in background of the black color, I just couldn't get the right lighting for it i guess! As for the screen printing i know i can get better at that as well but i think for a first timer it didn't come out too bad! The jewel allows you to see which diodes are being clipped and will light up as you play. Just a little extra feature i figured i throw in.
All in all for my first ever pedal I think it came out good. There's still a lot of room for improvement and i will be working much harder to get those perfect results in the future. I now know what it feels like to to do everything yourself and it feels really good. Going to be chasing that feeling again very soon! Hope you guys like it i know i do!


I first want to thank all of you for the knowledge you guys have provided on this forum without you guys i couldn't have made it this far!
Man its been a long time coming with this pedal and to be honest i don't even know what to say about other than its a RAT circuit that's been modified! Lets start off with the diode selection I went with a 1N5237B for the first diode being clipped. This diode has a 120R resistor in series with it. You then have the option to select a RED or BLUE led being clipped as the 2nd diode. This time when i built the board i put an ON/OFF/ON so you can have the 3rd option of killing the 2nd diode being clipped. Sounds almost like a boost in this mode!
The GAIN, LOUD, and FILTER all behave the same as a normal RAT. The LOUD (volume) knob has been moved in front of the Jfet in order to not overdrive it. The COMPRESSION knob allows you to clip the diodes harder without driving the OPAMP harder. Useful when you have the pedal at low gain but want the diodes to clip a little harder. The CONTOUR knob is @Chuck D. Bones modification to the RAT. Its basically a BASS control allowing you to add more or less bass, again useful for lower gain settings!
As for the enclosure I made it myself and is one of the few wedges i have left. This was among my first powder coat job and you can tell i have gotten much much better since then but its not too shabby.
All in all for my first ever pedal I think it came out good. There's still a lot of room for improvement and i will be working much harder to get those perfect results in the future. I now know what it feels like to to do everything yourself and it feels really good. Going to be chasing that feeling again very soon! Hope you guys like it i know i do!
