steviejr92
Authorized Vendor
Success!!! I finally found the depth at which I need to cut all the way through with no problems! I just need to make a bottom and I can get on with bending this prototype!


I also have that board on my bench
Got another commission for a Dandy Horse
View attachment 64254
Customer is gonna have a vinyl decal applied to ape the looks of the OG, so we went with a bare box.
View attachment 64255
View attachment 64256
And, that's the last of my commission queue. I get off work early tomorrow, and I'm gonna try my dang diddly darndest to get caught up, or at least started, on build reports and demos.

Success!!! I finally found the depth at which I need to cut all the way through with no problems! I just need to make a bottom and I can get on with bending this prototype!

8 min that’s including tool change for the 2nd job!How long does it take to cut one piece?
Not bad. I expected much longer cutting times. I would also engrave the bending lines. At least small markers at the very edges of the elements.8 min that’s including tool change for the 2nd
job!
1st job took 2 min and the 2nd took 6 min. I slowed down cause the bit was only 1mm in cutting diameter and didn’t want to break it.
Yeah i also expected longer cutting times. Ive done enough research to know that these desktop machines are slow but i think the rigidity of the machine outperformed my expectations. I got away with reasonable speeds and feeds. I think upgrading to a 1.5kw spindle helps a lot as well.Not bad. I expected much longer cutting times. I would also engrave the bending lines. At least small markers at the very edges of the elements.
I built this a while back and only a few people have seen it so far, I haven't done a sound clip yet either hence no build report but it's a really great filter. nothing really unusable in the range of the knobs, which is a bummer for the noise makers like you lol. you doing the expression jack? I opted not to.Didn't get home nearly as early as I thought I would, so no demos, but i did manage to slip this guy in before bedtime -
View attachment 64342
I think it's easily the most polite envelope filter I've ever played- it doesn't do anything weird or wacky, and dialing it in is super intuitive, even so far as not having to move the pots between the up and down modes


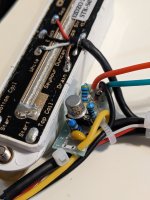
Hi Everyone, I'm new to the forum. I'm working on fixing a Sproing that burned out on an 18v wall wart. I just finished a Phase II.My Mustang modification project is going well. I had to route about 3cm^3 to get the switch to fit, though. Used a chisel.
I built this a while back and only a few people have seen it so far, I haven't done a sound clip yet either hence no build report but it's a really great filter. nothing really unusable in the range of the knobs, which is a bummer for the noise makers like you lol. you doing the expression jack? I opted not to.
Lmk if it shows up. I think the biggest bulb I have for my current limiter is 60w

What are you using to cut it with?8 min that’s including tool change for the 2nd job!
1st job took 2 min and the 2nd took 6 min. I slowed down cause the bit was only 1mm in cutting diameter and didn’t want to break it.
A desktop cnc router!What are you using to cut it with?


WANT. Do you have any build docs?Finally getting around to a project that's been in the queue awhile. My first vacuum tube pedal . . . . .
View attachment 64433 View attachment 64434
The enclosure isn't stuffed yet. Because the boards are being mounted on the bottom plate, I'm mounting user hardware before wiring. The will be a shielded umbilical cord between the controls and the boards.
The +9V to +48V, (555 based) power supply board (green) was designed by Peter Singfield, a colleague over the pond.
Looking forward to getting it fired up.